
Macrame Heart Bracelet - Free Tutorial

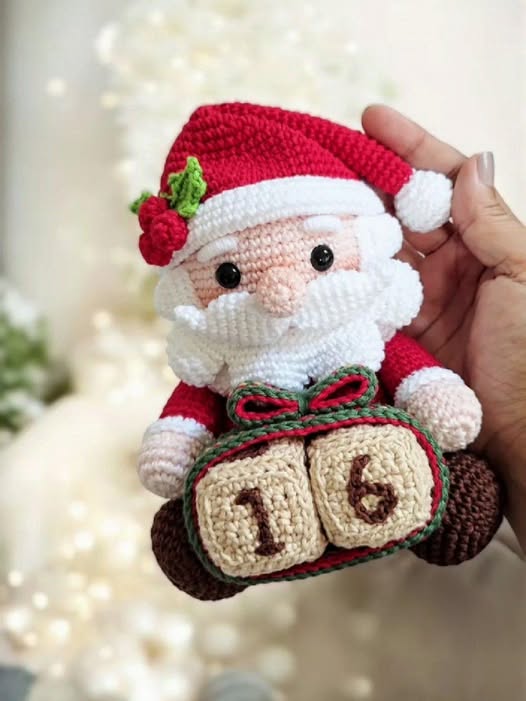
Crochet Santa Claus themed calendar – Tutorial is the perfect Christmas craft to bring holiday joy into your home while enjoying the process of crochet. This fun and festive project allows you to create a charming advent-style decoration inspired by Santa Claus himself.
Whether you are an experienced crocheter or just beginning your journey, this Crochet Santa Claus themed calendar – Tutorial will guide you step-by-step so you can proudly display your handmade piece throughout the Christmas season.
Making your own Christmas décor adds warmth and personality to your home. A Crochet Santa Claus themed calendar – Tutorial combines creativity with nostalgia, allowing you to craft unforgettable holiday memories.
Each tiny pocket or numbered detail becomes an opportunity to fill it with love, whether through small treats, motivational messages, or even mini toys for children. It’s an activity and decoration that families will look forward to every year.
This project also allows for customization. You can choose traditional Christmas colors such as red, white, and green, or explore variations like gold, snow blue, or soft pastels.
By following this Crochet Santa Claus themed calendar – Tutorial, you can adapt the size, accessories, textures, and finishing touches to match your home’s holiday theme. Let’s dive into all the steps you need to create this beautiful holiday calendar with crochet.
To begin working on your Crochet Santa Claus themed calendar – Tutorial, make sure you have all essential materials ready. You will need worsted-weight yarn in key Christmas colors such as red, white, and skin-tone shades for Santa’s face. Soft acrylic yarn works well because it is durable and easy to clean.
A crochet hook suitable for your yarn weight is necessary to ensure the right stitch tension. Many crafters prefer 4mm or 5mm hooks for medium-weight holiday projects. Choosing the right hook makes following this Crochet Santa Claus themed calendar – Tutorial even easier.
You will also need safety eyes or black yarn if you prefer to embroider Santa’s facial features. These small details help bring Santa’s sweet expression to life. Buttons or felt numbers from 1 to 24 are great additions to create a countdown effect.
Stitch markers are useful while crocheting in rounds, especially if you are making Santa’s head, beard, or hat. They help you keep track of each step in your Crochet Santa Claus themed calendar – Tutorial and ensure accurate shaping.
Polyester stuffing is optional but recommended if you want a more plush or dimensional look for Santa’s head or other decorative pieces on your calendar. It adds a touch of softness and enhances the festive feel.
Finally, a yarn needle will help you assemble all pieces neatly and securely. This tool is essential for sewing pockets, numbers, and other embellishments onto the base of your Santa calendar.
The base of your Crochet Santa Claus themed calendar – Tutorial holds everything together and sets the structure of the final decoration. Most crafters choose a long rectangular panel or a Christmas tree-shaped background to attach numbered pockets.
Use double crochet stitches to create a sturdy and uniform background. This stitch works fast and gives a solid appearance that supports all additions. When learning the Crochet Santa Claus themed calendar – Tutorial, keep your edges straight so the final look remains clean.
Red yarn is often used for the base because it highlights Santa’s theme, but you can combine red and green stripes for extra holiday charm. These color changes help create a warm and cozy design.
Once the base reaches the desired length, you can crochet small pockets that will hold surprises for each day of the countdown. These pockets are usually attached in rows, and each one should be large enough to contain a small treat or message.
When attaching pockets, spacing is important. Arrange them evenly and secure them firmly with a yarn needle. This ensures your Crochet Santa Claus themed calendar – Tutorial results in a durable decoration that can be used year after year.
Consider adding a border around the base to create a framed look. A simple shell stitch or crab stitch edging can give a polished finish that beautifully complements your handmade calendar.
Now comes the most exciting part of the Crochet Santa Claus themed calendar – Tutorial: making Santa! Start with his head by working in continuous rounds. Increase gradually to create a perfect sphere and add safety eyes before closing the piece.
Santa’s iconic beard can be made using loop stitch crochet or attaching strands of yarn for a fluffy texture. The beard is a standout feature in this Crochet Santa Claus themed calendar – Tutorial and gives Santa a cozy, cheerful appearance.
His hat should be crocheted with bright red yarn and finished with a fluffy white trim. A pom-pom on top adds extra Christmas charm and completes Santa’s traditional look.
You can also crochet or sew small embellishments like holly leaves, candy canes, stars, or snowflakes. These decorations make your calendar even more magical and unique to your style.
Attach Santa’s head at the top of the calendar so it becomes the main focal point of the entire design. Make sure it is securely stitched to the base so it stays in place when the calendar is hung.
If you want Santa to hold a gift bag or a festive banner, feel free to add extra accessories. These creative touches make your handmade calendar unforgettable and full of personality.
The final steps in the Crochet Santa Claus themed calendar – Tutorial include adding numbers that represent each day leading up to Christmas. You can crochet numbers using small appliqués, embroider them, or attach felt cutouts.
Be sure to arrange numbers from 1 to 24 in an order that makes sense visually and functionally. Most crafters start from the bottom so children count upward as Christmas approaches.
Use strong yarn and tight stitching to attach each number so they remain intact during handling. Advent calendars are interactive, so durability is key when following this Crochet Santa Claus themed calendar – Tutorial.
Test each pocket to ensure they can hold small surprises without stretching too much. Reinforcing pocket edges with slip stitches can help maintain their shape.
Add a hanging loop made from chain stitches or a wooden dowel across the top to display your decoration on a wall or door. A secure hanging solution is necessary for a long-lasting Christmas decoration.
Once everything is attached, take time to admire your work. You followed the Crochet Santa Claus themed calendar – Tutorial and created an adorable and festive calendar that will touch hearts every holiday season.
FAQ – Crochet Santa Claus Themed Calendar
Can beginners follow this Crochet Santa Claus themed calendar – Tutorial?
Yes! The steps can be adapted for all skill levels. Beginners may choose simpler stitches and fewer embellishments.
How long does it take to complete the calendar?
It depends on your crochet speed. Many people finish in 1–2 weeks by working a little each day.
What yarn is best for this project?
Acrylic worsted-weight yarn is ideal because it is durable and keeps its shape well.
Do I need to add stuffing to Santa’s head?
It’s optional, but stuffing gives a more dimensional and plush look.
Can I personalize the calendar?
Absolutely! Add family initials, different color themes, or special decorations to make it unique.
Is it washable?
Yes, but hand washing is recommended to keep the details beautiful for many Christmas seasons.
Creating a Crochet Santa Claus themed calendar – Tutorial project is a heartwarming way to celebrate the countdown to Christmas. With yarn, creativity, and a little time, you can craft a magical decoration that brings excitement every day of December.
This tutorial guided you through materials, the calendar base, Santa details, and final assembly so you can complete a festive design full of joy. I hope you feel inspired and excited to start your own project. Please leave your sincere opinion and suggestions below — I would love to know what you think and what other Christmas crochet ideas you’d like to learn!


