
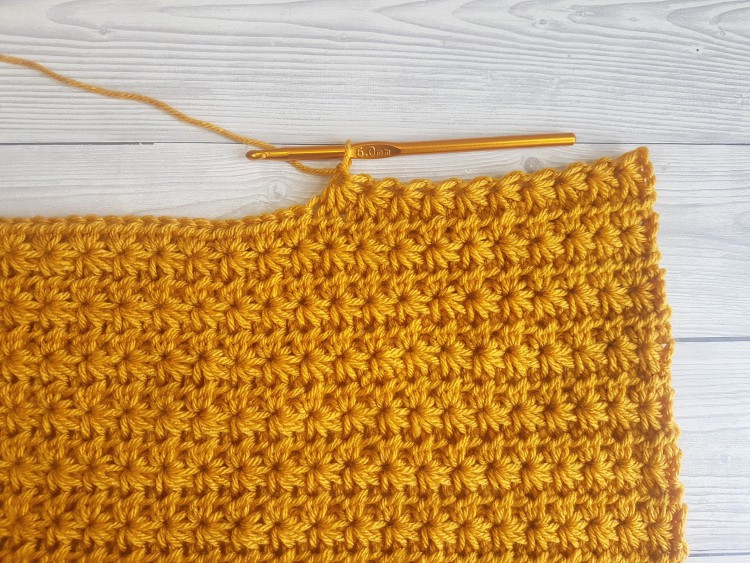
Crochet Star Stitch is a beautiful and eye-catching technique that adds texture and elegance to any crochet project. Known for its star-like clusters that resemble twinkling bursts of light, this stitch is perfect for scarves, baby blankets, shawls, and even home décor.
The charm of the Crochet Star Stitch lies in its dimensional effect and intricate appearance, which is surprisingly easy to master with just a little practice.
If you’re looking for a stitch that offers both visual appeal and a unique handmade touch, the Crochet Star Stitch should be on your list. This stitch creates a dense yet soft fabric, making it excellent for projects where comfort and style are both priorities.
Although it looks complex, it uses simple crochet techniques like single crochets and yarn overs in a sequence that’s easy to remember once you’ve done it a few times.
Throughout this article, we’ll guide you through the essentials of the Crochet Star Stitch, including how to make it, where to use it, tips for troubleshooting, and creative variations to explore.
Whether you’re a beginner eager to learn something new or an advanced crocheter searching for inspiration, this guide will help you master the art of the Crochet Star Stitch.
1. Understanding the Basics of the Crochet Star Stitch
The Crochet Star Stitch is sometimes referred to as the “Marguerite Stitch” due to its daisy-like appearance. It is typically worked in rows and creates a thick fabric, ideal for items meant to provide warmth and structure. Despite its decorative result, it only uses basic stitches, making it accessible even to those new to crochet.
To begin this stitch, you’ll typically start with a foundation chain in multiples of two, plus one. The first row involves drawing up multiple loops to create the center of the star, then closing them together and anchoring the cluster with a chain or single crochet. This process is repeated across the row to form the first line of stars.
The following rows build upon the previous stars. The placement of your hook is crucial—you’ll insert it into specific parts of the star below: the eye, the last leg, the base, and so on. Once you understand the rhythm, the pattern becomes meditative and smooth to execute.
The Crochet Star Stitch works best with medium-weight yarns that show off the detail of the stitch. Smooth cotton or acrylic yarns tend to highlight the star shapes, while fuzzy or textured yarns can obscure them. Choose a yarn that provides good stitch definition for the best effect.
This stitch creates a denser fabric than many other decorative stitches, so keep that in mind when choosing your hook size. You might want to go up a hook size to maintain a good drape, especially if making wearable items like shawls or cardigans.
Once you get the hang of it, you’ll be amazed at how quickly a project comes together using the Crochet Star Stitch. The repetition of the stitch makes it ideal for relaxing evenings and mindful crafting.
2. How to Crochet the Star Stitch: Step-by-Step
To start the Crochet Star Stitch, chain an even number of stitches plus one for turning. For this example, you could begin with a chain of 21 (20 + 1). Your first row will form the base for your stars.
Begin by pulling up loops in the second chain from the hook and in the next four chains (you should have 6 loops on your hook). Yarn over and pull through all six loops, then chain one to close the star. This chain creates the “eye” of the star, which will be used in the next row.
For the second star, insert your hook into the “eye” of the previous star, then draw up loops in the same chain, the base of the star, and the next two chains. Again, yarn over and pull through all six loops, and chain one to close. Continue this across the row.
Once you reach the end, you will typically finish with a half-star or a single crochet into the last stitch to anchor the row. This keeps the edges straight and gives the project a neat finish.
The second row is usually worked in single crochets: one single crochet in each “eye” of the star and one in the final stitch. This balances the tension and creates a base for the next row of stars.
Repeat rows one and two to build up the Crochet Star Stitch fabric. The stars will align in neat rows, giving your project a consistent and polished appearance.
Make sure to keep your tension even throughout. If you find your stars are tight or pulling, consider using a larger hook or loosening your grip. This will ensure your stars remain full and well-formed.
3. Projects That Shine with the Star Stitch
The Crochet Star Stitch is not just pretty—it’s practical. One of its best uses is in making baby blankets. The dense fabric keeps little ones warm, and the starry texture adds charm and interest.
Another popular project is scarves. The stitch’s texture and thickness make for cozy, stylish scarves that stand out from the usual patterns. Using gradient or ombré yarns adds even more dimension to the stars.
The stitch is also fantastic for tote bags and pouches. Because it creates a sturdy fabric, items made with the Crochet Star Stitch tend to hold their shape well. Pair it with a lining for added durability and structure.
If you’re into home décor, consider making throw pillows or cushion covers. The star stitch adds sophistication and a handmade touch that looks great on any couch or chair.
For wearable items, the star stitch can be used in cowls, shrugs, or even sweaters. Just remember to account for the stitch’s thickness and weight—these garments are best for cooler weather.
You can also mix the Crochet Star Stitch with other stitch patterns in larger projects like afghans or stitch sampler blankets. This adds texture variety and keeps the project exciting from start to finish.
4. Tips, Tricks, and Common Mistakes to Avoid
One common mistake in the Crochet Star Stitch is pulling loops too tight, which can make it difficult to insert your hook into the correct spaces on the next row. Always keep your loops loose and even.
Another issue is losing count of stitches. Because stars are made from several loops pulled through different spots, it’s easy to skip a step. Count your loops before pulling through, and double-check that you’re inserting your hook in the right places.
If you find the stitch looking uneven, block your finished piece. Wet blocking or steam blocking can help smooth out inconsistencies and make your stars look crisp and uniform.
Keep your starting chain loose. A tight foundation can cause the first row of stars to bunch up and warp the fabric. Consider using a hook one size larger just for the foundation chain.
Use stitch markers if you’re working on a large project. They help mark the start of rows or pattern repeats, saving you from having to rip back when mistakes happen.
Practice makes perfect. Like many textured stitches, the Crochet Star Stitch becomes easier with repetition. Don’t get discouraged if your first row looks messy—just keep going!
FAQ About the Crochet Star Stitch
Is the Crochet Star Stitch suitable for beginners?
Yes! Although it looks complex, it uses basic stitches. With a little practice, beginners can master it and create beautiful textured pieces.
What kind of yarn works best for the star stitch?
Medium-weight yarns with smooth textures work best, as they highlight the star design. Avoid fluffy or textured yarns that may hide the stitch detail.
Can I use this stitch for clothing?
Absolutely. The stitch works well for warm garments like sweaters, shawls, and cowls. Just remember to adjust for its density and drape.
How do I keep my edges straight with this stitch?
Be sure to complete each row with the correct number of stars and anchor stitches. Finishing with a single crochet at the end of each row helps keep the edges straight.
Is blocking necessary for this stitch?
While not required, blocking improves the appearance of the finished piece and ensures your stars lay flat and evenly.
Can the Crochet Star Stitch be worked in the round?
Yes, with modifications. You’ll need to adjust your placement points, but it can be adapted for round projects like hats or circular blankets.
Conclusion
The Crochet Star Stitch is a captivating technique that brings elegance, texture, and creativity to your projects. From cozy scarves to stylish home décor, its starry design adds a magical touch wherever it appears. With simple stitches and a bit of practice, you can master this beautiful technique and use it in a wide variety of creative ways.
We’ve explored how to make the Crochet Star Stitch, the best types of yarn and hooks to use, what to create with it, and how to avoid common pitfalls. Whether you’re crocheting a gift, a garment, or something for your home, this stitch is sure to dazzle.
VIDEO TUTORIAL
Have you tried the Crochet Star Stitch? Let us know what you made and how it turned out! We’d love to hear your honest feedback, experiences, or even requests for future tutorials. Let your creativity shine—just like the stars in your crochet!


