
The CROCHET TURTLE Switch out his shells – Step by step pattern is one of the most adorable and fun crochet projects you can make, especially if you’re looking for a toy that’s interactive, customizable, and giftable.
This charming little turtle isn’t just cute—it also comes with the exciting twist of having removable and interchangeable shells, making it a creative project for both children and adults who love playful handmade items.
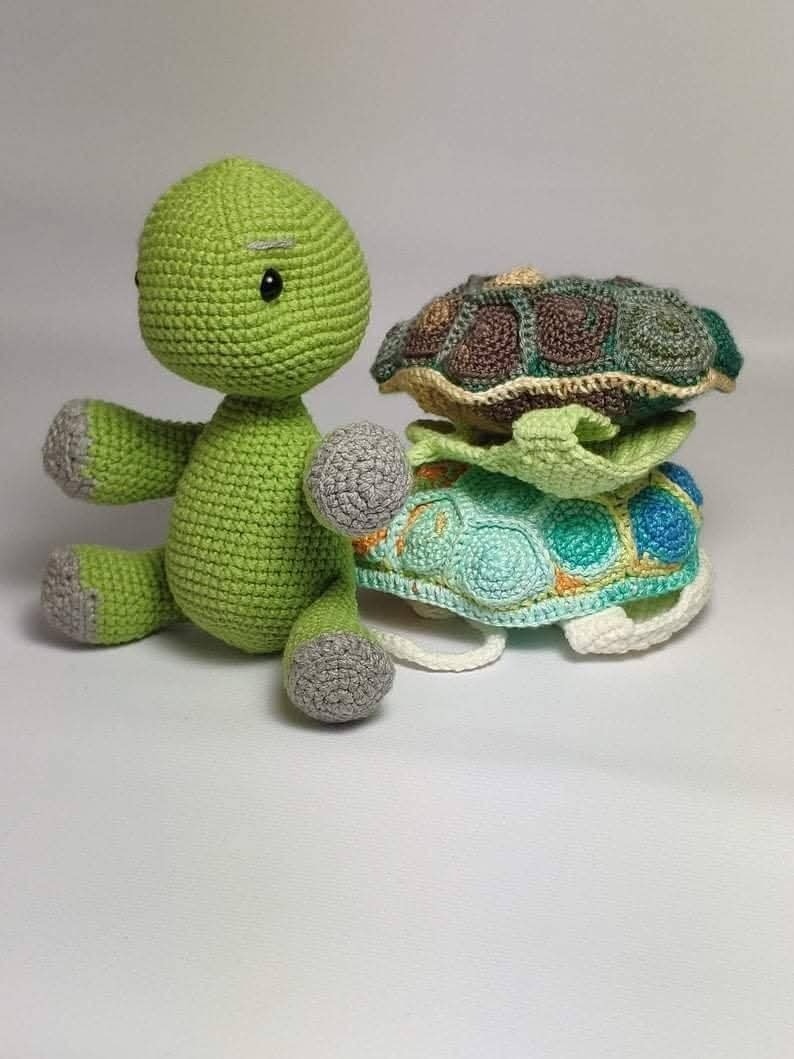
What makes this CROCHET TURTLE Switch out his shells – Step by step project so special is its flexibility. You can design a base turtle and then create multiple shells in different colors, textures, and even themes (think beach shell, ladybug shell, or rainbow swirl).
It’s perfect for seasonal changes, educational activities, or simply bringing joy through handcrafted play. Whether you’re a crochet beginner or a seasoned crafter, this tutorial walks you through every detail, ensuring your turtle comes to life with ease and joy.
Crocheting toys—especially ones with interactive elements—boosts creativity and offers a refreshing alternative to digital play. The CROCHET TURTLE Switch out his shells – Step by step design allows for imagination and personalization.
You can even involve kids in picking shell colors or decorating them. Let’s dive into this step-by-step tutorial and create your very own turtle friend, complete with a wardrobe of shells.
1. Materials and Tools You Will Need
Before you begin your CROCHET TURTLE Switch out his shells – Step by step project, gathering the right supplies is key.
Use worsted weight cotton yarn for both the turtle and the shells. Cotton holds shape well and is safe for kids.
Choose a 3.5 mm or 4 mm crochet hook to create tight stitches, especially since the turtle is a stuffed item.
You’ll need polyfill or stuffing material for the turtle’s body to keep it plush and firm.
Safety eyes work well for younger kids, or you can crochet/embroider the eyes for added softness.
A yarn needle will help you sew the turtle pieces together securely and neatly.
Optional materials include buttons, velcro, or snaps to attach the shells interchangeably.
2. Step-by-Step: Crocheting the Turtle Body
The main body of the CROCHET TURTLE Switch out his shells consists of a base head, body, legs, and tail.
Begin with the head using a magic ring and work in continuous rounds to shape a smooth sphere.
Increase and decrease stitches gradually to keep the turtle’s head proportionate and rounded.
For the body, crochet an oval or circle slightly flattened to form a good base for the shell to attach.
Create four small legs and a tiny tail separately, then sew them securely to the base.
Attach the eyes and embroider a little smile on the turtle’s face to give it personality.
Be sure to stuff each part lightly before closing to maintain softness and shape.
3. Designing and Crocheting Interchangeable Shells
Now comes the fun part—creating the switchable shells that make this pattern so creative and fun!
Start with a flat circle and increase evenly to the size of the turtle’s back.
Add rows using creative stitch patterns like puff stitch, bobbles, or shells to give texture.
Customize shells with different color combinations—blue for water, green for grass, red with black dots for a ladybug.
If desired, add a fastening mechanism: small loops and buttons or tiny velcro pieces.
Each shell should fit snugly over the turtle’s back but be easy enough to take off and replace.
Make a few extra shells for holidays or themes—Halloween, Easter, summer, or birthday-themed designs.
4. Assembly and Finishing Touches
The final part of this CROCHET TURTLE Switch out his shells – Step by step pattern involves putting it all together neatly.
Double-check all parts are securely sewn and the stuffing is evenly distributed.
Test each shell for fit, ensuring they slide on and off without stretching or slipping too much.
Add optional embellishments like mini flowers, stars, or initials on the shell tops.
For gifting, consider making a small “wardrobe” bag to store the extra shells with the turtle.
If making this for younger children, avoid buttons or small parts that could pose choking risks.
Take a moment to photograph your finished turtle and shells—each is a handmade masterpiece worth sharing!
FAQ – CROCHET TURTLE Switch out his shells – Step by step
Is this project beginner-friendly?
Yes! The basic stitches used are easy to learn, and the turtle’s construction is simple with step-by-step guidance.
What’s the best yarn to use?
Cotton yarn is recommended for its structure, softness, and washability, especially for toys.
How do I make the shells stay in place?
You can use buttons, velcro, or just design the shell to be snug enough that it doesn’t fall off easily.
Can I wash the turtle and shells?
Yes, if using cotton yarn. Hand washing and air drying are best to preserve shape and color.
How many shells should I make?
As many as you want! Some people make themed sets—spring, summer, holiday, or birthday collections.
Can I sell turtles made from this pattern?
Yes, if it’s your own handmade work. Just avoid selling or claiming the original pattern as your own.
Conclusion
The CROCHET TURTLE Switch out his shells – Step by step project is more than just a toy—it’s an invitation to play, explore creativity, and bring smiles to everyone who sees it. With interchangeable shells and endless design options, this turtle is a versatile and joyful creation for crafters of all levels.
We hope this tutorial has inspired you to pick up your hook and start stitching! If you’ve made your own crochet turtle, we’d love to hear about it. What colors did you choose? What shell designs did you come up with? Leave a comment below with your thoughts, suggestions, or questions. Your feedback helps other crafters learn and grow!


