
If you’re looking for a fun and creative project to celebrate the Easter season, this Crocheted Easter Bunny – Pattern is just what you need! Crocheting an Easter bunny is a delightful way to bring some handmade charm into your home or to create special gifts for loved ones.
This crochet pattern combines the joy of Easter with the artistry of crochet, making it a perfect project for both beginners and experienced crafters alike. In this tutorial, we’ll guide you through the process of creating your very own crocheted Easter bunny from start to finish.
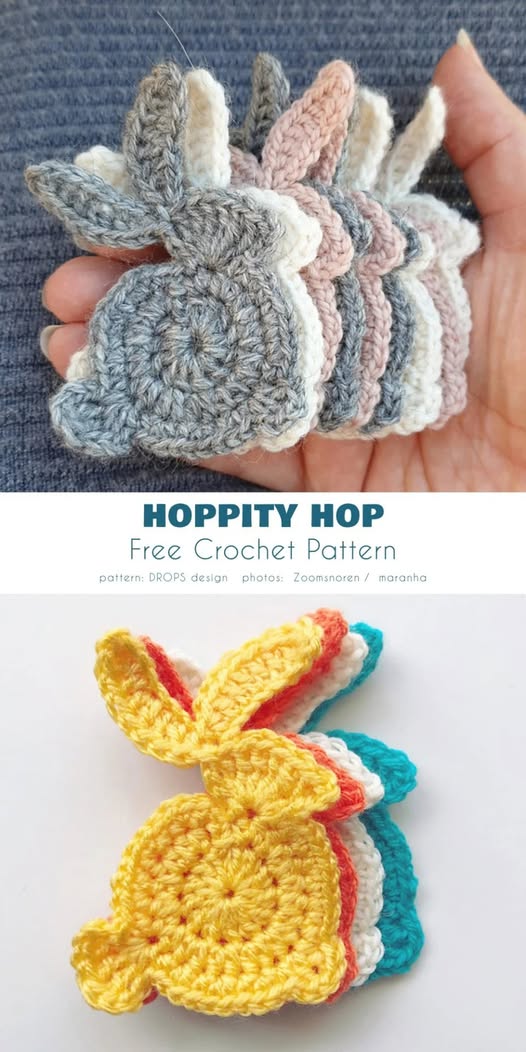
The Crocheted Easter Bunny – Pattern can be customized with various yarns and colors to match your personal style or Easter theme. Whether you want a soft pastel bunny to fit in with springtime décor, or a bold, colorful bunny to add a playful touch to your Easter celebrations, this pattern allows for plenty of creativity.
In this article, we will cover the essential materials you need, step-by-step instructions, and helpful tips to ensure your bunny turns out perfectly.
Crocheting a bunny for Easter is a wonderful way to express your creativity, especially when you can customize each one to suit different preferences.
So, whether you’re new to crochet or looking to expand your skills, this Crocheted Easter Bunny – Pattern will provide all the guidance you need to create a beautiful and festive bunny. Let’s get started by reviewing the materials and tools you’ll need for this project!
Materials Needed for the Crocheted Easter Bunny
Before you start crocheting your Easter bunny, make sure you have all the necessary materials on hand. Having the right tools and yarn will ensure your project runs smoothly.
First, you will need yarn in a variety of colors. Typically, soft pastel shades like pink, white, and yellow are popular choices for an Easter-themed bunny, but you can also experiment with other colors to give your bunny a more unique look. For a classic look, white yarn works well for the bunny’s body, while you can add accents like pink for the nose or ears.
Next, choose a crochet hook. A 3.5 mm (E) hook is commonly used for amigurumi crochet patterns, but you may adjust this depending on your preferred yarn thickness. Additionally, you’ll need a yarn needle for weaving in ends and stitching together the pieces.
To give your bunny structure, you’ll also need some stuffing. Polyester stuffing or cotton batting works great for filling the bunny’s body and limbs to ensure a soft yet firm shape. You may also want to consider safety eyes or embroidered features, such as the eyes, nose, and mouth, to complete the bunny’s face. Lastly, a stitch marker will be helpful for keeping track of your rounds during the crochet process.
With your materials ready, let’s move on to the instructions for creating your own Crocheted Easter Bunny!
Step-by-Step Instructions for Crocheting an Easter Bunny
Creating a Crocheted Easter Bunny is a rewarding project that will fill your space with festive joy. Follow these simple instructions to make your own bunny, and you’ll soon have a charming Easter decoration or gift.
1. Start with the Body
To begin the Crocheted Easter Bunny, start by crocheting the bunny’s body in the round. Begin with a magic ring and crochet 6 single crochets (sc) into the ring. Tighten the ring to close the hole. This creates a small, round foundation for the bunny’s body.
2. Increase Rounds for the Bunny’s Shape
As you work up the body, increase the number of stitches in each round to give the bunny a smooth, rounded shape. After completing the first round, crochet 2 single crochets in each stitch around for the second round. Repeat this process until you’ve reached the desired size for the body. Be sure to periodically check the size as you go, making sure it fits the overall look you want for your bunny.
3. Crochet the Ears
Now it’s time to create the bunny’s long ears. Begin by crocheting a chain of about 6 stitches, then work in rows to form the shape of the ear. You’ll need to crochet several rows of single crochets, gradually increasing and decreasing to shape the ear. Once both ears are completed, attach them to the top of the bunny’s head, making sure they are centered.
4. Create the Bunny’s Arms and Legs
Next, crochet the arms and legs of your bunny. Start with a small round for each limb, then crochet in the round, gradually increasing and decreasing to form the shape of each leg and arm. Once each limb is finished, attach them to the body, making sure they are securely positioned.
5. Add the Tail and Facial Features
For the tail, crochet a small round shape and attach it to the back of the bunny. The tail adds a cute and playful touch to the overall look of your Crocheted Easter Bunny. Once the body and limbs are assembled, it’s time to add the facial features. Use safety eyes or embroidered thread to create the eyes, nose, and mouth, giving your bunny a friendly and expressive face.
6. Stuff and Finish
Once all parts are assembled, it’s time to stuff the bunny. Gently fill the body, arms, and legs with your chosen stuffing material. Make sure not to overstuff, as you want the bunny to remain soft but firm. Once you’ve reached the desired level of stuffing, sew up any openings, and your bunny is ready for display or gifting!
Creative Variations of the Crocheted Easter Bunny
Once you’ve mastered the basic Crocheted Easter Bunny – Pattern, you can get creative by experimenting with different variations and embellishments. Here are some ideas to help you personalize your bunny:
For a more whimsical look, try using multicolored yarn for the bunny’s ears or limbs. You can also create a rainbow-colored bunny by changing yarn colors for each section of the body. Alternatively, add a little bowtie or scarf around the bunny’s neck to give it a cute, fashionable flair.
If you’re working on multiple bunnies, try creating a whole Easter bunny family by making different sizes or adding accessories like little baskets or carrots. You can also use different types of yarn, such as sparkly or variegated yarn, to give your bunny some extra character and shine.
Another fun idea is to crochet a bunny blanket or bunny egg cozy to go along with your crocheted Easter bunny. These accessories can be made using similar techniques and will tie your Easter-themed crochet collection together.
You can even try making a Crocheted Easter Bunny in different positions, such as one sitting, standing, or holding an Easter egg. Changing the position of the bunny adds personality and can make each one feel unique and special.
For a more elaborate project, try adding a small crochet dress or vest to your bunny, turning it into a charming Easter figurine. The possibilities are endless when it comes to personalizing your crocheted bunny!
FAQ – Frequently Asked Questions About the Crocheted Easter Bunny
1. What type of yarn should I use for the Crocheted Easter Bunny? It’s best to use soft yarn, such as acrylic or cotton, for your bunny. Pastel-colored yarn works well for an Easter theme, but you can also use other yarns to match your personal style.
2. How do I make sure my bunny’s ears are even? When crocheting the bunny’s ears, take your time with each row to ensure they’re symmetrical. You can use a stitch marker to mark the first stitch of each row to help maintain evenness.
3. Can I add accessories to my crocheted bunny? Absolutely! You can add accessories such as a bowtie, scarf, or tiny basket to your bunny to make it more unique. Get creative with embellishments and personalize your bunny!
4. How do I attach the bunny’s limbs? Use a yarn needle to sew the arms and legs securely onto the bunny’s body. Make sure to stitch them firmly to prevent them from falling off.
5. Can I crochet a larger Easter bunny? Yes! You can adjust the size of the bunny by using thicker yarn and a larger crochet hook. This will create a larger, more pronounced bunny that can be a statement piece in your Easter decorations.
6. How do I make my bunny’s facial features? You can either use safety eyes or embroider the eyes, nose, and mouth with yarn. If you choose embroidery, make sure to securely knot the ends to prevent them from unraveling.
Join our VIP broadcast list and gain access to exclusive patterns, all for free. As a VIP member, you’ll receive the best patterns daily, delivered directly to your device. ✨📱 It’s a unique opportunity to stay up-to-date with the latest trends and designs, curated just for you. Don’t miss out on enhancing your projects and discovering new inspirations with the best patterns every day! 🎨🔝
Conclusion
The Crocheted Easter Bunny – Pattern is a fun and creative project that allows you to add a personal, handmade touch to your Easter celebrations. By following the steps outlined in this guide, you can easily crochet a bunny that will be a charming addition to your spring décor or a thoughtful gift for someone special.
We hope this tutorial has inspired you to try your hand at crocheting your very own Easter bunny. Feel free to experiment with different colors, sizes, and accessories to make each bunny unique. If you have any questions or suggestions, we’d love to hear from you in the comments below. Happy crocheting, and enjoy your Crocheted Easter Bunny!


