
Macrame Heart Bracelet - Free Tutorial

Crocheting your own cupcake beanie is a delightful way to blend creativity and practicality.
Whether you’re crafting for yourself, as a gift, or even for sale, this project is fun, versatile, and suitable for various skill levels.
This tutorial will guide you through the process of creating a sweet and stylish hat that mimics the charming look of a cupcake.
The cupcake beanie is not only adorable but also highly customizable. You can play with different yarn colors to match your style or the recipient’s preferences.
Additionally, it’s an excellent project for using up leftover yarn, making it an eco-friendly choice. Let’s dive into this step-by-step guide to crochet your own cupcake-inspired hat.
Before we get started, make sure you have all the necessary materials. You’ll need yarn in two contrasting colors (one for the cupcake base and another for the frosting), a crochet hook, scissors, and a yarn needle.
This crochet tutorial is beginner-friendly, but familiarity with basic stitches will make the process even smoother.
The foundation of any great crochet project is selecting the right materials. For your cupcake beanie, it’s essential to choose yarn that suits the design and your comfort.
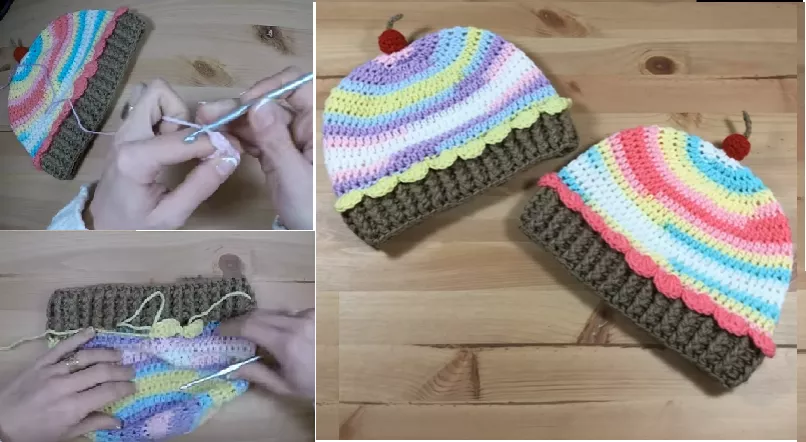
The base of the cupcake beanie resembles the wrapper of a real cupcake. This part forms the foundation of your project.
Now comes the fun part – creating the frosting! This section adds character to your cupcake beanie.
No cupcake is complete without a cherry on top! Here’s how to make your cupcake beanie truly stand out.
Q1: What level of crocheter is this tutorial suitable for? A1: This tutorial is beginner-friendly but assumes basic knowledge of crochet stitches like single crochet (SC) and double crochet (DC).
Q2: Can I use different yarn types for the frosting and base? A2: Yes, mixing yarn types can add texture and interest to your design. Just ensure the weights are compatible.
Q3: How do I adjust the beanie size? A3: To make the beanie larger or smaller, adjust the number of starting stitches and the number of increase rounds.
Q4: Can I wash the cupcake beanie? A4: Yes, but it’s best to hand wash it in cold water to maintain its shape and color.
Q5: What are some other embellishments I can add? A5: Consider adding crocheted sprinkles, embroidered designs, or even small felt appliqués for extra flair.
Q6: How long does it take to make a cupcake beanie? A6: Depending on your skill level, it may take 2-5 hours to complete this project.
Join our VIP broadcast list and gain access to exclusive patterns, all for free. As a VIP member, you’ll receive the best patterns daily, delivered directly to your device. ✨📱 It’s a unique opportunity to stay up-to-date with the latest trends and designs, curated just for you. Don’t miss out on enhancing your projects and discovering new inspirations with the best patterns every day! 🎨🔝
Creating a cupcake beanie is a delightful way to combine creativity and functionality. This tutorial has guided you through each step, from selecting materials to adding finishing touches. Whether you’re making it as a gift or for yourself, the cupcake beanie is sure to bring joy.
We hope this Cupcake Beanie Tutorial – Crochet a Sweet and Stylish Hat! inspires your next project. Share your thoughts, suggestions, and experiences in the comments below. Happy crocheting!


