
The DIY Granny Square Flower Crochet Crossbody Bag is a perfect blend of classic crochet techniques and modern fashion flair. This fun and functional accessory has become a favorite among crafters who love handmade style.
Whether you’re an experienced crocheter or a beginner looking for your next project, this bag is both approachable and rewarding to make.
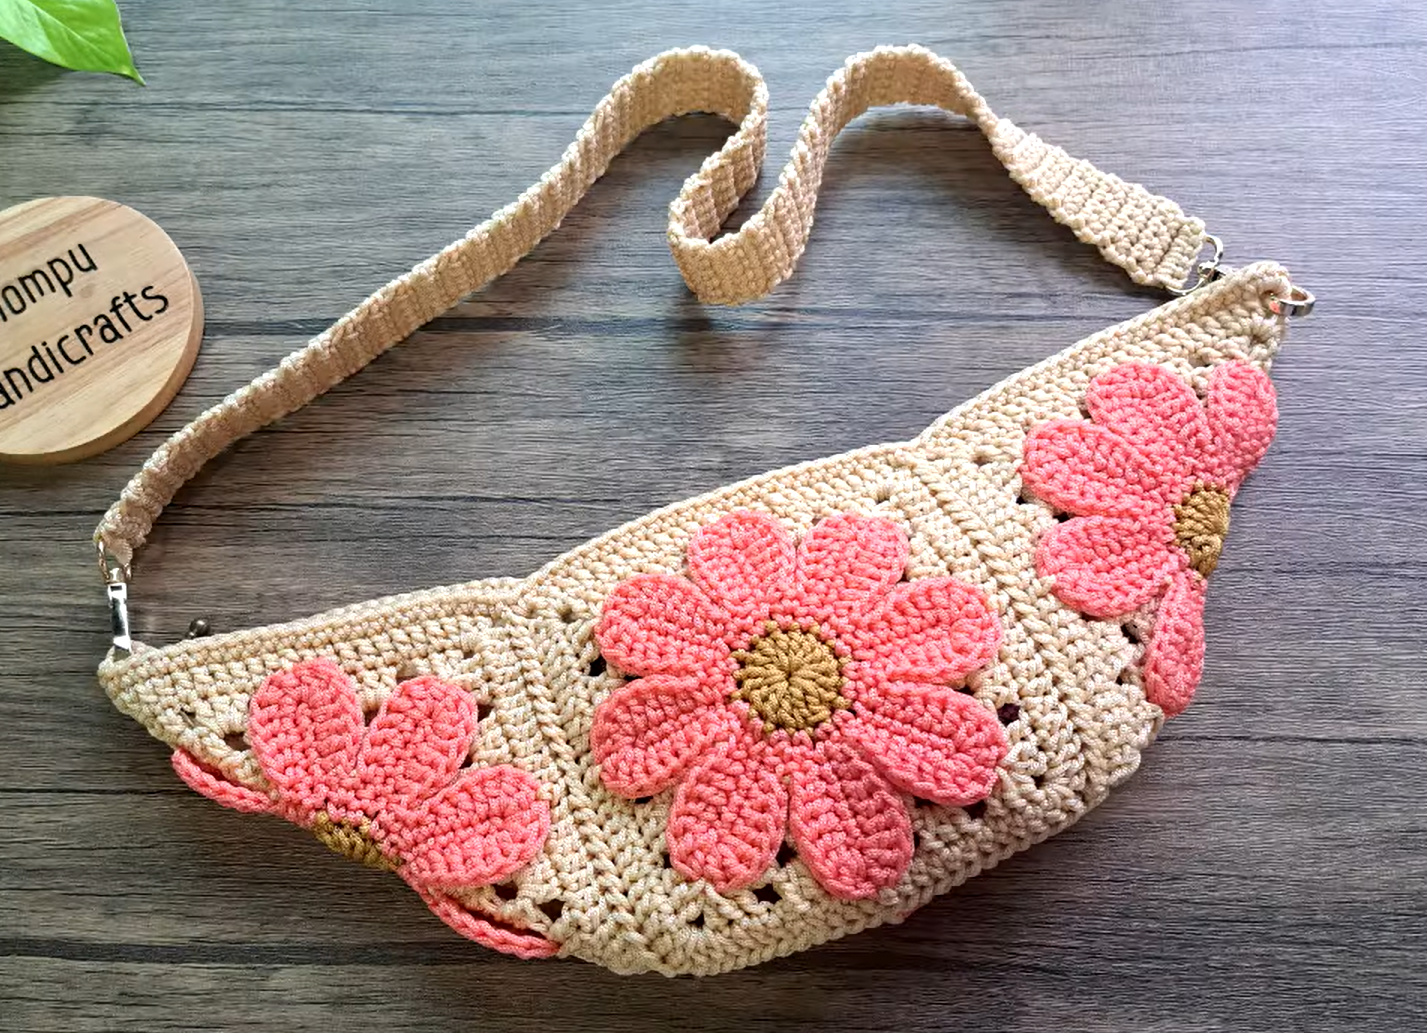
With its vibrant flower motifs and cozy granny square design, this bag stands out in the world of crochet. It’s not only stylish but also highly customizable—use your favorite yarn colors, adjust the size, and personalize the strap to suit your needs.
The beauty of the DIY Granny Square Flower Crochet Crossbody Bag is that you’re creating something truly unique.
In addition to being a creative outlet, making your own crochet bag is a sustainable choice. You can use leftover yarn or repurpose materials, which helps reduce waste and gives new life to your supplies.
In this guide, you’ll learn everything you need to know about crafting a DIY Granny Square Flower Crochet Crossbody Bag, from materials to assembly and finishing.
1. Materials You’ll Need for Your Crochet Crossbody Bag
Before you begin crocheting your DIY Granny Square Flower Crochet Crossbody Bag, it’s important to gather the right materials. Having everything ready will make the process smoother and more enjoyable.
You’ll need medium-weight (worsted) yarn in at least three different colors—one for the flower center, one for the petals, and one for the background of the granny square. Cotton or cotton-blend yarns are ideal because they provide structure and durability.
Use a crochet hook that matches your yarn weight, typically between 4.0 mm and 5.0 mm. Be sure to check your gauge so that your granny squares are consistent in size, which is crucial for a neat final assembly.
Other essentials include a yarn needle for sewing and weaving in ends, stitch markers to keep your place in rounds, and scissors. You may also want to have a measuring tape handy to keep track of your bag’s dimensions.
If you plan to line your bag, lightweight cotton fabric is perfect. It adds strength and a clean interior finish. You can also add a zipper or magnetic snap for a secure closure.
Lastly, you’ll need a strap. This can be crocheted using the same yarn or replaced with a leather, canvas, or chain strap. Make sure it’s strong enough to support the bag when in use.
2. How to Crochet the Granny Square Flower
The heart of your DIY Granny Square Flower Crochet Crossbody Bag is the granny square flower motif. Start by crocheting a flower center using a magic ring and a few rounds of double crochet or puff stitches for texture.
Next, change to a new color for the petals and use shell or cluster stitches to create a floral look. These petals will sit atop the center and form a circular shape before squaring off in the following rounds.
After completing the flower, switch to the background color. Begin to square off the shape by placing corner spaces with chains and filling in the sides with double crochet stitches. This will give the traditional granny square structure to your flower design.
Continue expanding the square until it reaches your desired size. Typically, each square should measure about 4 to 5 inches across, depending on how large you want your bag.
Make enough squares to form the front, back, and sides of your bag. A common layout includes 6 to 10 squares, depending on your bag’s dimensions.
Weave in the ends neatly, and if needed, block each square to help them lay flat and match in size. This step ensures your finished DIY Granny Square Flower Crochet Crossbody Bag has a clean and professional look.
3. Assembling Your Bag Step by Step
Once all your granny squares are ready, it’s time to assemble your DIY Granny Square Flower Crochet Crossbody Bag. First, decide on the layout—usually a simple 2×3 or 3×3 square arrangement works well.
Begin by joining your squares using slip stitch or whip stitch. Some crafters prefer the flat join method for a smooth finish, while others enjoy the ridged look of a visible seam. Choose what works best for your style.
Join the sides and bottom first to form the base of the bag. Make sure the floral motifs align and the squares are facing the right direction for a cohesive design.
If you’re adding a fabric lining, cut your fabric to match the shape of the assembled squares. Sew the lining pieces together and then hand-stitch or machine-sew it into the bag for extra durability.
Attach your strap by crocheting it directly into the top corners or sewing it onto the inside lining. You can adjust the length for a shoulder bag or crossbody style.
Finish the bag with your closure of choice. A button, zipper, or magnetic snap will keep your belongings secure while complementing your handmade design.
4. Style Ideas and Customization Tips
The DIY Granny Square Flower Crochet Crossbody Bag is already eye-catching, but adding your own style makes it even more special. Start with color—choose a bold, coordinated palette or go with pastels for a vintage feel.
Experiment with yarn textures, such as using a slightly metallic thread for the flower center to add shimmer, or soft wool for a cozy winter version of the bag.
Change up the strap design by braiding yarns together, adding beads or charms, or even incorporating macramé techniques. The strap is where you can really get creative.
You can also decorate the bag with buttons, tassels, or embroidered initials for a personalized touch. These additions are small but impactful.
Consider the size of the bag as well—create a mini version for festivals or a larger tote-style option for everyday use. Adjust the number of squares and strap length accordingly.
Finally, use this pattern as a base for other projects. The granny square flower motif works beautifully in pillows, scarves, and even clothing. Your DIY Granny Square Flower Crochet Crossbody Bag could be just the start of your crochet journey.
FAQ – DIY Granny Square Flower Crochet Crossbody Bag
Q: Is this pattern suitable for beginners?
A: Yes! The granny square is one of the most beginner-friendly patterns in crochet. With a little practice, even first-time crocheters can make this bag.
Q: How long does it take to complete the bag?
A: It depends on your skill level, but most people finish the project in 2–3 days if working a few hours per day.
Q: What type of yarn is best for this bag?
A: Cotton yarn is best for structure and durability. However, acrylic can also work if you prefer more color options or softness.
Q: Can I wash the bag in a machine?
A: It’s best to hand wash and lay flat to dry, especially if it has a fabric lining or a non-crochet strap.
Q: How many granny squares do I need?
A: Typically, 6 to 10 squares will form a medium-sized crossbody bag. You can add more if you want a larger design.
Q: Can I use this pattern to sell bags I make?
A: Yes, as long as the pattern is free for personal or commercial use. Always give credit to the designer if one is listed.
Conclusion
The DIY Granny Square Flower Crochet Crossbody Bag is a delightful project that combines classic crochet charm with practical fashion. With just a few materials and some creative flair, you can craft a beautiful, eco-friendly accessory that stands out from store-bought bags.
Throughout this article, we covered how to select your materials, crochet the floral granny squares, assemble your bag, and personalize it with finishing touches. This guide was designed to make your process smooth and enjoyable from start to finish.
We hope you feel inspired to pick up your hook and yarn and start creating your own unique bag. If you’ve made one already or plan to try it soon, we’d love to hear from you.
Please leave a sincere opinion and share your suggestions in the comments. Your feedback helps us continue sharing free, creative crochet projects like this one!


