
If you’re looking for a charming and practical handmade gift, EASY CROCHET BABY SHOES STEP BY STEP is the perfect project. Baby shoes are small, adorable, and ideal for both beginner and experienced crocheters.
With a few simple stitches and a soft yarn, you can create something beautiful and functional that will be treasured by any new parent.
Crocheting baby shoes offers a heartfelt way to welcome a newborn. Whether you’re preparing for your own baby, a friend’s baby shower, or building up your handmade craft shop, this step-by-step guide ensures you’ll succeed from the very first stitch. The process is enjoyable and relaxing, and the results are undeniably cute.
This guide is designed to walk you through the process of making easy crochet baby shoes step by step. You’ll find detailed tips on choosing materials, working through the pattern, customizing the shoes, and finishing them off for a professional look. Let’s get started and bring some handmade warmth to tiny feet!
1. Choosing the Right Yarn and Hook for Baby Shoes
When starting your easy crochet baby shoes step by step journey, selecting the right yarn is crucial for both comfort and safety.
Softness is key. Babies have delicate skin, so opt for soft cotton or baby acrylic yarn that won’t irritate or overheat. These materials are also machine-washable, which is a big plus for parents.
Choose a yarn weight that is light or medium (usually labeled as 3 or 4 on yarn labels). This will ensure the shoes are flexible and breathable, without being too bulky on little feet.
Your hook size should correspond to your yarn. For baby shoes, a 3.5mm to 4.5mm crochet hook is commonly used. Check the yarn label for recommendations and adjust your tension as needed.
Stick to light-colored yarns or pastels for a classic baby look. They’re easier to work with and show stitch definition clearly, which is helpful for beginners.
Avoid any yarns with loose fibers or sparkles that could shed. Safety is a top priority, especially when making items for infants who may put things in their mouths.
Before beginning the full project, crochet a small swatch with your chosen yarn and hook to make sure the fabric feels good and your gauge is consistent.
2. How to Crochet Baby Shoes: Step-by-Step Guide
Now let’s dive into the core of this tutorial: easy crochet baby shoes step by step. With simple instructions and patience, you’ll finish your first pair in no time.
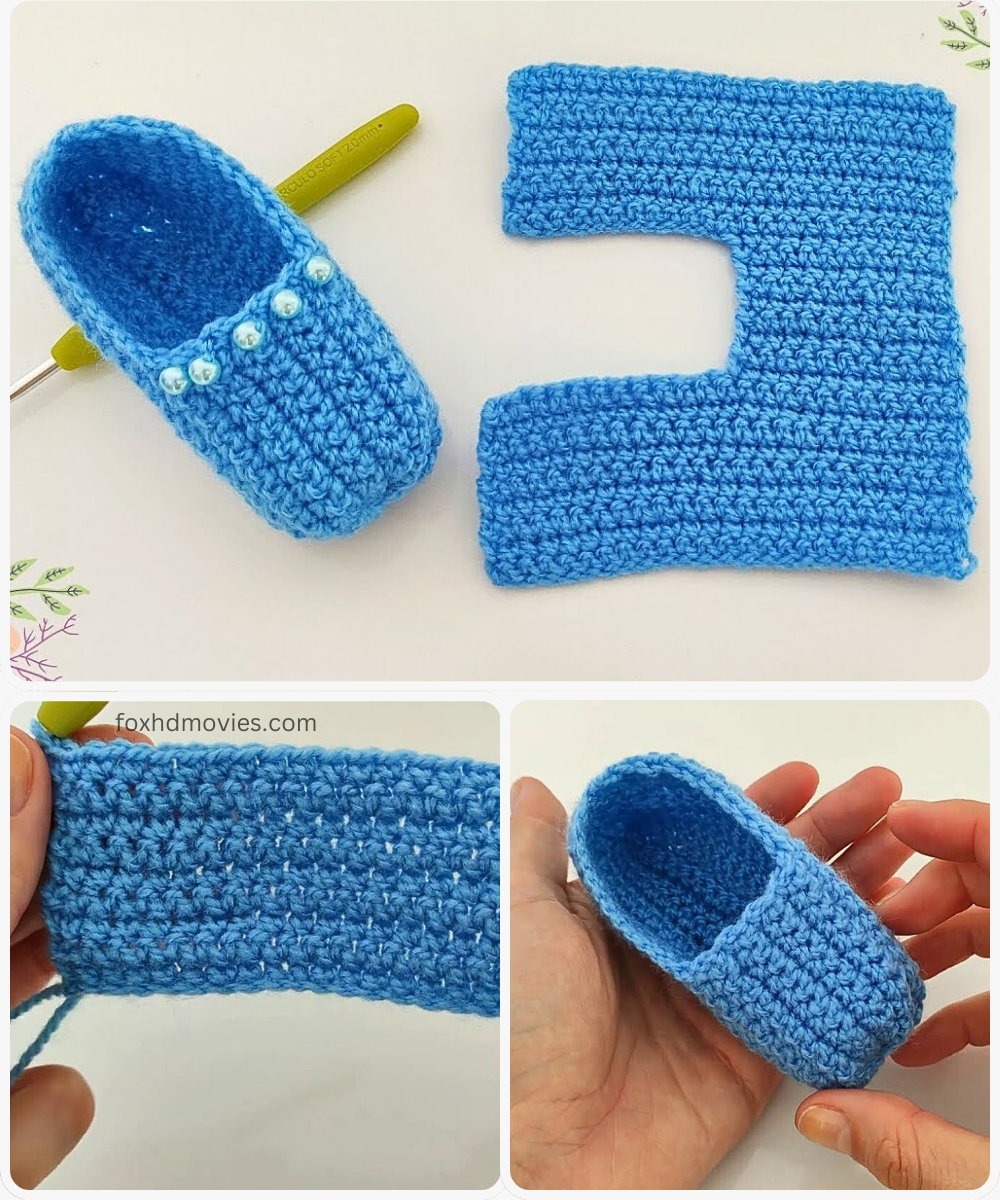
Start with the sole. Chain 10–12 stitches depending on the desired size, and work single crochets across. At the end of each row, increase by two stitches to create a gentle oval shape.
Work in the round by crocheting around the chain base. This will form the sole of the shoe. Add increases at the ends of each round to shape it like a foot’s outline.
After the sole is the upper part. Begin single or half-double crochets along the edge of the sole. Work in the round without increasing to build height and form the sides of the shoe.
To shape the toe, you’ll need to decrease stitches at the front of the shoe. Use invisible decreases to keep the shape smooth and tight.
Continue working in rounds to build a snug upper shape, then finish off with a simple trim like a slip stitch round or a contrasting color to add flair.
Make sure to fasten off securely, and weave in any loose ends using a yarn needle. Repeat the entire process to make the second shoe, ensuring both match in size and shape.
3. Tips for Personalizing and Customizing Baby Shoes
The fun part about easy crochet baby shoes step by step is that once you’ve mastered the base, you can personalize each pair to suit any style.
Add small embellishments like bows, buttons, or flowers. These can be sewn securely on the top or side of the shoe to make each pair unique.
Experiment with color blocking or stripes. Change yarn color every few rows to create adorable patterns or themed baby shoes for holidays or special occasions.
For extra warmth, line the inside with soft flannel fabric. Sew the lining in after crocheting, being sure not to leave any loose ends that might irritate the baby’s skin.
Turn your baby shoes into booties by adding extra rounds to the ankle cuff. Use ribbed stitches or even add a small tie or strap for a boot-like finish.
If you’re gifting these shoes, add a handmade tag or wrap them in a pretty box. It adds a personal touch that shows your time and love went into the project.
And if you sell your handmade creations, take high-quality photos of each design variation. Unique custom touches will help your listings stand out online.
4. Caring for and Using Crochet Baby Shoes
After completing your easy crochet baby shoes step by step project, knowing how to care for them ensures they’ll be loved and used for a long time.
Always use machine-washable yarn for practicality. Babies can be messy, and easy cleaning is essential for busy parents.
Wash the shoes in cold or warm water on a gentle cycle, and avoid using bleach or harsh detergents that could break down the yarn.
Lay the shoes flat to dry rather than using a dryer. This will help them retain their shape and avoid unnecessary stretching.
Inspect the shoes before giving them to a baby. Make sure all threads are woven in tightly and that any decorations are sewn on securely and won’t come loose.
Use these shoes for photo shoots, baby showers, or everyday wear. They’re not just cute—they help keep little toes warm and protected.
Always size the shoes carefully. Use a baby foot size chart or measure the baby’s foot length to ensure the fit is just right—not too tight, not too loose.
FAQ – EASY CROCHET BABY SHOES STEP BY STEP
Q: Are these crochet baby shoes safe for newborns?
A: Yes, as long as you use baby-safe yarn and avoid loose decorations. Always supervise infants while wearing handmade items.
Q: What size should I make for a newborn?
A: Newborn baby shoes typically measure around 3.5 inches (9 cm) in length. You can adjust by adding or removing stitches in the sole.
Q: Can I use leftover yarn for baby shoes?
A: Absolutely! Baby shoes require a small amount of yarn, making them a great project for using up scraps.
Q: Do I need to use a specific type of yarn?
A: It’s best to use soft, machine-washable yarns like baby cotton or baby acrylic. Avoid rough or scratchy yarns.
Q: How long does it take to make one pair of baby shoes?
A: Most crocheters can complete a pair in 1–2 hours. It’s a quick and rewarding project.
Q: Can I sell the baby shoes I make from this pattern?
A: Yes, you can sell the finished items. Just ensure you credit any designers if you use a specific published pattern.
Conclusion
Creating easy crochet baby shoes step by step is a fun, creative, and heartfelt craft. Whether you’re crocheting as a hobby or building a handmade gift collection, baby shoes are always appreciated and cherished. With just a few basic materials, some time, and a little love, you can produce something truly special.
In this article, we covered how to choose materials, follow a simple step-by-step pattern, personalize your shoes, and care for them properly. We hope this guide inspired you to start crocheting today!
VIDEO TUTORIAL
We’d love to hear your thoughts! Leave a sincere comment below with your experience, any questions, or suggestions for future tutorials. Happy crocheting!


