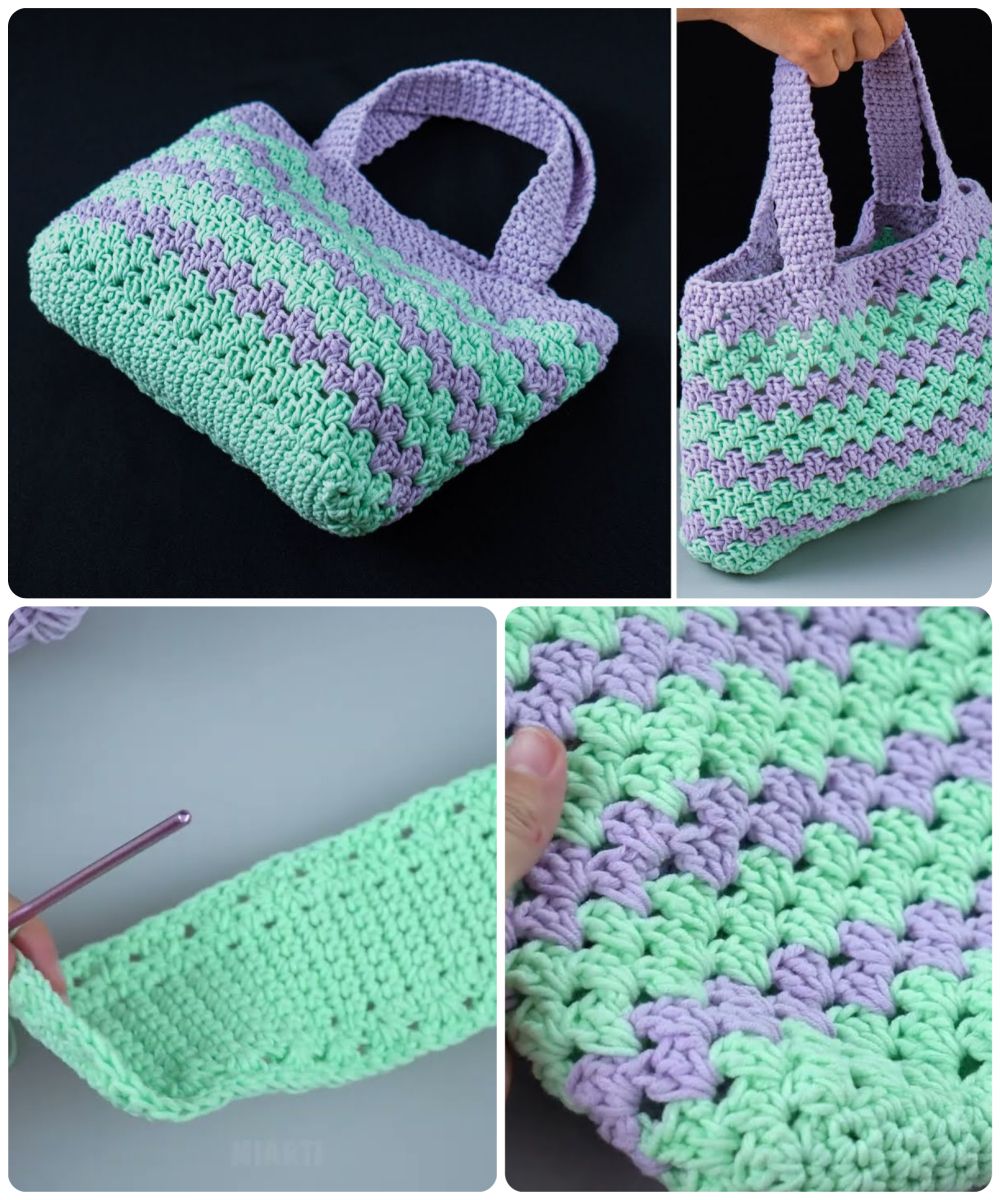
If you have ever dreamed of making your own stylish and practical accessory, this easy model crochet tote bag – tutorial for beginners is exactly what you need. Crochet tote bags are not only trendy but also functional, perfect for carrying your essentials to the market, beach, or even as an everyday bag.
This step-by-step guide will walk you through the process in a simple and enjoyable way, even if you have never made a crochet project before. With the right stitches, yarn, and patience, you will be amazed at what you can create.
Creating your own crochet tote bag is a satisfying experience. It gives you the freedom to choose your favorite colors, textures, and finishes. This tutorial focuses on an easy model crochet tote bag so that beginners can follow along without feeling overwhelmed.
You don’t need advanced crochet skills; a few basic stitches are enough to bring this project to life. As you progress, you will also develop more confidence and speed, making it easier to explore more advanced patterns in the future.
By following this tutorial for beginners, you will learn how to select the right yarn, use simple stitches, and assemble the bag for durability and beauty.
We will cover all the essentials step by step, so there’s no need to worry about missing details. By the end of this article, you’ll have a beautiful tote bag you can proudly show off or gift to someone special.
The first step in creating your easy model crochet tote bag – tutorial for beginners is selecting the right materials. Using good quality yarn is essential for durability and an attractive finish. Cotton yarn is highly recommended because it is strong, washable, and holds its shape well, making it perfect for bags that carry weight.
When it comes to choosing a crochet hook, check the label on your yarn for the suggested size. Beginners often find that a medium-sized hook, such as 4.5 mm to 5.5 mm, offers better control and comfort. Avoid very thin or very thick yarn for your first bag, as they can be harder to work with consistently.
Select a color that inspires you. Bright shades make cheerful summer bags, while neutral tones give a more classic, versatile look. You can also combine two or more colors for a striped design that adds personality to your tote bag.
Aside from yarn and hook, you will need scissors, a yarn needle for sewing, and possibly stitch markers to help keep track of your work. Having everything prepared before you start will make the process smoother and more enjoyable.
Always ensure that your yarn and hook combination gives you a fabric that is dense enough to hold items securely. You can make a small swatch before starting to check the tension and thickness. This simple step can save you from making an entire bag that turns out too loose or too stiff.
Lastly, remember that investing in slightly better materials can make a big difference in the final product’s appearance and longevity. While budget options are fine for practice, a quality yarn will give your tote bag a professional finish.
The base is the foundation of your easy model crochet tote bag and determines its size and shape. Most beginner-friendly designs start with a simple rectangle or oval base, worked in rows or rounds. This ensures that the structure is solid and can support the weight of items inside.
To create the base, start with a chain that matches your desired bag width. For example, 30 to 40 chains is common for a medium-sized tote. Then, work single crochet (sc) stitches into each chain across. At the end, add a few stitches to turn, and continue crocheting along the opposite side of the chain to form a rounded edge.
Continue working in rounds to build up the base, increasing stitches evenly on both ends so the base lays flat. Using single crochet or half double crochet (hdc) gives you a dense, strong fabric that won’t stretch too much when you carry heavier items.
Take your time at this stage. The base needs to be even and sturdy because it supports the entire bag. Use a stitch marker to mark the beginning of each round so you don’t lose track of where you are in the pattern.
If you want a more structured base, you can work a few extra rows in a tighter stitch pattern. Some crafters even insert a piece of sturdy fabric or plastic canvas between crochet layers to reinforce it.
Once you have completed the base, measure it to ensure it meets your desired size. Remember, the width and length will determine the bag’s capacity, so adjust if necessary before moving on.
With the base complete, you can now start building the body of your crochet tote bag. This is where your bag will take shape and gain height. For beginners, a continuous spiral or joined rounds are both good methods to avoid complicated shaping.
A common and attractive stitch for tote bags is the double crochet (dc) stitch, as it works up quickly and creates a flexible yet sturdy fabric. Simply work one stitch into each stitch of the base, continuing round by round without increasing. This will naturally cause the sides to rise.
If you prefer a more decorative texture, you can alternate between rows of double crochet and single crochet. This creates subtle horizontal stripes and adds interest without complicating the pattern.
Keep checking your work as you go. Make sure your stitches are consistent in size, as uneven tension can lead to a bag that leans or has an uneven shape. If needed, pause to adjust your grip or hook size.
You can decide how tall you want your tote bag to be. Most medium totes are around 12 to 14 inches in height, but you can customize based on your needs. Taller bags are great for shopping, while shorter ones make chic handbags.
Once you reach your desired height, finish with a round or two of single crochet to give the top edge a clean and sturdy finish. This also prepares the bag for the handles.
Handles are a defining feature of any easy model crochet tote bag. They should be comfortable to hold and securely attached to support the bag’s weight. For beginners, the simplest way is to crochet the handles directly onto the top of the bag.
To make basic handles, chain the desired length (usually 16 to 22 inches for shoulder straps) and skip the same number of stitches on the bag body. Then, reattach and crochet around until you reach the other handle position, repeating the process. Work several rounds over the handles to strengthen them.
If you want extra durability, you can crochet the handles separately and sew them on with a yarn needle. This method allows you to use thicker or reinforced stitches for heavy-duty bags.
Don’t forget finishing touches! Weave in all loose ends carefully so the bag looks neat. You can also add a lining made from fabric to prevent small items from poking through and to increase the bag’s strength.
Decorations such as tassels, buttons, or crochet flowers can personalize your tote and make it truly unique. Just remember not to overload the design with too many elements; sometimes simplicity is more elegant.
After completing all these steps, your bag is ready for use. Give it a gentle wash and shape it while damp to ensure it looks perfect.
1. Can beginners really make a crochet tote bag?
Yes! With basic stitches like single crochet and double crochet, even absolute beginners can create a beautiful and functional tote bag.
2. What type of yarn is best for tote bags?
Cotton yarn is the best choice because it’s durable, washable, and holds its shape well.
3. How long does it take to crochet a tote bag?
For beginners, it can take 2–4 days working a few hours each day, depending on the complexity and size.
4. Do I need to line my crochet tote bag?
It’s optional, but lining adds strength and prevents small items from slipping through the stitches.
5. Can I make the bag larger or smaller?
Absolutely! Adjust the starting chain length for width and add or remove rounds for height.
6. What if my bag looks uneven?
Check your tension and count your stitches regularly. Uneven shapes usually result from missed or extra stitches.
Making an easy model crochet tote bag – tutorial for beginners is a rewarding project that combines creativity, practicality, and skill-building. By choosing the right materials, starting with a sturdy base, building the body carefully, and adding strong handles, you can create a tote that will last for years.
Whether you keep it for yourself or gift it to someone, the handmade touch makes it special. Now that you have the steps, I’d love to hear your thoughts—share your honest opinion and suggestions for future tutorials in the comments!