
If you’re on the hunt for a charming and unique amigurumi project, this Free Crochet Camel Pattern is exactly what you need.
Whether you’re an experienced crocheter or just starting your crafting journey, this adorable camel is the perfect way to expand your skill set while creating a delightful toy or decorative item. With detailed guidance and a simple structure, you’ll be able to make a beautiful crochet camel step by step.
The crochet camel offers a touch of whimsy and character, ideal for nurseries, themed decor, or thoughtful handmade gifts. It’s especially fun because of its distinctive shape—think humps, long legs, and a sweet face—all made from yarn.
Despite its complex look, this project is beginner-friendly when broken into easy-to-follow parts. In this tutorial, we’ll explore the Free Crochet Camel Pattern, covering everything from materials to final assembly.
Creating a crochet camel is also a wonderful way to practice shaping, color changes, and sewing parts together. This pattern will help you grow your confidence while producing something truly unique. So, gather your yarn and hook—let’s dive into the world of desert-inspired cuteness and start stitching your very own camel today!
1. Materials and Preparation
To begin your Free Crochet Camel Pattern, you’ll need to gather a few essential tools and materials. Choosing the right items ensures a smooth and enjoyable crochet experience.
Start with yarn in camel shades—light brown, beige, or even golden yellow work well. Choose worsted weight yarn for a balanced size and texture.
A 3.5mm or 4mm crochet hook is ideal for amigurumi. It creates a tight stitch that prevents stuffing from showing through.
You’ll need polyester fiberfill stuffing to give your camel shape and softness. A yarn needle is also necessary for sewing the parts together securely.
Small black safety eyes or embroidered eyes will give your camel personality. Embroidery thread for nostrils and mouth adds charming facial detail.
Optional items include a stitch marker to keep track of rounds and a soft brush to gently fuzz the yarn for a textured look.
Be sure to work in a well-lit, comfortable space, and have all your materials within reach before beginning.
2. Crocheting the Camel Body
Now that you’re ready, let’s move on to the main part of the Free Crochet Camel Pattern—the body. This forms the base of your adorable animal.
Start with a magic ring and crochet in continuous rounds. The body is typically oval, tapering slightly toward the front.
Use single crochet (sc) stitches throughout for a clean, tight texture. Increase evenly in early rounds to shape the base.
After reaching the desired width, work even rounds without increases. This gives your camel the signature long body.
Begin decreasing toward the neck area to give it a natural transition to the head. Stuff as you go to ensure firmness.
Once the body shape is complete, bind off and set aside. You’ll attach the head and legs later, creating that classic camel form.
3. Head, Legs, and Humps
The next steps in your Free Crochet Camel Pattern focus on the unique features that give this animal its charm—starting with the head.
The head is crocheted separately using a round shape that narrows at the snout. Begin with a magic ring and build up using single crochet.
Add safety eyes before closing the head, and lightly stuff to maintain shape. Embroider nostrils and a smiling mouth.
For the legs, make four identical tubes. Begin with magic rings and increase, then crochet even rounds to form long limbs.
Stuff the legs firmly and sew them securely to the bottom of the camel’s body. Make sure they’re aligned to keep the camel standing.
The humps are the camel’s most iconic feature. Crochet two small domes using increasing and decreasing rounds. Lightly stuff before attaching.
Position the humps on top of the body and sew them down carefully, spacing them to reflect a realistic camel silhouette.
4. Final Touches and Assembly
The finishing touches truly bring the Free Crochet Camel Pattern to life. Assembly and decoration add personality and style.
Use strong thread and small stitches to attach the head to the neck area. Ensure it’s centered and upright.
Sew the legs evenly, adjusting the positioning so the camel stands steadily. A little extra stuffing in the legs can help with balance.
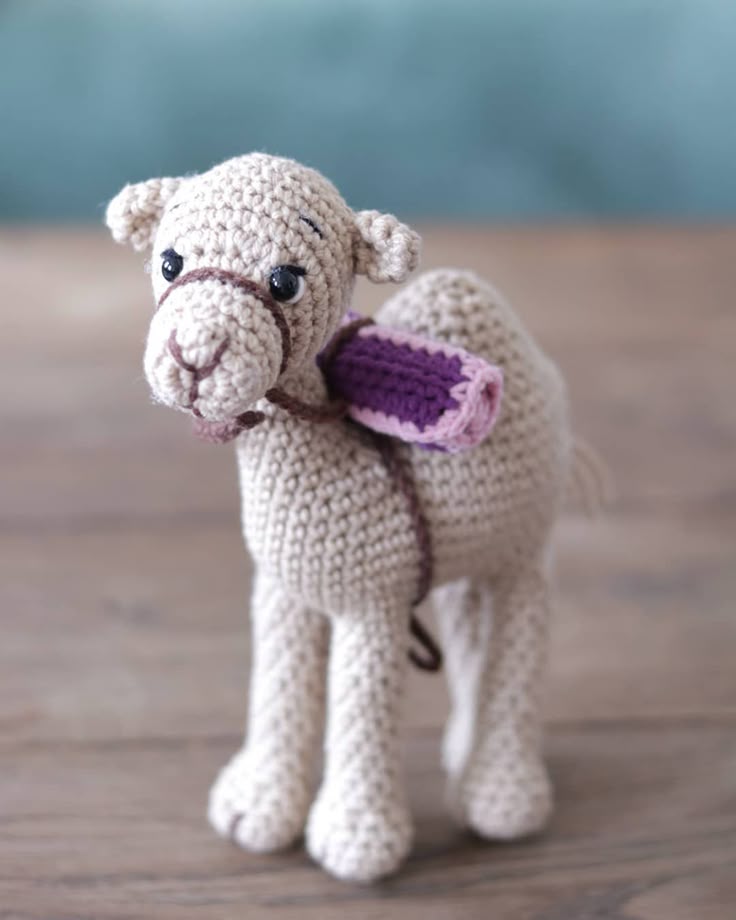
The ears can be simple small ovals folded and sewn to the sides of the head. Optional extras include a tail, saddle, or decorative harness.
Brush out certain yarn sections gently for a fluffier, more realistic texture—especially on the humps or mane if desired.
You can customize your camel with small accessories like mini tassels or a crocheted blanket for a traditional look.
Once all parts are secure and your camel looks balanced, take a moment to admire your unique creation. You’ve just completed a full amigurumi project!
FAQ – Free Crochet Camel Pattern
Is this pattern suitable for beginners?
Yes! The Free Crochet Camel Pattern is broken down into simple parts, and it uses basic stitches like single crochet, increases, and decreases. It’s a great starting point for beginner amigurumi makers.
What yarn should I use for this project?
Worsted weight acrylic or cotton yarn works best. Choose natural camel colors like beige, tan, or light brown for a realistic look, or go colorful for a playful version.
Can I make the camel bigger or smaller?
Absolutely. Use thicker yarn and a larger hook for a bigger camel, or finer yarn and a smaller hook for a tiny version. Adjust the number of stitches proportionally.
How long does this project take to complete?
Most crocheters can finish the camel in 4–6 hours, depending on experience and detail level. Breaking the work into sessions makes it easy to manage.
Do I need to use safety eyes?
No. You can embroider the eyes with black yarn or thread if preferred, especially for a baby-safe toy.
What can I do with a finished crochet camel?
It makes a perfect gift, toy, or nursery decoration. You can also use it as part of a themed amigurumi collection—think desert animals or travel souvenirs!
Conclusion
Now that you’ve followed the complete Free Crochet Camel Pattern, you’ve learned how to create an adorable and impressive handmade camel from start to finish. From selecting the perfect yarn and hook to shaping the body, legs, and iconic humps, you’ve practiced essential amigurumi techniques in a fun and rewarding way.
We’d love to hear your thoughts! Have you made your own crochet camel? Was this pattern easy to follow? Share your feedback in the comments and feel free to suggest other animals or characters you’d like tutorials for. Happy crocheting!


