
Macrame Heart Bracelet - Free Tutorial

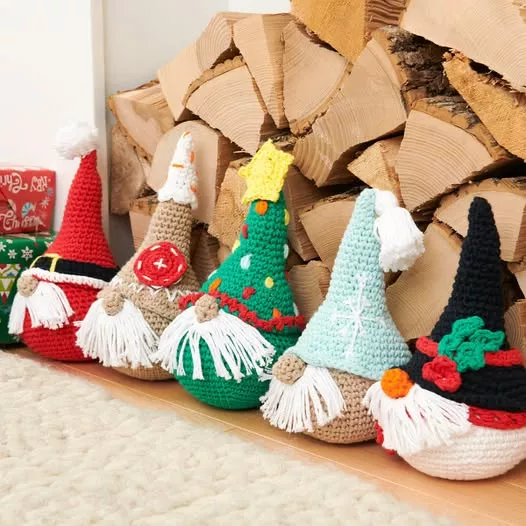
Crocheting whimsical characters like the Free Lily Crochet Gnomes Family of Five Pattern, Single Size / Santa Gnome brings festive cheer and creativity into your home.
These delightful gnomes are perfect for holiday decorations or year-round charm. The pattern’s versatility allows you to create an entire family of gnomes, each unique in style and personality.
Whether you’re crafting a Santa Gnome to highlight the holiday spirit or a quirky companion for your crochet collection, this pattern offers endless possibilities.
Designed with both beginners and experienced crocheters in mind, this guide ensures everyone can enjoy crafting these adorable gnomes.
The Free Lily Crochet Gnomes Family of Five Pattern encourages personal touches, such as color customization and accessorizing.
With easy-to-follow instructions, you’ll quickly create a charming set of gnomes that adds personality to any setting.
Starting the Free Lily Crochet Gnomes Family of Five Pattern requires gathering a few essential materials.
Having the right tools ensures a smooth crocheting process, allowing you to focus on creativity and detail.
The foundation of the Free Lily Crochet Gnomes Family of Five Pattern lies in crafting the gnome bodies.
The gnome’s hat is a defining feature of the Free Lily Crochet Gnomes Family of Five Pattern and allows for creative expression.
Assembling the Free Lily Crochet Gnomes Family of Five Pattern involves bringing all the elements together for a cohesive look.
1. Can beginners create the Free Lily Crochet Gnomes Family of Five Pattern?
Yes! This pattern is designed for all skill levels. Detailed instructions and basic stitches make it accessible for beginners.
2. How long does it take to crochet one gnome?
On average, a single gnome takes 4–6 hours, depending on size and detail. The entire family may take a weekend to complete.
3. Can I use different yarn types for this project?
Absolutely! Feel free to experiment with various yarn types and textures to achieve different looks and sizes.
4. What’s the best way to make a fluffy beard?
Use brushed yarn or fray regular yarn strands with a comb for a soft, fluffy beard.
5. Can I wash the gnomes if they get dirty?
Handwashing with mild detergent is recommended. Avoid machine washing to maintain their shape and structure.
6. How can I customize my Santa Gnome for the holidays?
Add festive elements like a small sack, a belt buckle, or tiny gifts for a Christmas-inspired design.
Join our VIP broadcast list and gain access to exclusive patterns, all for free. As a VIP member, you’ll receive the best patterns daily, delivered directly to your device. ✨📱 It’s a unique opportunity to stay up-to-date with the latest trends and designs, curated just for you. Don’t miss out on enhancing your projects and discovering new inspirations with the best patterns every day! 🎨🔝
The Free Lily Crochet Gnomes Family of Five Pattern, Single Size / Santa Gnome offers a delightful crochet project that blends creativity with functionality. From designing each gnome to assembling the family, this guide has provided all the steps and tips for success.
We hope this tutorial inspires you to create your own adorable gnome family. Share your thoughts, experiences, and suggestions in the comments below. Your feedback helps others and keeps the crochet community vibrant! Happy crocheting!


