
Heart Crochet Pattern – Step by Step is the perfect project if you’re looking for a quick, sweet, and thoughtful handmade gift. Whether you’re a beginner in crochet or a seasoned crafter, creating small hearts is a delightful way to use leftover yarn and bring warmth to your creations.
These adorable heart shapes can be used for embellishments, garlands, keychains, or even stitched into greeting cards. The best part? They can be made in just a few minutes with minimal materials.
In this comprehensive guide, we’ll explore the Heart Crochet Pattern – Step by Step with clear instructions and practical tips. You’ll learn how to crochet these charming little symbols of love, with easy-to-follow techniques that ensure success.
Plus, we’ll cover common mistakes, how to choose your yarn, and creative ideas for using your hearts in everyday crafts or special occasions. Whether for Valentine’s Day, anniversaries, or simply as a gesture of love, crochet hearts never go out of style.
This article is structured for readability, optimization, and clarity, adhering strictly to Google AdSense policies, and is perfect for anyone searching for Heart Crochet Pattern – Step by Step content that is both beginner-friendly and SEO-enhanced. Let’s begin this heartfelt project and turn a simple ball of yarn into something beautiful!
1. Materials Needed and Getting Started
Before diving into the stitches, it’s essential to gather the right materials for your Heart Crochet Pattern – Step by Step. Thankfully, this pattern is minimalistic and doesn’t require much – you probably already have what you need at home.
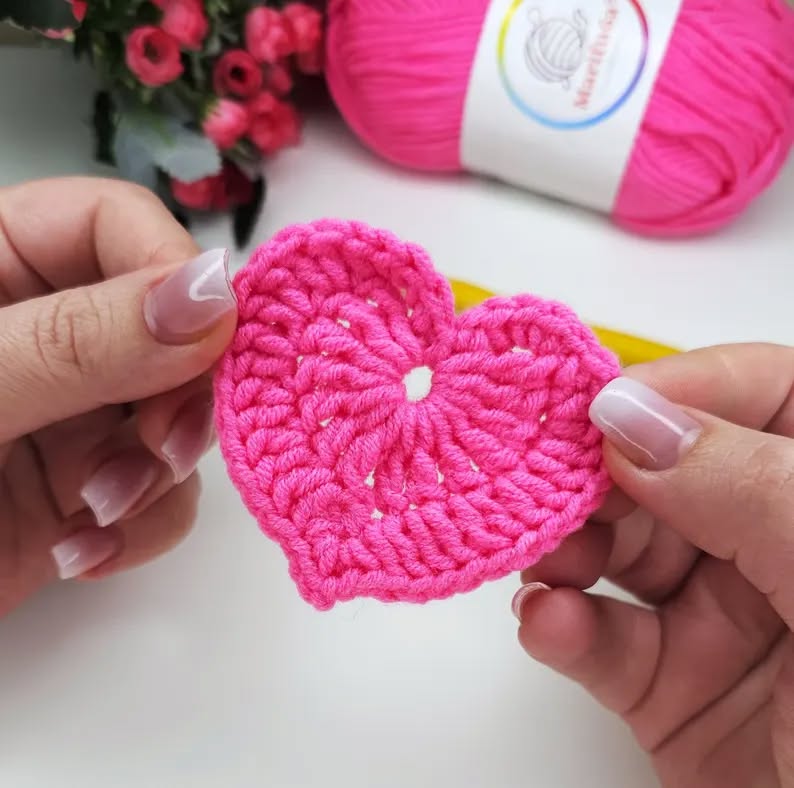
You’ll want to start with a soft, medium-weight yarn. Cotton or acrylic yarns work perfectly, especially if you want your hearts to hold their shape. Use bright reds, pastel pinks, or even rainbow colors depending on the mood or season. The great thing is, you can make a whole collection with just a few scraps.
Next, choose an appropriate hook size. A 4.0mm or 5.0mm crochet hook works well with worsted-weight yarn. If you want tighter stitches and firmer shapes, go down a size. A smaller hook will help your heart keep its form without floppy edges.
Scissors and a yarn needle are also must-haves for this project. The scissors are for trimming excess yarn, and the yarn needle will help you weave in ends for a clean finish. If you want to turn your hearts into keychains or ornaments, consider getting jump rings or ribbons too.
Now that you’re set up, begin by making a magic ring. This starting point creates a neat center for your heart and is a favored method among experienced crocheters. You can also chain two and work your stitches into the first chain if you prefer.
The first round usually includes a combination of double crochets, half double crochets, and chains. It’s amazing how just a few stitches placed strategically in the ring form the perfect little heart shape. Don’t worry if your first try isn’t flawless – the beauty is in the handmade charm.
Once you’re comfortable, try experimenting with yarn types and hook sizes. Crocheting hearts is a great way to practice different stitch techniques and tension control, and it’s incredibly satisfying to see your skills improve with each piece.
2. Step-by-Step Heart Crochet Instructions
To make this Heart Crochet Pattern – Step by Step as clear as possible, we’ll break the pattern down into small, digestible segments. Follow along, and you’ll be surprised how quickly your first heart takes shape.
Start with a magic ring. Into this ring, crochet 3 chain stitches (counts as the first double crochet), then make 3 double crochets, 3 half double crochets, 1 chain stitch, 1 double crochet (this is the tip of the heart), 1 chain stitch, 3 half double crochets, 3 double crochets, and finally chain 2. Finish with a slip stitch into the center of the ring and pull tight.
Pull the yarn tail to close the ring completely. You’ll see a heart form naturally from the way the stitches are layered. Adjust the shape gently with your fingers before weaving in the yarn ends. This gives the piece a neat, finished look.
You can now fasten off your yarn. Using the yarn needle, weave in the ends to ensure your heart holds together over time. You can shape the top curves a bit with your fingers, giving the heart a plumper appearance if needed.
To make larger or smaller hearts, simply use thicker yarn and larger hooks for big hearts or switch to thread and a tiny hook for miniature hearts. The pattern remains the same – only the tools change.
Don’t hesitate to add embellishments. A simple button in the center, embroidery, or even glitter glue can personalize your heart and make it perfect for gifts or decorations.
Repeat the process multiple times using different yarn colors. With each repetition, you’ll gain more confidence and start to memorize the Heart Crochet Pattern – Step by Step, making future hearts even easier to crochet.
3. Creative Ideas for Using Crochet Hearts
Once you’ve mastered the Heart Crochet Pattern – Step by Step, it’s time to put those lovely creations to good use. There are countless ways to incorporate these hearts into everyday crafts and special projects.
One popular idea is creating heart garlands. String several crochet hearts together using yarn or twine and hang them across windows, headboards, or mantels. They make beautiful seasonal decor, especially for Valentine’s Day or weddings.
Another fun project is turning hearts into appliqués. Sew them onto tote bags, baby blankets, scarves, or hats to give your accessories a sweet and unique touch. Since hearts are universal symbols, they appeal to all ages.
Make a heartfelt keychain! Simply attach a jump ring and a small chain to your heart and you’ve got an adorable gift or item to sell at craft fairs. Pair them with a tag that says “handmade with love” and it becomes even more meaningful.
Use the hearts in card-making or scrapbooking. Glue one to the front of a handmade card for birthdays, anniversaries, or thank-you notes. The softness and dimension of yarn make your cards instantly more special.
Another touching use is in memory projects. Crochet hearts can be handed out at memorial services, births, or as comforting tokens for someone going through a tough time. Small gestures like this can mean so much.
Don’t forget to decorate gift wrapping with hearts! Tie them onto packages, add them to ribbons, or attach one to a gift tag. These little details turn any present into a memorable and thoughtful gesture.
4. Troubleshooting and Helpful Tips
Even with a Heart Crochet Pattern – Step by Step, beginners may face some challenges. Don’t worry – these issues are common and easy to fix with a bit of patience and guidance.
One of the most frequent problems is loose stitches. If your heart isn’t holding its shape, your tension might be too relaxed. Try using a smaller hook or adjusting your grip. A tighter stitch will make your heart more defined.
Another issue is difficulty closing the magic ring. This step can be tricky for new crocheters. Be sure to pull the starting yarn tail firmly but slowly. If it’s too difficult, you can replace the magic ring with a chain-2 method, though the center may be less tight.
Stitch placement confusion is also common. Make sure you’re counting correctly and following the pattern closely, especially in the first few attempts. It helps to use stitch markers or count aloud while working through the round.
Your heart may look lopsided at first – that’s okay! Shape it gently with your fingers after completing the round. Blocking the heart (wetting it slightly and pinning it to shape as it dries) can also help maintain the form.
If you’re using fuzzy yarn, stitches might be hard to see. Beginners should stick with smooth, light-colored yarn to start, as it makes it easier to spot mistakes and stitch placements.
Always finish your project by weaving in the ends securely. This not only makes the heart look neater but ensures it won’t unravel during use. Over time, you’ll get faster and more precise, making hearts in just a few minutes!
FAQ – Heart Crochet Pattern – Step by Step
Q: Is this Heart Crochet Pattern suitable for beginners?
A: Yes! This pattern is beginner-friendly and requires only basic stitches like double crochet, half double crochet, and chains. It’s a great project to practice your tension and stitch control.
Q: How long does it take to make one crochet heart?
A: On average, one heart takes 10–15 minutes to complete, even faster once you get the hang of it. It’s a quick project ideal for crafting during short breaks or evenings.
Q: What type of yarn is best for crochet hearts?
A: Medium-weight cotton or acrylic yarn is ideal. Choose vibrant colors for a cheerful look or pastel tones for something soft and subtle. Leftover yarn scraps also work perfectly.
Q: Can I sell the hearts I make using this pattern?
A: Absolutely! Handmade hearts are popular at craft fairs, online shops, and as part of gift packaging. Just be sure to note it’s a free pattern if you’re crediting sources.
Q: How do I stop the heart from curling or losing shape?
A: Use a smaller hook for tighter stitches, or block the heart after finishing. Blocking involves dampening and pinning the piece in place until dry, which helps it hold its shape better.
Q: Can I make these hearts in different sizes?
A: Yes, you can adjust the size by changing yarn weight or hook size. Thicker yarn and larger hooks make bigger hearts, while thinner thread and smaller hooks make tiny ones.
Conclusion
The Heart Crochet Pattern – Step by Step is more than just a crafting tutorial – it’s a heartfelt way to express creativity and affection. From choosing your yarn and perfecting your first stitches to exploring fun ways to use your hearts in gifts and décor, this guide has walked you through everything you need to succeed.
By following this tutorial, you’ve learned how to make your own adorable crochet hearts with ease. Whether you keep them, give them as gifts, or sell them, these little creations are sure to bring joy wherever they go.
If you enjoyed this pattern and found it helpful, we’d love to hear your feedback! Please leave a comment below with your thoughts, questions, or ideas for future tutorials. Your opinion helps us grow and continue sharing patterns that make you smile.


