How To Crochet A Supercute Paw Print - Free Tutorial
Advertising
Learning how to crochet a supercute paw print is a fun and rewarding project for crochet lovers of all skill levels.
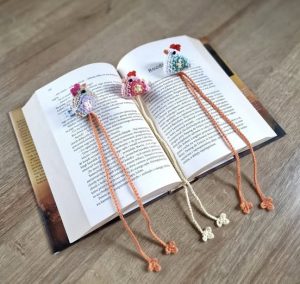
These adorable paw prints can be used as appliques, keychains, coasters, or even decorations for pet-themed items.
Advertising
Whether you’re crafting for a pet lover or adding a cute touch to your own projects, this easy tutorial will guide you through creating these charming designs.
Image from google.
Crocheting paw prints is not only enjoyable but also a great way to use up leftover yarn from other projects.
With a few simple materials and basic crochet stitches, you’ll be able to make paw prints in no time.
They’re perfect for adding a personal, handmade touch to gifts or using as embellishments on bags, hats, and scarves.
Advertising
In this article, we’ll provide step-by-step instructions, explain the materials you’ll need, and share creative ideas for using your finished paw prints. Let’s dive into the How To Crochet A Supercute Paw Print – Tutorial and explore all the possibilities this pattern offers.
1. Materials You’ll Need for Crocheting Paw Prints
Before you start learning how to crochet a supercute paw print, it’s essential to gather all the materials. Having the right tools and yarn ensures your project is smooth and enjoyable.
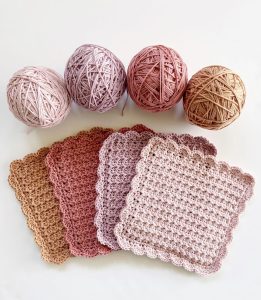
Yarn
Choose medium-weight yarn in your preferred color. For a natural look, opt for brown, gray, or black. Bright colors like pink or blue are perfect for playful and whimsical designs.
Crochet Hook
A 4mm or 5mm crochet hook works well for this project, but you can adjust the size based on your yarn weight and desired paw print size.
Scissors
Keep a pair of sharp scissors handy to trim the yarn.
Yarn Needle
You’ll need a yarn needle to weave in ends and assemble the paw print.
Stitch Markers (Optional)
These can help you keep track of your stitches, especially if you’re a beginner.
Measuring Tape
To ensure consistent sizing, use a measuring tape to check your paw prints’ dimensions as you work.
Now that you’ve gathered your materials, you’re ready to start crocheting!
2. Step-by-Step Instructions for Crocheting a Paw Print
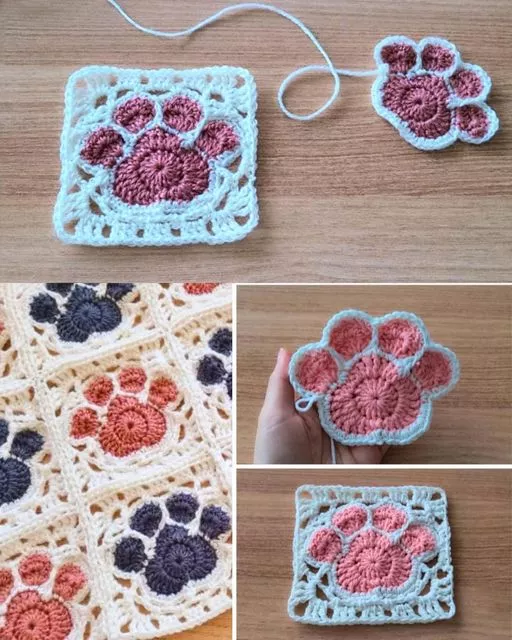
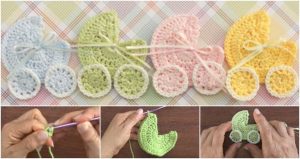
Creating a crochet paw print involves making a series of small circles and assembling them to form the shape of a paw. Follow these steps to crochet your own supercute paw prints:
Crochet the Main Pad
Start by making a magic ring and crocheting several single crochet stitches into the ring. This will form the paw’s main pad. Close the ring tightly and join with a slip stitch. Depending on your desired size, you can use additional rounds of single crochet to enlarge the pad.
Create the Toe Pads
Each paw print has four toe pads. To make them, follow the same steps as the main pad but use fewer stitches to create smaller circles. Crochet all four toe pads before moving on to assembly.
Join the Pads Together
Arrange the main pad and toe pads on a flat surface to form the shape of a paw. Use a yarn needle and matching thread to stitch the pads together. Alternatively, you can use hot glue for a quicker but less durable finish.
Add Decorative Details
For added personality, you can embroider details onto the paw print, such as lines or shapes that mimic the texture of a real paw.
Customize Your Paw Print
Experiment with different yarn colors and textures to create unique paw prints. You can make them smaller or larger by adjusting your hook size and yarn weight.
Finish and Secure the Ends
Weave in any loose ends with a yarn needle. Trim excess yarn to give your paw print a neat and tidy appearance.
Once your crochet paw print is complete, it’s time to think about how to use it in your crafts and decor.
3. Creative Uses for Crochet Paw Prints
After learning how to crochet a supercute paw print, the next step is finding creative ways to use them. These versatile designs can enhance various projects and decorations.
Make Keychains
Attach a metal ring to the paw print to create a keychain. This is a practical and adorable way to show off your crochet skills.
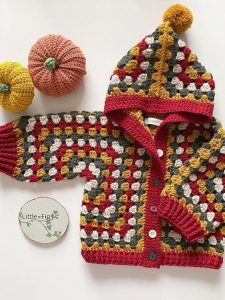
Use as Appliques
Sew paw prints onto clothing, bags, or blankets to add a touch of charm. They’re perfect for pet-themed items or gifts for animal lovers.
Create Coasters
Larger paw prints can double as coasters. Use thick yarn to make sturdy, functional coasters for your home.
Decorate Pet Accessories
Add crochet paw prints to pet collars, leashes, or beds for a personalized look.
Design a Banner or Garland
String together multiple paw prints to create a cute garland or banner. Hang it in your home, at a pet party, or in a craft booth.
Use in Scrapbooking or Card Making
Crochet paw prints can be a unique embellishment for scrapbooks or handmade cards. Attach them with glue for a special touch.
4. Tips for Crocheting Perfect Paw Prints
Creating flawless paw prints takes practice and a few helpful tips. Here are some suggestions to improve your project:
Practice with Scrap Yarn
If you’re new to crocheting shapes, use scrap yarn to practice. This way, you won’t worry about wasting your best yarn.
Experiment with Sizes
Make paw prints in different sizes by adjusting your hook size and number of stitches.
Use Blocking for Shaping
To ensure your paw prints lie flat, block them by pinning them to a surface and spraying with water. Allow them to dry before using.
Try Variegated Yarn
For a unique look, use variegated yarn to create multicolored paw prints without changing yarn.
Work in Good Lighting
Crochet in a well-lit area to see your stitches clearly, especially when using dark-colored yarn.
Keep Tension Consistent
Maintain even tension throughout your project to ensure uniform stitches and a polished look.
FAQ
1. What size crochet hook is best for paw prints?
A 4mm or 5mm crochet hook is ideal for medium-weight yarn. You can adjust the size depending on your yarn and desired paw print size.
2. Can beginners crochet paw prints?
Yes! Paw prints are beginner-friendly and require only basic stitches like single crochet and slip stitches.
3. How do I make my paw prints more durable?
Use sturdy yarn and secure your stitches tightly. If attaching to items, sew them on rather than gluing for a longer-lasting hold.
4. Can I use different yarn types?
Absolutely! Experiment with cotton, acrylic, or even textured yarns to achieve different looks.
5. How long does it take to crochet a paw print? It depends on your skill level, but most paw prints can be completed in 15-30 minutes.
Conclusion
In this How To Crochet A Supercute Paw Print – Tutorial, we’ve covered everything you need to know to create adorable crochet paw prints. From gathering materials to creative uses, these paw prints are a fun and versatile addition to your crochet repertoire.


