
Creating a Baby Moses Basket out of Knitted Yarn is a heartwarming and practical project, especially for those who love handmade crafts.
Whether you’re making it as a keepsake, a cozy resting place for a newborn, or a thoughtful gift, this project is beginner-friendly and incredibly rewarding.
If you’re new to knitting, don’t worry! This step-by-step guide will walk you through the entire process, from selecting the right materials to assembling and finishing your Moses basket.
With just a few basic stitches and patience, you’ll have a beautiful, handcrafted piece that will be cherished for years.
Ready to get started? Grab your knitting needles, and let’s begin this wonderful DIY journey!
1. What is a Baby Moses Basket?
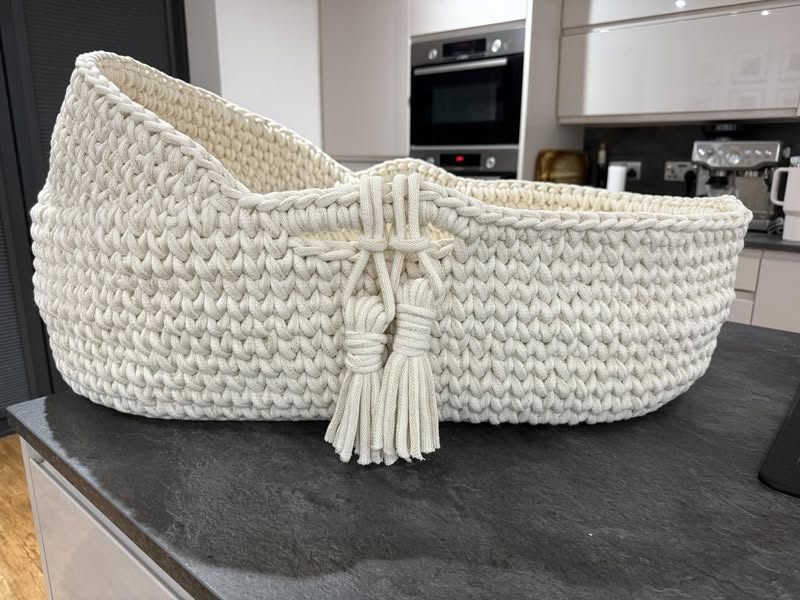
A Baby Moses Basket is a small, portable bassinet traditionally woven from natural fibers like palm leaves or wicker. However, knitted versions are becoming increasingly popular due to their softness, customizability, and handmade charm.
Here’s why knitted Moses baskets are a fantastic choice:
- Comfortable & Soft – The plush texture of knitted yarn makes it extra cozy for babies.
- Customizable – Choose different yarn colors, patterns, and sizes to suit your needs.
- Beginner-Friendly – Simple knitting techniques allow even beginners to create a sturdy and beautiful basket.
Now that you understand the appeal of a knitted Moses basket, let’s gather all the materials you’ll need!
2. Materials and Tools Needed
To make a knitted Baby Moses Basket, you’ll need the following supplies:
✔ Chunky or super bulky yarn (cotton or wool blend recommended)
✔ Knitting needles (US size 10-15 or 6-10mm) – depends on yarn thickness
✔ Stitch markers – Helps track stitch placement
✔ Tapestry needle – For weaving in ends
✔ Scissors – To trim excess yarn
✔ Fabric lining (optional) – Adds extra softness inside the basket
✔ Foam or quilted padding (optional) – Enhances support for the base
Before you start knitting, it’s important to select the right yarn and stitches to ensure the basket holds its shape.
3. Choosing the Right Yarn and Knitting Techniques
For a durable and structured Moses basket, selecting the right yarn is crucial. Here’s what works best:
✅ Recommended Yarn:
- Cotton yarn – Sturdy and machine-washable, ideal for baby items.
- Wool-blend yarn – Adds warmth while maintaining structure.
- Recycled t-shirt yarn – Thick and eco-friendly option.
✅ Basic Knitting Techniques for Beginners:
- Garter stitch (knit every row) – Creates a strong, textured base.
- Stockinette stitch (alternating knit and purl rows) – Adds a smoother texture to the sides.
- Slip stitch edging – Helps maintain structure and neatness.
Now that you’re familiar with the basics, let’s dive into the knitting process!
4. Step-by-Step Guide to Knitting the Moses Basket
Follow these steps to create your Baby Moses Basket:
Step 1: Knit the Base
- Cast on 30-40 stitches (adjust based on the desired basket size).
- Knit using the garter stitch (knit every row) until the base measures approximately 20-24 inches long and 12-14 inches wide.
- Bind off and weave in the ends with a tapestry needle.
Step 2: Knit the Sides
- Pick up stitches around the edge of the base (use stitch markers to keep track).
- Knit in stockinette stitch for 8-12 inches to create sturdy sides.
- Bind off and check the basket’s shape—gently block the piece if needed.
Step 3: Knit the Handles
- Cast on 8-10 stitches for each handle.
- Knit in garter stitch for about 12 inches to form a strong strap.
- Bind off and securely attach both handles to opposite sides of the basket.
Your knitted Baby Moses Basket is now complete! But before using it, let’s add some finishing touches.
5. Finishing Touches & Personalization
To make your Moses basket extra special, consider these finishing options:
🌟 Add a Soft Lining: Sew a fabric liner inside the basket for extra comfort.
🌟 Reinforce the Structure: Insert a foam or quilted padding at the base for better support.
🌟 Decorate with Pom-Poms or Ribbons: Attach small embellishments for a stylish look.
🌟 Customize Colors & Patterns: Mix yarn shades or use multicolored stitches for a unique touch.
Personalizing your basket makes it even more special—whether it’s for your baby or as a handmade gift.
FAQ – Common Questions for Beginners
1. Can I use regular yarn instead of chunky yarn?
Chunky yarn is recommended for structure and durability, but you can use multiple strands of thinner yarn held together as an alternative.
2. How do I make the basket firmer?
To reinforce the basket’s structure, you can:
- Knit tighter stitches (use smaller needles).
- Use sturdy cotton or t-shirt yarn.
- Insert a removable foam base inside the basket.
3. Is this basket safe for newborns to sleep in?
While a knitted Moses basket is great for storage and decorative purposes, it is NOT recommended for overnight sleeping unless it meets safety standards and has proper support.
4. Can I wash the Moses basket?
Yes! Most cotton yarns are machine washable, but always check the yarn label for care instructions.
5. How long does it take to complete this project?
For beginners, expect to spend 10-15 hours knitting this basket, depending on your speed and the size of the basket.
Join our VIP broadcast list and gain access to exclusive patterns, all for free. As a VIP member, you’ll receive the best patterns daily, delivered directly to your device. ✨📱 It’s a unique opportunity to stay up-to-date with the latest trends and designs, curated just for you. Don’t miss out on enhancing your projects and discovering new inspirations with the best patterns every day! 🎨🔝
Conclusion
Knitting a Baby Moses Basket is a wonderful project for beginners, allowing you to create something both practical and beautiful. With just a few basic stitches, the right yarn, and a little patience, you can craft a cozy and unique basket for a newborn.
VIDEO TUTORIAL
Now it’s time to grab your knitting needles and start this adorable project! Whether you’re making it for your baby, a loved one, or as a heartfelt handmade gift, your knitted Moses basket is sure to be cherished.
Happy knitting! 🧶💕
