
A Kid’s crochet beanie is a fun and practical accessory that every child needs during the cooler months. This cozy hat not only keeps your little ones warm but also adds a touch of style to their outfits.
Whether you are a beginner or an experienced crocheter, a crochet beanie pattern for kids is easy to follow and can be customized with different colors and designs.
In this guide, we’ll show you how to make a simple yet adorable Kid’s crochet beanie – free pattern step by step.
Crocheting a beanie for kids is a great project for those looking to make something useful and heartfelt. Not only is it a functional item, but it also makes for a fantastic handmade gift. This pattern can be adjusted for various sizes to fit children of different ages.
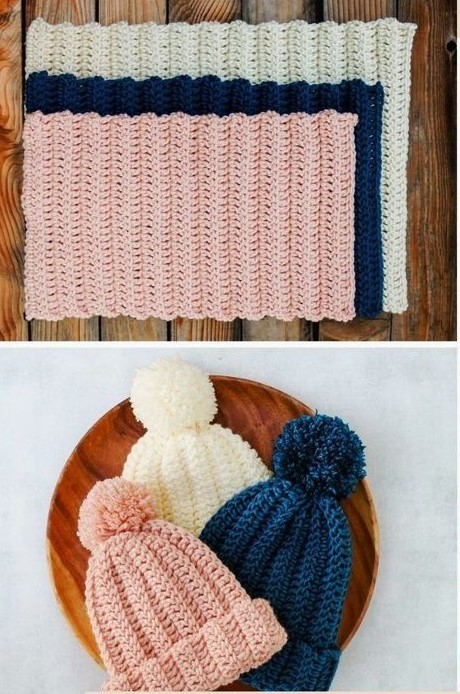
You can play with different yarns and stitch types to create a beanie that suits your child’s personality and preferences. Whether you want a beanie that’s slouchy, fitted, or with a pom-pom on top, the choice is yours!
The Kid’s crochet beanie – free pattern is versatile enough to be worked with different yarns and hooks. You can choose vibrant colors for a playful look or neutral tones for a more classic style.
The best part is that crocheting this beanie is not only a fun activity but also a great way to hone your crochet skills. By following the detailed instructions below, you will be able to create a lovely and snug beanie for any child.
1. Materials Needed for Kid’s Crochet Beanie
Before starting your Kid’s crochet beanie – free pattern, it’s essential to gather all the necessary materials. Having the right yarn and crochet hook will make the process smoother and more enjoyable.
First, you’ll need a medium weight yarn (Category 4), such as acrylic, cotton, or wool, which is perfect for making hats. Acrylic yarn is especially popular because it’s soft, durable, and easy to care for. The amount of yarn you need will depend on the size of the beanie and whether you’re adding any embellishments like a pom-pom or decorative stitches. Usually, around 100 grams of yarn should suffice for a child-sized beanie.
Next, choose an appropriate crochet hook. A 5mm (H-8) crochet hook is generally the best size for medium weight yarn, but you can use a larger or smaller hook if you prefer a looser or tighter fabric. Having the right hook ensures that your stitches are uniform and that the beanie fits comfortably.
In addition to yarn and a hook, you will need scissors for cutting the yarn, a yarn needle for weaving in ends, and optional stitch markers to help you keep track of rounds. The stitch markers are particularly useful when you’re working in the round and need to keep your place in the pattern.
2. How to Start the Kid’s Crochet Beanie
Now that you’ve gathered all your materials, it’s time to begin your Kid’s crochet beanie – free pattern. The first step is to create a foundation ring, which forms the base of your beanie.
To begin, make a slip knot with your yarn and place it onto your hook. Then, chain 4 stitches and join the last chain to the first using a slip stitch. This creates a small ring that will be the center of your beanie. After that, chain 2 more stitches (this will act as your first double crochet in the round).
Next, work 11 more double crochets into the ring. You should have 12 stitches in total. Join the round with a slip stitch into the top of your starting chain 2. This is the base of your beanie, and you’ll continue building from here.
Once you’ve completed the first round, continue crocheting into the stitches, gradually increasing the size of your circle. Each round will consist of double crochets, with increases in specific places to shape the top of the beanie. You can adjust the size by adding or removing rounds, depending on the head circumference of the child you are making the beanie for.
3. Building the Beanie Shape
After completing the base of the Kid’s crochet beanie, you’ll start shaping the sides of the beanie. This is where the pattern starts to take form and become more structured.
For Round 2, you will begin by working in the back loop only. This creates a subtle texture that gives your beanie a more polished look. Chain 2, and then work 1 double crochet into the next stitch. Continue this around the entire round, placing 2 double crochets into every other stitch to increase the size of the circle.
Repeat this process for a few more rounds, increasing every other stitch until the beanie fits around the child’s head. Once you’ve reached the desired width, you can begin working in regular double crochets without any further increases. This will create the sides of the beanie.
To achieve a snug fit, try the beanie on the child as you go to ensure that it’s not too tight or too loose. If necessary, make small adjustments by adding or subtracting rounds to achieve the perfect size.
4. Finishing Touches for Kid’s Crochet Beanie
Once the body of the Kid’s crochet beanie is complete, it’s time to add the finishing touches. This is where you can get creative with the design and make the beanie unique.
One popular option is to add a pom-pom to the top of the beanie. To do this, use extra yarn to create a small, fluffy pom-pom and attach it to the center of the beanie using a yarn needle. Pom-poms add a fun and playful touch that many kids love.
If you want to add a little extra texture, consider crocheting a few rows of a different stitch. A front post double crochet stitch adds a raised effect, which can give the beanie a more intricate look. You can also add a cute little bow or button as a decorative feature.
Finally, be sure to weave in any loose ends with your yarn needle to ensure your work is neat and tidy. Once all the ends are secure, your Kid’s crochet beanie is ready to be worn!
FAQ: Frequently Asked Questions
1. What yarn is best for a kid’s crochet beanie?
For a kid’s crochet beanie, it’s best to use medium weight yarn like acrylic, cotton, or wool. Acrylic yarn is durable, easy to care for, and soft against the skin, making it ideal for children’s hats.
2. How do I measure the size of a kid’s crochet beanie?
To measure the size of the beanie, use a soft tape measure around the child’s head, just above the ears. Make sure to leave a little extra room for comfort, as the hat should fit snugly but not be too tight.
3. How can I customize the color of my kid’s crochet beanie?
You can use as many colors as you like for a customized look. Consider switching colors every few rounds, or use variegated yarn for a more dynamic effect. Adding stripes or a color block design can make the beanie more fun.
4. Can I add a pom-pom to the beanie?
Yes! Adding a pom-pom is a great way to make the beanie even more fun and adorable. You can make your own pom-pom using extra yarn and attach it to the top of the beanie for a playful touch.
5. How do I adjust the size of the beanie for different ages?
To adjust the size of the beanie, simply add or subtract rounds to increase or decrease the circumference. For larger sizes, add more increases early on and crochet a few extra rounds of double crochet.
6. How do I take care of the finished beanie?
Most yarns used for kid’s beanies are machine washable, but it’s always best to check the yarn label for care instructions. If the yarn is machine washable, you can wash the beanie in cold water and lay it flat to dry.
Conclusion
In this guide, we’ve walked you through the steps of making a Kid’s crochet beanie – free pattern, from the materials you need to the final finishing touches.
Whether you’re a beginner or an experienced crocheter, this pattern is easy to follow and can be customized to fit your child’s style. The Kid’s crochet beanie is a perfect project for creating a warm and stylish accessory that your child will love to wear.
VIDEO TUTORIAL
We’d love to hear your thoughts! Please leave a comment with your feedback and any suggestions for other crochet projects.


