
Macrame Heart Bracelet - Free Tutorial

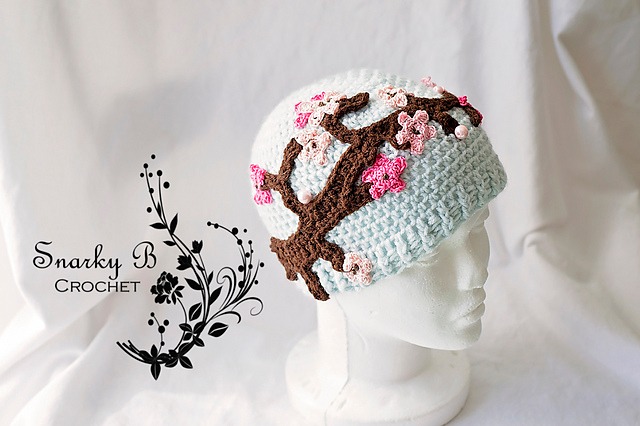
The Snarky Crochet Hat – Free Pattern is a fun and stylish project perfect for crocheters who love adding personality to their handmade accessories.
Whether you enjoy bold designs, playful phrases, or a unique twist on classic patterns, this crochet hat is a great way to showcase your creativity. Plus, it’s beginner-friendly and customizable, making it a great project for all skill levels.
Crocheting a hat is not only a rewarding hobby but also a fantastic way to make personalized gifts. The Snarky Crochet Hat allows you to incorporate cheeky or witty text into your design, giving it a modern and humorous touch.
From sarcastic quotes to clever wordplay, the possibilities are endless. With the right yarn and hook, you can create a cozy and stylish hat that makes a statement.
In this guide, we will walk you through the entire process of making your own Snarky Crochet Hat with a free pattern included. We’ll cover everything from selecting the best materials to adding snarky phrases to your design. Follow along and get ready to crochet a hat that’s as bold and unique as you are!
Selecting the right materials is essential for achieving the best results with your Snarky Crochet Hat – Free Pattern. The type of yarn, hook size, and additional embellishments all play a role in the final look and feel of your hat.
For this project, a worsted-weight yarn is ideal. It provides warmth, durability, and excellent stitch definition. Acrylic yarn is a great choice for affordability and ease of care, while wool offers extra warmth and softness.
The crochet hook size will depend on your yarn choice. Typically, a 5mm (H-8) or 6mm (J-10) hook works well with worsted-weight yarn. If you crochet tightly, consider using a slightly larger hook to maintain a comfortable fit.
When it comes to color selection, consider contrasting shades if you plan to add text or designs to your hat. Bright, bold colors make snarky phrases pop, while neutral tones provide a classic look.
To add text to your hat, you can use surface crochet, embroidery, or even appliqués. Each method offers a different aesthetic, so choose the one that best suits your style and skill level.
Lastly, don’t forget about finishing touches like pom-poms or decorative edging. These small details can enhance the overall look and give your hat a unique touch.
Now that you have your materials ready, let’s dive into the steps to crochet your Snarky Crochet Hat – Free Pattern. This simple and fun pattern is worked in rounds and can be easily adjusted for different sizes.
Start by making a magic ring and crocheting 8-10 single crochet stitches into the loop. Pull tight to close and join with a slip stitch to form the base of the hat.
Increase gradually in the next few rounds to shape the crown. You can do this by working two single crochets into each stitch of the previous round until you reach the desired width.
Once the crown is complete, continue working even rounds without increasing. This forms the body of the hat. You can use half-double crochet or double crochet stitches for a slightly looser fit.
If you want to add stripes or color changes, switch yarns at the beginning of a new round. Carry the yarn loosely at the back to maintain a clean look.
To ensure a snug fit, try the hat on periodically as you work. Adjust the stitch count or tension as needed to achieve the perfect size.
Finish off with a ribbed brim using front post and back post double crochet stitches. This adds elasticity and a polished edge to your hat.
The best part of making a Snarky Crochet Hat is personalizing it with clever and humorous phrases. Here are some techniques to add text to your hat.
Surface crochet is a great method for adding letters. Simply use a contrasting yarn color and slip stitch across the surface of the hat, forming words or patterns.
Embroidery allows for more intricate lettering. Use a tapestry needle and yarn to stitch words directly onto the fabric. Chain stitches or backstitches work well for text.
Appliqués are another fun option. Crochet separate letters or shapes and sew them onto your hat for a bold, raised effect.
Consider using stencils to map out your design before stitching. This ensures your letters are evenly spaced and properly aligned.
If you’re adding text, keep the phrases short and impactful. Some popular snarky phrases include “Not Today,” “Leave Me Alone,” or “Bad Hair Day.”
Finally, don’t be afraid to mix text with other fun elements like stars, stripes, or quirky shapes to enhance your design.
Once your Snarky Crochet Hat is complete, it’s time to add the finishing touches and style it to match your personality.
Block your hat to give it a smooth and professional finish. Lightly steam or wet-block it, shaping it as it dries to ensure the perfect fit.
If your hat feels too loose, add an elastic band inside the brim to improve the fit. This is especially useful for hats made with softer yarns.
Attach a pom-pom for extra flair. Faux fur pom-poms add a trendy touch, while yarn pom-poms keep the look playful and fun.
Pair your snarky hat with casual outfits to let it be the focal point of your look. These hats are great conversation starters and make excellent gifts.
Store your crochet hat in a cool, dry place to maintain its shape and prevent stretching over time.
Finally, show off your work! Share photos of your hat on social media or gift one to a friend who appreciates a good dose of sarcasm.
1. Is the Snarky Crochet Hat beginner-friendly?
Yes! The basic pattern is simple enough for beginners, and embellishments can be added as you gain confidence.
2. What’s the best yarn for this project?
Worsted-weight yarn works best, especially acrylic or wool for durability and warmth.
3. Can I make this hat in different sizes?
Absolutely! Adjust the number of increase rounds and stitch counts to customize the fit.
4. How do I add snarky text to my hat?
Use surface crochet, embroidery, or appliqués to incorporate fun phrases and designs.
5. Can I wash my crochet hat?
Yes, but follow the yarn’s care instructions. Machine washing on a gentle cycle or handwashing is recommended.
Join our VIP broadcast list and gain access to exclusive patterns, all for free. As a VIP member, you’ll receive the best patterns daily, delivered directly to your device. ✨📱 It’s a unique opportunity to stay up-to-date with the latest trends and designs, curated just for you. Don’t miss out on enhancing your projects and discovering new inspirations with the best patterns every day! 🎨🔝
The Snarky Crochet Hat – Free Pattern is a fun and creative project that allows you to express your personality through crochet. With the right materials, a simple pattern, and a touch of humor, you can create a stylish and unique hat that stands out.
We hope you enjoyed this tutorial! Have you made your own Snarky Crochet Hat? Share your experiences, opinions, and suggestions in the comments below. We’d love to see your snarky creations!


