
Macrame Heart Bracelet - Free Tutorial

If you’re looking for a fun and adorable crochet project, this Swirly Cat FREE Crochet Pattern is perfect for you. Whether you’re a beginner or an experienced crocheter, this cute little cat will bring joy to your crafting time. Handmade crochet animals are always loved, and this swirly design adds a playful twist that makes your creation truly unique.
Making crochet toys is not only satisfying but also an excellent way to create thoughtful gifts. This Swirly Cat FREE Crochet Pattern is ideal for birthdays, holidays, or even as a lovely decoration for your own home. Plus, it’s a great way to use up leftover yarn from other projects, making it eco-friendly and budget-conscious.
In this article, you will find everything you need to know about how to make the Swirly Cat FREE Crochet Pattern. From choosing the best materials to step-by-step instructions, we’ll guide you through the entire process. So grab your hook and yarn, and let’s start creating your very own swirly cat!
To begin working on the Swirly Cat FREE Crochet Pattern, you’ll first need to gather the right materials. Selecting the proper supplies is crucial for achieving a neat and professional-looking result.
Start with yarn. Cotton yarn is highly recommended because it holds shape well and gives a clean finish to crochet toys. Acrylic yarn is another good option if you want something soft and budget-friendly.
Choose the right hook size based on your yarn. Typically, a 2.5mm to 3.5mm hook works well for amigurumi like this Swirly Cat FREE Crochet Pattern. A smaller hook creates tighter stitches, preventing stuffing from showing through.
You’ll also need polyester fiberfill stuffing. This will give your swirly cat a soft yet firm shape. Be sure to stuff evenly to maintain a smooth appearance.
Safety eyes or embroidery floss are needed for the cat’s face. Safety eyes give a shiny, realistic look, while embroidered eyes are perfect if the toy is for young children or babies.
Don’t forget basic tools like a yarn needle for sewing pieces together, scissors, and stitch markers. Stitch markers are incredibly helpful to keep track of rounds, especially when working in continuous spirals.
Finally, consider some optional embellishments like a small bow, a bell, or a tiny collar to personalize your swirly cat and make it extra adorable.
Before diving into the Swirly Cat FREE Crochet Pattern, it’s helpful to review some essential crochet techniques that will make this project smoother and more enjoyable.
The magic ring is the foundation of most amigurumi projects, including this swirly cat. It creates a tight, adjustable circle that prevents gaps at the start of your work.
Single crochet is the primary stitch used throughout this pattern. It creates a dense fabric that’s perfect for holding stuffing without gaps.
Increasing stitches help shape your cat’s body and head. For example, crocheting two single crochets into one stitch expands the piece to the desired size.
Decreasing stitches are equally important for shaping. You’ll use invisible decreases to make the reductions smooth and less noticeable in the finished toy.
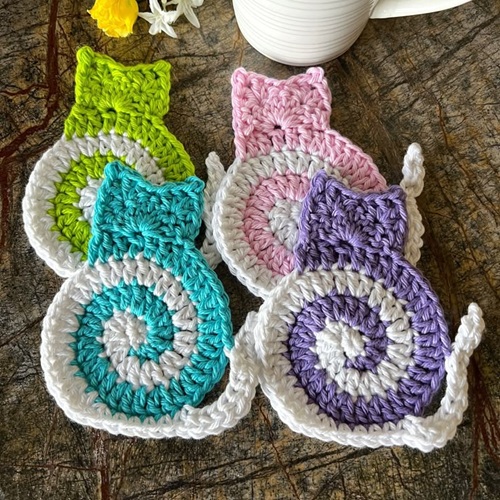
The swirly effect in the Swirly Cat FREE Crochet Pattern comes from alternating colors in a spiral pattern. You’ll change colors seamlessly without noticeable joins, giving the toy its signature swirl design.
Sewing pieces together is the final step. You’ll neatly attach the head, body, legs, tail, and ears using a yarn needle, ensuring everything is aligned correctly for a balanced and cute look.
Now, let’s dive into how to create your Swirly Cat FREE Crochet Pattern step by step. Follow these instructions carefully for the best results.
Start with the head. Use a magic ring to begin and work in continuous rounds, gradually increasing the number of stitches until the head reaches the desired size. Then, continue with several rounds of single crochet before beginning the decreases to shape the head.
Next, crochet the body. The process is similar to the head but elongated. Begin with increases, work even rounds, and then shape it with decreases towards the top.
Create the legs and arms. Each limb is made separately starting with a magic ring, then working several rounds of single crochet. Stuff them lightly before closing.
For the ears, make small triangular shapes. They are simple and made with just a few rounds, but they add so much character to your swirly cat.
The tail is long and thin. Start with a magic ring and work several rounds of single crochet without increases or decreases to create a tube. The tail can be positioned in different ways for extra personality.
Once all the pieces are finished, assemble your swirly cat. Use your yarn needle to sew the parts together securely, making sure everything is symmetrical and balanced.
The last stage of making your Swirly Cat FREE Crochet Pattern involves finishing touches that make your toy extra special. This is where creativity really shines.
Start by adding the eyes. If you’re using safety eyes, install them before closing the head completely. For embroidered eyes, stitch them on carefully using black embroidery floss.
Add a little pink nose using embroidery floss or a small piece of felt. This simple detail brings your cat’s face to life and adds charm.
You can also give your swirly cat some whiskers. Use thin embroidery floss or fishing line, stitching them into place securely so they don’t come loose.
Consider personalizing your cat with accessories. A tiny crocheted scarf, a mini bell, or a small fabric bow can transform your toy into something truly unique.
Play with color combinations to make different versions of the swirly cat. You can make one that looks like a classic tuxedo cat, a playful calico, or even a fantasy rainbow cat.
Finally, give your swirly cat one last fluff and check that all stitches are secure. Now your beautiful handmade toy is ready to gift, display, or cuddle!
Is the Swirly Cat FREE Crochet Pattern suitable for beginners?
Yes! This pattern is beginner-friendly, using basic stitches like single crochet, increases, and decreases. It’s a great project for anyone starting with amigurumi.
How long does it take to crochet the swirly cat?
On average, it takes 4 to 6 hours, depending on your crochet speed and experience level. More experienced crafters may finish it in less time.
Can I use any type of yarn for this pattern?
While you can use different yarn types, cotton or acrylic yarn works best. Make sure to adjust your hook size to match the yarn for a tight stitch.
Is stuffing necessary for the swirly cat?
Yes, stuffing is essential to give the cat its shape. Use polyester fiberfill for the best results.
Can I sell items made from this pattern?
Yes, you can sell the finished items you make from the Swirly Cat FREE Crochet Pattern, but it’s always courteous to credit the pattern’s source.
How do I change colors to make the swirl effect?
Simply switch yarn colors at the end of the stitch before the color change. Carry the unused yarn inside the piece to avoid loose strands.
Creating your own Swirly Cat FREE Crochet Pattern is not only a fun and rewarding experience but also a great way to express your creativity. Throughout this guide, you’ve learned how to select materials, master essential techniques, follow step-by-step instructions, and add finishing touches to bring your swirly cat to life.
This handmade project makes for a thoughtful gift or a cheerful addition to your home. We hope this tutorial has inspired you to pick up your crochet hook and start crafting. Please leave your honest opinion and share any suggestions in the comments. Your feedback helps us continue to create beautiful and helpful patterns for fellow crafters.


