
If you’re looking for a very easy crochet baby shoes pattern for beginners, you’ve come to the right place. Creating adorable baby shoes with your own hands is not only satisfying but also a perfect way to create meaningful handmade gifts.
Whether you’re new to crochet or just want a quick and relaxing project, this tutorial is designed to guide you step-by-step. Using basic stitches and soft yarn, you’ll be amazed at how fast these tiny shoes come to life.
Crocheting baby items like booties is a great project for beginners because it allows you to practice simple techniques while making something useful. Baby shoes are small, so they don’t take much time or materials, making them ideal for learning.
Plus, they’re incredibly cute and customizable with colors, buttons, and trims. This makes the very easy crochet baby shoes pattern for beginners a favorite among new crocheters.
In this article, we’ll cover everything you need to complete this sweet project. You’ll learn how to start your base, build up the sides, shape the top, and finish your baby shoes cleanly.
With a cozy and friendly approach, you’ll feel like you’re sitting with a friend who’s showing you the ropes. So grab your hook, some soft yarn, and let’s begin crafting your first pair of baby booties.
1. Getting Started with Your Crochet Baby Shoes
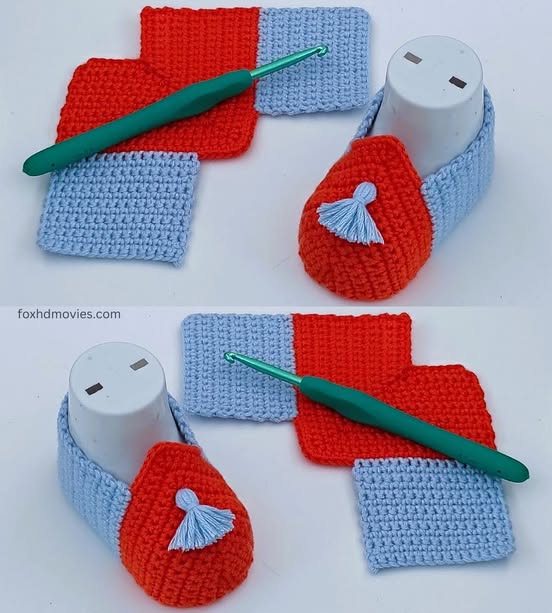
To begin this very easy crochet baby shoes pattern for beginners, gather your materials. You’ll need a soft baby-friendly yarn (like cotton or acrylic), a 3.5 mm crochet hook (or the size recommended for your yarn), scissors, and a yarn needle for weaving in ends. For embellishments, you may also choose buttons or bows, but these are optional.
Start by making a foundation chain. For newborn baby shoes, you’ll chain about 10 stitches. This will form the base length of your shoe. From here, we’ll begin working in rounds to form the sole. You’ll single crochet along one side of the chain, increase at the end, and then continue along the opposite side. This creates an oval shape perfect for little feet.
Your next step is building up the sole with more rounds. Increase evenly on each side to maintain the oval shape. Typically, two or three more rounds will be enough to form a snug and soft base. This is an important foundation for your very easy crochet baby shoes pattern for beginners. Make sure your work is lying flat and symmetrical.
Once the sole is complete, you’ll begin shaping the sides. Use single or half-double crochet stitches to work in the back loops only for one round. This technique creates a subtle edge that helps the shoe start forming upward. Keep your stitches even and your tension consistent for a neat result.
For the next few rounds, continue working without increasing to build the sides up. Depending on the size of the shoe, you may need two to three rounds. Don’t worry if it looks simple – that’s the beauty of this beginner-friendly project. Simplicity can be very charming when crocheting for babies.
By the time you finish the sides, your work should resemble a little bowl. This is a sign that your very easy crochet baby shoes pattern for beginners is coming together nicely. Next, we’ll learn how to shape the top of the shoe to close the front and give it that sweet baby bootie appearance.
2. Shaping the Top of the Baby Shoes
To shape the top of your baby shoes, you’ll begin by counting stitches around the front half of your shoe. Mark the center if needed to ensure symmetry. The front portion will be crocheted in rows instead of rounds for a few steps. This technique gives the shoes that rounded closed toe.
Start by decreasing stitches on each side of the front row. Use single crochet decreases to gently narrow the top. This gives your shoe a soft slope rather than a sharp edge. The very easy crochet baby shoes pattern for beginners depends on this simple shaping to achieve a snug fit over the toes.
Continue crocheting in rows, turning your work each time, and decreasing at the start and end. After about three or four rows, you’ll see a curved front forming. The toe should now look like a little cap, curving naturally to match the sole. This is a sign that your shoe is taking shape beautifully.
Once the top front is closed enough, it’s time to rejoin the heel. Crochet around the entire opening again, working in a round to smooth and clean the edges. You can add a decorative row here using a different color or stitch type if you want a more finished look.
To secure the shoe on a baby’s foot, some crocheters add a strap. Simply chain a short length from one side of the opening, then slip stitch it to the other side. Add a tiny button or just sew the strap down. This keeps the shoe snug and adds a cute touch. The very easy crochet baby shoes pattern for beginners allows for creative personalization like this.
Now that your shoe is fully formed, finish by weaving in all yarn tails with a yarn needle. Smooth out your work and gently shape the shoe. If needed, block the shoe with a little steam or mist. One shoe is done – now make its twin following the same steps!
3. Customizing Your Baby Shoes
The fun doesn’t stop once your baby shoes are complete. The very easy crochet baby shoes pattern for beginners is also a canvas for creativity. You can change the colors, yarn textures, and embellishments to match any baby outfit or special occasion.
One popular option is using variegated yarn. This gives the shoes a multicolor appearance without changing yarns. It adds interest to your project and still keeps it beginner-friendly. For a more classic look, stick with soft pastels like baby pink, sky blue, or cream.
If you enjoy a little flair, try adding tiny bows to the toe area. You can crochet small bows separately and sew them on, or use baby ribbon. Little details like this elevate your project and give it a more boutique look. It’s a charming way to finish your very easy crochet baby shoes pattern for beginners.
Another adorable idea is to make themed baby shoes. For example, you could use orange yarn and add a green top to mimic a pumpkin for fall. Or make little Santa booties with red and white for the holidays. Once you’ve mastered the basic shape, the possibilities are endless.
Don’t be afraid to try different stitches too. The basic pattern uses single crochet, but you can experiment with textured stitches like half-double crochet or puff stitches on the sides for visual interest. This still keeps the pattern accessible while adding variety.
Even adding a border in a contrasting color makes a big difference. A shell stitch trim or crab stitch border can give your baby shoes a delicate and finished edge. These tiny touches take your very easy crochet baby shoes pattern for beginners from simple to stunning.
Lastly, remember that handmade gifts have a special warmth to them. When you give these baby shoes to a friend, family member, or even donate them, you’re sharing love through your craft. That’s what makes projects like this so rewarding.
4. Tips for Success and Common Mistakes to Avoid
When following a very easy crochet baby shoes pattern for beginners, keep a few tips in mind to make your experience smoother. First, always check your gauge. Even though these are small shoes, yarn thickness and tension can drastically change the final size.
If you’re unsure about your size, measure a baby’s foot or compare with a size chart. Adjust your starting chain or use a larger or smaller hook if needed. This helps ensure the shoes fit properly and stay comfortable on tiny feet.
It’s also important to work with a soft, baby-safe yarn. Avoid scratchy fibers or ones with loose hairs. Cotton blends are ideal because they’re gentle on the skin, breathable, and easy to care for. The best very easy crochet baby shoes pattern for beginners starts with the right material.
As you crochet, make sure your stitch count remains consistent. Beginners often add or skip stitches unknowingly, which leads to uneven shapes. Counting your stitches at the end of each round helps keep things symmetrical and clean.
Don’t rush the decreases or shaping steps. These areas affect the overall look and fit of the shoe, so take your time. Even if you need to unravel and redo a row, that’s okay – it’s all part of learning and growing as a crocheter.
Lastly, finish your work cleanly. Weave in ends securely and trim excess yarn carefully. Well-finished pieces not only look more professional but also hold up better with use and washing. That’s especially important for items like baby shoes.
If you make a mistake, don’t stress. The beauty of crochet is that you can always undo and try again. Over time, each pair will look better and take less time to make. This is what makes the very easy crochet baby shoes pattern for beginners so enjoyable – it builds your confidence stitch by stitch.
FAQ – Very easy crochet baby shoes pattern for beginners
What size are these crochet baby shoes?
The pattern is typically for newborns (0–3 months), but you can adjust the size by changing the yarn weight or hook size. Adding more stitches to the foundation chain also increases the length.
How long does it take to make one pair?
Most beginners can complete a pair in under 2 hours. With practice, you may be able to finish in just 45 minutes or less.
Can I sell baby shoes made from this pattern?
Yes! Handmade baby items are popular at craft fairs and online shops. Just be sure to use baby-safe materials and mention that they’re handmade with care.
Is this pattern suitable for absolute beginners?
Absolutely. This very easy crochet baby shoes pattern for beginners uses basic stitches like chain, single crochet, and simple decreases. It’s a perfect first wearable project.
What’s the best yarn to use?
Look for soft cotton or baby acrylic yarn labeled hypoallergenic. DK (light worsted) weight yarn works well for baby shoes.
How do I clean the baby shoes?
Machine wash on gentle cycle or hand wash in cool water. Lay flat to dry. Avoid high heat to keep the shape intact.
Conclusion
We hope this guide to the very easy crochet baby shoes pattern for beginners has helped you feel confident and inspired to start your own adorable pair. You’ve learned how to crochet the sole, shape the shoe, add personal touches, and avoid common mistakes – all while growing your crochet skills in a gentle, rewarding way.
VIDEO TUTORIAL
If you enjoyed this tutorial, please leave a sincere comment with your feedback or suggestions. Did you try it? What yarn colors did you choose? Your thoughts can help others feel encouraged and join this creative journey. Happy crocheting!


