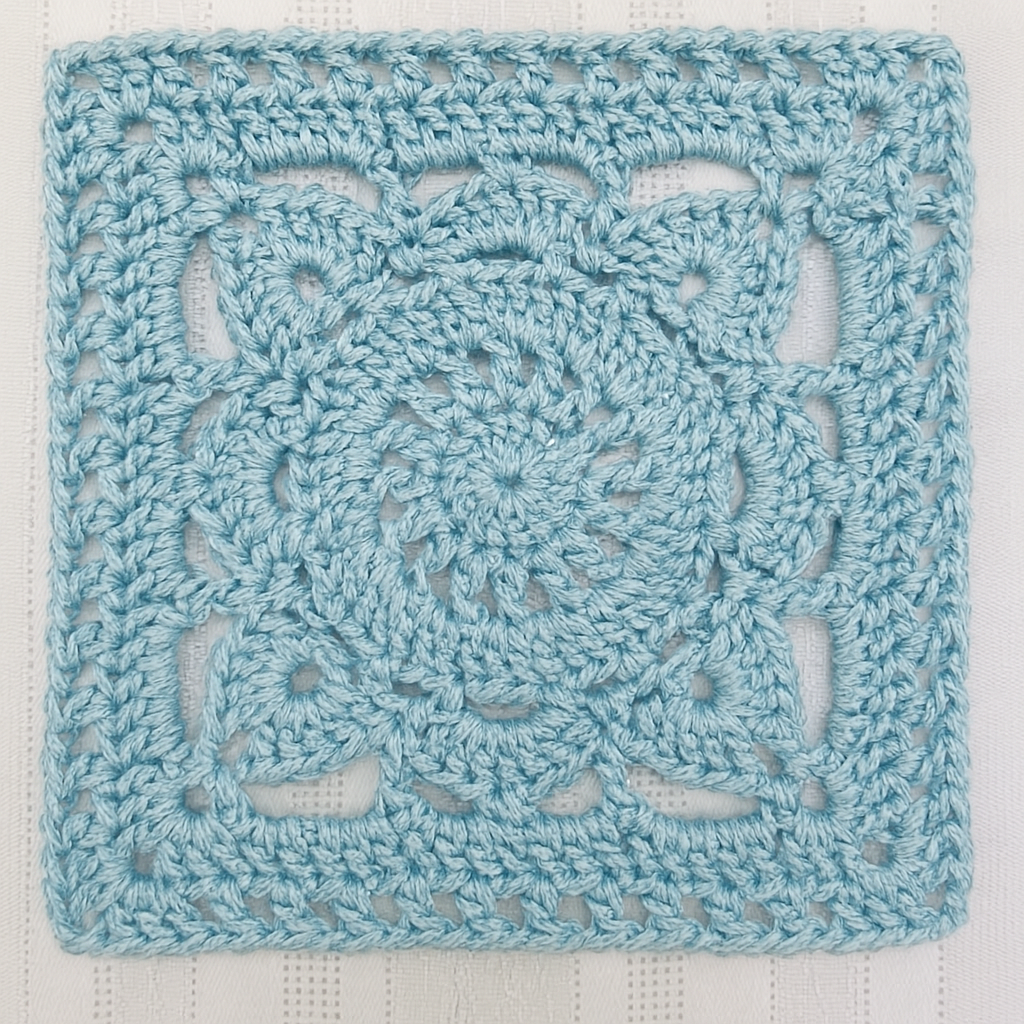
The Willow Granny Square Pattern Free Tutorial is a timeless choice for crafters who love crochet and want to explore designs that are both classic and versatile. This particular square is known for its elegant floral look in the center, which gradually expands into a delicate but structured square.
It’s a project that can be used to create blankets, cushions, clothing details, or even wall hangings, making it one of the most beloved designs among crochet enthusiasts. By following this tutorial, you will not only create beautiful motifs but also learn techniques that can elevate your overall crochet skills.
When starting with the Willow Granny Square Pattern Free Tutorial, beginners often feel intimidated by its intricate appearance. However, this design is much easier than it looks. With some patience and attention to detail, even those new to crochet can achieve great results.
What makes the willow square so appealing is the combination of simplicity and elegance. Its structure provides a balance between the openwork stitches and the compact design, making it stand out from ordinary granny squares. This versatility ensures that the square can adapt to different styles of projects.
Another advantage of working with the Willow Granny Square Pattern Free Tutorial is its adaptability in color choices. You can go for a single-tone square for a minimalist design or use multiple colors to highlight the intricate sections.
Whether you choose bold, vibrant shades or soft, neutral tones, the willow square maintains its beauty and sophistication. This means that every crafter can personalize it according to their taste or the project’s purpose. Now, let’s explore step by step how to create this lovely square and how to make the most of it in your crochet journey.
The Willow Granny Square Pattern Free Tutorial begins with a floral motif at the center, created with chains and clusters of double crochets. This floral design gives it a delicate and vintage touch, often compared to lacework. Unlike the traditional granny square, which has a simpler structure, the willow square provides a more intricate and artistic impression.
The foundation ring usually starts with a small circle of chains, which is then worked into clusters to form the petals of the flower. Each round builds upon the previous one, expanding the square while maintaining symmetry. For beginners, this structure helps improve skills such as joining rounds and reading crochet diagrams.
Another essential aspect is tension control. Since the Willow Granny Square Pattern Free Tutorial involves both open and dense stitches, keeping an even tension ensures the square doesn’t curl or warp. Practicing with different yarns and hooks can help you understand how to achieve the best results.
The willow square also allows flexibility in size. Depending on how many rounds you add, you can create smaller motifs for accents or larger ones for centerpiece projects. This adaptability makes it a go-to choice for many crafters.
Because of its beauty and adaptability, the willow granny square has become a favorite not only for blankets but also for modern crochet projects. Designers incorporate it into clothing, accessories, and home décor items, showing how versatile this pattern can be.
Overall, mastering the Willow Granny Square Pattern Free Tutorial is a rewarding experience that helps you grow as a crocheter while also offering a stunning design to showcase.
To begin the Willow Granny Square Pattern Free Tutorial, you’ll need some basic crochet supplies. The most important tool is your crochet hook, and the recommended size will depend on the yarn you choose. Typically, a 4mm to 5mm hook works well for medium-weight yarns.
For yarn, you can use cotton for a crisp and clean look or acrylic for a softer and more flexible square. Cotton yarns are especially great for home décor projects, while acrylic works beautifully for blankets and wearables. Choosing the right yarn weight is key to achieving the correct size and drape.
Scissors are necessary to cut the yarn cleanly, and a yarn needle will help weave in the ends once your square is complete. These finishing touches are just as important as the stitching, as they ensure your project looks neat and professional.
Stitch markers can also be helpful, especially when working the initial rounds. They allow you to identify where each round starts and ends, which is essential for keeping your square symmetrical.
When choosing colors, consider how they will blend together across multiple squares. For instance, contrasting shades will emphasize the floral center, while tonal colors create a subtle, elegant effect.
Having your materials prepared before starting ensures a smooth and enjoyable crochet process. With the right tools in hand, you can focus entirely on following the Willow Granny Square Pattern Free Tutorial without interruptions.
The Willow Granny Square Pattern Free Tutorial is usually worked in rounds, starting from the center and moving outward. Begin with a slip knot and chain a small circle, usually four to six chains joined together. This will form the base for your floral motif.
Next, you’ll create clusters of double crochets separated by chain spaces. These clusters form the petals of the flower in the middle. The second round often involves expanding the floral motif with additional clusters, giving it the signature willow design.
As you move into further rounds, the shape gradually transitions into a square. This is achieved by adding chain spaces and strategically placing clusters at the corners. This balance ensures the piece develops evenly.
Consistency in stitch count is crucial here. Missing a stitch or adding an extra one can distort the square’s symmetry. That’s why counting stitches at the end of each round is an excellent habit.
Blocking your finished square is another essential step. Once the willow square is complete, lightly dampen it and pin it to the correct measurements. This enhances the beauty of the stitches and gives the final project a polished look.
By practicing these steps and paying attention to details, you will successfully create the Willow Granny Square Pattern Free Tutorial and be able to replicate it with confidence for larger projects.
One of the most exciting parts of learning the Willow Granny Square Pattern Free Tutorial is exploring how you can use the finished motifs in your projects. A popular use is making blankets, where multiple squares are joined together to create a cozy and decorative piece.
Another creative idea is to use willow squares as pillow covers. By joining a few squares, you can transform a plain cushion into a handmade work of art. This is also a fantastic way to showcase your favorite color combinations.
If you enjoy making wearables, you can incorporate willow squares into garments like cardigans, vests, or ponchos. They add a bohemian touch and make the clothing unique and stylish.
Home décor projects are also a great match. Consider making table runners, wall hangings, or even placemats using willow squares. Their delicate floral center creates an elegant design that enhances any space.
For smaller projects, you can use the Willow Granny Square Pattern Free Tutorial to create coasters, bookmarks, or bags. These quick projects are perfect for gifts or for using up leftover yarn.
Overall, the possibilities are endless. The willow square adapts to different projects, making it a timeless design that every crocheter should learn.
1. Is the Willow Granny Square suitable for beginners?
Yes, the Willow Granny Square Pattern Free Tutorial may look complex, but it is accessible for beginners who are comfortable with basic stitches like chains and double crochets.
2. How many squares do I need for a blanket?
The number of willow squares depends on the size of your blanket and the dimensions of each square. Typically, you will need anywhere from 30 to 80 squares.
3. What type of yarn works best?
Cotton yarn is ideal for a crisp look, while acrylic yarn is great for warmth and flexibility. Choose based on the final project you want to create.
4. How do I join the squares together?
You can join willow squares using slip stitches, whip stitch, or even decorative joining methods like the join-as-you-go technique.
5. Can I customize the size of the willow square?
Yes, by adding more rounds, you can make larger squares. Conversely, stopping earlier creates smaller motifs for compact projects.
6. Do I need to block every square?
Blocking is highly recommended, especially if you’re making projects like blankets or garments, as it helps align the stitches and gives a neat finish.
The Willow Granny Square Pattern Free Tutorial is a delightful project that blends elegance with versatility. From learning the floral motif at the center to transforming it into a perfect square, every step provides valuable crochet experience. Whether you’re making blankets, cushions, or decorative accessories, this pattern adds charm to every project.
If you’ve followed along, you now have the knowledge and steps to create your own willow granny squares. I’d love to hear your thoughts—share your opinion about this tutorial and let me know what projects you’re planning to make with your squares. Your feedback and suggestions are always welcome!