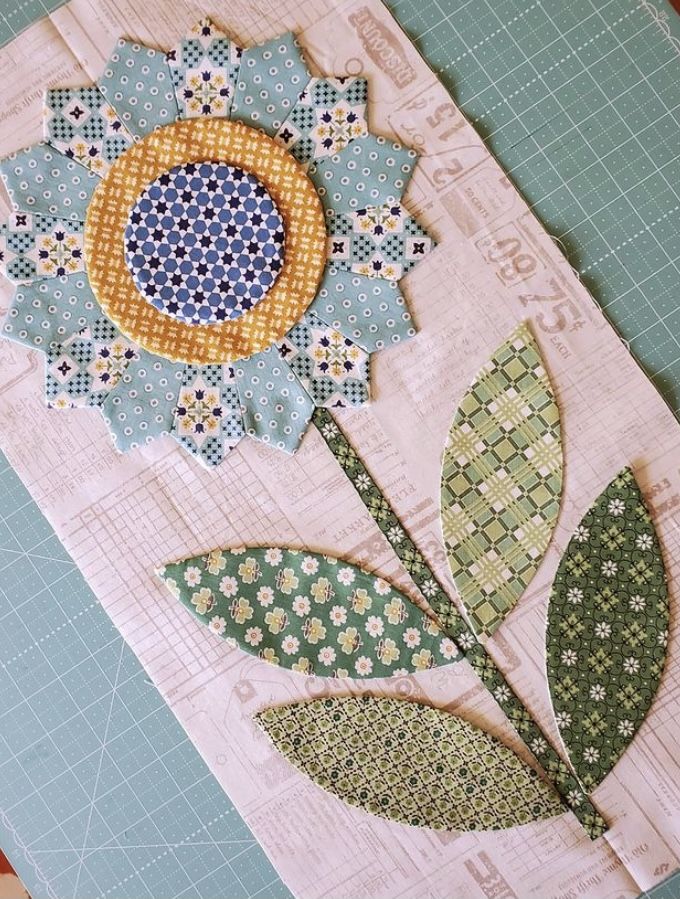
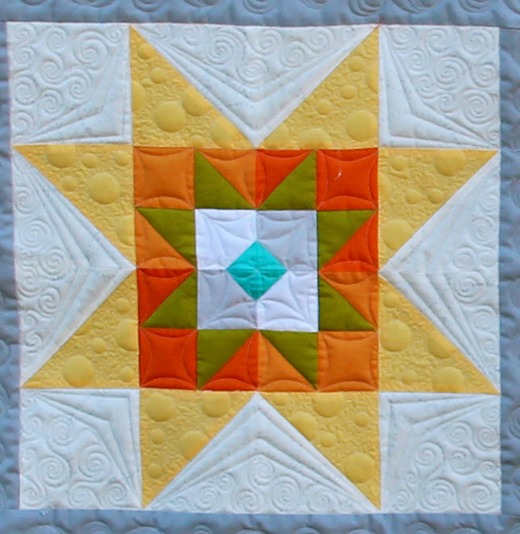
The Celaeno Star Block Pattern is a beautiful and inspiring quilt block that brings elegance and cosmic charm to any quilting project. Whether you’re an experienced quilter or just starting out, this free pattern offers a rewarding journey through fabric, color, and creativity.
With its starry shape and geometric balance, the Celaeno Star Block Pattern stands out as a delightful block to create and cherish.
This tutorial is designed to walk you through every detail of the Celaeno Star Block Pattern, using easy-to-follow instructions and tips to ensure success.
We’ll explore fabric selection, cutting, piecing, and assembly—all while maintaining a beginner-friendly tone. The aim is to make quilting enjoyable, accessible, and empowering.
By the end of this article, you’ll have a strong understanding of how to complete the Celaeno Star Block Pattern and use it in your own quilt projects.
This guide includes helpful visuals, practical advice, and answers to common questions to support you at each step. Let’s begin this stellar journey into quilt-making!
1. Choosing Fabrics and Colors for the Celaeno Star
When starting your Celaeno Star Block Pattern, one of the most exciting parts is picking out your fabrics. The right colors can bring your star block to life and match the overall theme of your quilt.
Choose a background fabric that contrasts well with your star points. Light backgrounds like white or cream help darker star fabrics pop, while darker backgrounds can give a more dramatic effect.
For the star points, use bold or bright fabrics to highlight the star shape. Consider using prints with subtle designs to add texture without overwhelming the pattern.
Try using scraps for a scrappy-star effect. Mixing different colors or fabrics can create a charming and whimsical result, perfect for a playful quilt.
If you’re following a celestial or galaxy-inspired theme, purples, blues, and silvers work beautifully for the Celaeno Star Block Pattern. This adds a magical and dreamy feeling to the design.
Always prewash your fabrics if you’re using bold colors. This prevents bleeding during the quilting process and ensures your finished quilt looks polished and professional.
Lay out your fabric choices before cutting to see how they interact together. This helps visualize the finished block and allows you to make changes early on.
2. Cutting and Preparing Your Fabric Pieces
Accurate cutting is key to ensuring your Celaeno Star Block Pattern comes together neatly and evenly. Having sharp rotary cutters and a reliable quilting ruler will make all the difference.
Start by ironing your fabrics to remove any wrinkles. This helps ensure straight cuts and accurate measurements when cutting your pieces.
Use a rotary cutter to cut your squares and triangles according to the pattern dimensions. Double-check your measurements before making cuts to avoid waste.
Label your fabric pieces with small sticky notes or fabric clips to keep track of each component. This helps you stay organized as you move on to piecing.
Take your time when cutting star points. These usually involve triangle or diamond shapes that need precision to fit together correctly.
Keep all your cut pieces on a tray or flat surface where they won’t get wrinkled or mixed up. Organization is a small step that makes assembly much easier.
If you’re new to quilting, consider cutting a practice set using scrap fabric. This allows you to try the construction before working with your final pieces.
3. Assembling the Celaeno Star Block
Now comes the fun part—putting together your Celaeno Star Block Pattern! This stage brings your fabric choices and careful cutting to life.
Begin by sewing your center square if your pattern uses one. This is often the focal point of the block and sets the tone for the rest of the star.
Next, assemble the star points. Use a quarter-inch seam allowance for consistency. Press seams open or to the side depending on your preference and the block’s structure.
Once you’ve sewn the star points, attach them to the center. Make sure to align points and corners accurately. Pinning helps prevent shifting during stitching.
Check your block frequently with a quilting ruler to make sure it stays square. Minor adjustments can be made early to avoid a distorted final block.
If the pattern includes background squares or corner triangles, sew these in next. These help form the block’s overall shape and bring harmony to the design.
Press your completed block and trim any uneven edges. A square, flat block makes quilt assembly later much more enjoyable and accurate.
4. Using the Celaeno Star Block in a Quilt Project
Once you’ve completed your Celaeno Star Block Pattern, you’ll want to consider how to incorporate it into a full quilt or project.
A single block can be used as a pillow cover or wall hanging. This is a great option if you want a quick finish or showcase the star pattern on its own.
Repeat the block in a 3×3 or 4×4 layout to create a full quilt top. Use sashing or contrasting borders between blocks for added visual interest.
Combine your Celaeno Star Block Pattern with other star or traditional blocks. This creates variety in your quilt while maintaining a cohesive theme.
Consider rotating the blocks in your quilt layout to form a secondary pattern. Star blocks often create stunning interlocking effects when arranged this way.
Add borders and cornerstones to frame your quilt. This enhances the visual appeal and gives your quilt a finished, intentional look.
Finish your project with quilting stitches that echo the star shape or follow the seams. This brings texture and dimension to your finished quilt.
FAQ about Celaeno Star Block Pattern
What size is the Celaeno Star Block?
Most patterns offer a 12” finished block size, but variations may include 10” or 8”. Check your pattern instructions for specific measurements.
Is the Celaeno Star Block suitable for beginners?
Yes! With clear instructions and basic sewing skills, beginners can confidently create this block. It’s an excellent pattern to practice precision and color play.
What tools do I need to make this block?
You’ll need a rotary cutter, quilting ruler, cutting mat, sewing machine, pins, and an iron. Optional tools include fabric clips and marking pens.
Can I hand-sew the Celaeno Star Block?
Absolutely! While machine-sewing is faster, hand-stitching offers control and can be a relaxing way to assemble your block.
How do I avoid crooked star points?
Accurate cutting and careful alignment are essential. Use pins or clips to hold pieces together, and always sew with a consistent seam allowance.
Can I resize the block for a different project?
Yes, but remember to adjust all fabric measurements proportionally. A quilting calculator or graph paper can help with planning.
Join our VIP broadcast list and gain access to exclusive patterns, all for free. As a VIP member, you’ll receive the best patterns daily, delivered directly to your device. ✨📱 It’s a unique opportunity to stay up-to-date with the latest trends and designs, curated just for you. Don’t miss out on enhancing your projects and discovering new inspirations with the best patterns every day! 🎨🔝
Conclusion
The Celaeno Star Block Pattern is a stunning and accessible block that brings elegance and charm to any quilting project. From selecting fabrics to assembling and finishing, each step of this tutorial is designed to guide you through a joyful quilting experience.
We hope this tutorial has inspired you to try the Celaeno Star Block Pattern for your next quilt. Whether you’re making a single block or an entire quilt, this celestial design is sure to shine. If you enjoyed this article, please leave a comment with your thoughts, experiences, or suggestions. Your feedback helps us grow and continue creating content that supports and inspires quilters like you.