The Stockinette Stitch – Pattern is one of the most iconic and widely used stitch patterns in the world of knitting. Recognized for its smooth, sleek front and bumpy reverse side, it forms the basis of countless projects—from sweaters to scarves and even cozy blankets.
Whether you’re just starting your knitting journey or you’re a seasoned crafter, understanding how to master the Stockinette Stitch – Pattern is an essential skill that will serve you for years to come.
This classic pattern is created by alternating rows of knit stitches and purl stitches. On flat knitting, you knit one row and purl the next, repeating this sequence throughout the fabric.
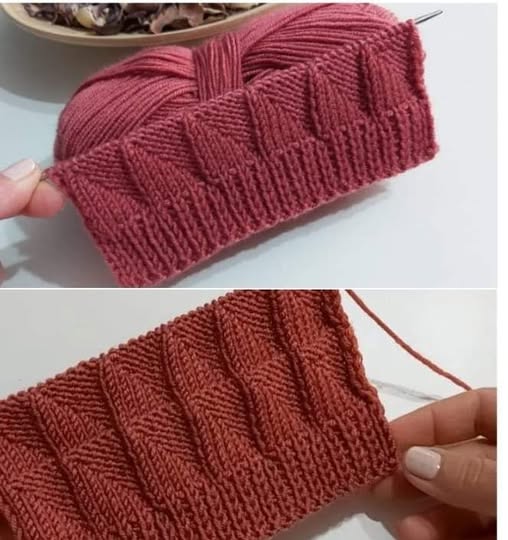
The result is a smooth V-shaped appearance on the front (the “right” side) and a wave-like texture on the back (the “wrong” side). The Stockinette Stitch – Pattern is not only aesthetically pleasing but also incredibly versatile, lending itself well to garments, accessories, and even home décor.
In this article, we’ll walk through everything you need to know to work the Stockinette Stitch – Pattern confidently.
From choosing your yarn and needles to preventing edge curling and incorporating the stitch into more complex patterns, this guide is tailored to help both beginners and experienced knitters achieve a polished and professional finish in all their stockinette projects.
1. Understanding the Structure of the Stockinette Stitch – Pattern
The key to the Stockinette Stitch – Pattern is its repetitive structure: knit one row, purl the next. This simplicity makes it one of the first stitch patterns new knitters learn. Its elegant and flat texture is why it’s often used in the main body of garments and accessories.
When knitting flat (back and forth), stockinette is created by alternating knit and purl rows. However, when knitting in the round (using circular or double-pointed needles), you simply knit every round to achieve the same look, which many knitters find easier and faster.
One important characteristic of the Stockinette Stitch – Pattern is its tendency to curl at the edges. This natural curling happens because the tension is not balanced between the front and back stitches. Blocking or adding borders like ribbing or garter stitch can help minimize this effect.
Another reason knitters love the stockinette stitch is that it creates a stretchy and flexible fabric, perfect for clothing. It molds well to the body, providing comfort and mobility, while still maintaining structure.
The stitch definition in stockinette is also very crisp. This clarity makes it ideal for showcasing variegated yarns, embroidery, or intarsia designs, which can pop beautifully against the smooth background.
Despite its simplicity, the Stockinette Stitch – Pattern offers room for customization. You can adjust the gauge by changing yarn weight or needle size, and it pairs beautifully with other stitches to create interesting textures and transitions in your work.
2. Materials and Techniques for Working the Stockinette Stitch – Pattern
To get started with the Stockinette Stitch – Pattern, all you need is yarn, a pair of knitting needles (or circular needles), and a basic understanding of the knit and purl stitches. Choosing the right materials is important for achieving the look and feel you want in your finished project.
When selecting yarn, consider how the texture will affect the stitch. Smooth yarns like merino wool or cotton show off the V shapes of stockinette beautifully. Avoid fuzzy or textured yarns if you want clear stitch definition.
Needle size will depend on your yarn and the project. Larger needles produce looser, drapier fabric, while smaller needles make the stitch tighter and more structured. Always knit a gauge swatch before starting a project, especially with fitted items.
The technique is simple: on a flat piece, knit the first row, purl the second, and repeat. On circular needles, you only need to knit every row, making this method even more beginner-friendly.
Maintaining consistent tension is crucial when working with the Stockinette Stitch – Pattern. Uneven tension can result in bumpy rows or inconsistent shaping, so take your time and focus on even stitches.
As your fabric grows, pay attention to curling edges. This can be addressed later with blocking, but it’s a good idea to incorporate a border of garter stitch, seed stitch, or ribbing to help keep your piece flat from the beginning.
Finally, remember to practice. The more you work with this pattern, the more your hands will memorize the movements, and the smoother your knitting will become. The Stockinette Stitch – Pattern is a lifelong skill worth mastering.
3. Common Uses and Projects Featuring the Stockinette Stitch – Pattern
The Stockinette Stitch – Pattern appears in everything from casual scarves to elegant cardigans. Its flat, uniform look makes it especially popular in garments that require a clean and modern appearance.
Sweaters are one of the most common projects for this stitch. The smooth surface is perfect for shaping with increases and decreases, and it’s often used as the main body of a pullover or cardigan. Ribbed cuffs and necklines are usually added to stabilize the edges.
Scarves made with stockinette can be soft and luxurious, especially with fine yarns. Because of the curling edges, many knitters add a garter stitch or seed stitch border to keep the piece from rolling up.
Baby clothes also make great use of the Stockinette Stitch – Pattern, offering softness and flexibility. From booties to hats, the gentle stretch of the fabric is perfect for keeping babies warm and comfortable.
Hats worked in the round are another excellent project for this pattern. Since you only need to knit every round to produce stockinette in the round, it’s a great option for quick and relaxing knitting.
Blankets and throws can also be knit using this stitch, although it’s best to include a stable edge or border to combat curling. The simplicity of the stitch allows you to focus on colorwork or shaping if desired.
For those interested in exploring colorwork, the Stockinette Stitch – Pattern serves as a perfect canvas for intarsia or Fair Isle designs. The smooth surface shows off color transitions beautifully and is easy to chart.
4. Tips to Prevent Curling and Improve Your Results
One of the biggest challenges with the Stockinette Stitch – Pattern is edge curling. Fortunately, there are a number of ways to reduce or eliminate this issue and ensure your finished project lays flat.
First, consider adding a border. A few stitches of garter stitch or seed stitch on each side can go a long way in stabilizing the edges. This is especially helpful for scarves, blankets, and panels.
Blocking is another effective solution. Wet blocking or steam blocking helps set the fibers and encourages the fabric to relax into a flat position. Just be sure to follow your yarn’s care instructions to avoid damage.
Using a heavier yarn or larger needles can sometimes reduce curling by altering the balance of tension between the knit and purl rows. Test a few swatches to find what works best for your specific yarn and project.
You can also experiment with stitch patterns that blend with stockinette. For instance, alternating sections of stockinette and garter stitch can create a visually appealing texture while helping to balance the fabric.
Another strategy is to line your finished piece with fabric or use a decorative hem. This is more common in garments or home décor items but can be a great way to finish your piece professionally.
Lastly, remember that curling is a natural characteristic of the Stockinette Stitch – Pattern, not a flaw. With practice and a few thoughtful techniques, you can manage it and enjoy the full beauty of this timeless stitch.
FAQ
What is the Stockinette Stitch – Pattern?
The Stockinette Stitch – Pattern is a basic knitting pattern made by alternating rows of knit and purl stitches. It creates a smooth, flat surface on one side and a bumpy texture on the other.
Why does the stockinette stitch curl?
Stockinette curls because the knit and purl stitches create uneven tension across the fabric. This is a natural feature of the pattern and can be managed with blocking or borders.
Can I use stockinette stitch in the round?
Yes! When knitting in the round, you can achieve stockinette by knitting every round. This simplifies the process and eliminates the need to purl.
What is the best yarn for stockinette stitch?
Smooth, even yarns like wool or cotton are ideal for Stockinette Stitch – Pattern projects. They showcase the stitch definition clearly and are easy to work with.
How do I stop the edges from curling?
Add a garter or seed stitch border, use proper blocking techniques, or experiment with different yarn weights and needle sizes to minimize curling.
Is stockinette stitch good for beginners?
Absolutely! It’s one of the most beginner-friendly patterns, offering both simplicity and elegance. Mastering it builds a strong foundation for more complex knitting projects.
Conclusion
The Stockinette Stitch – Pattern is a cornerstone of knitting that combines simplicity with versatility. From sweaters to accessories and beyond, it provides a clean and attractive texture that works beautifully in many types of projects. While curling can be a challenge, techniques like blocking and adding borders allow you to manage it easily.
By understanding the structure of the stitch, choosing the right materials, and applying the tips shared here, you’ll be able to create polished and professional-looking pieces with confidence. Whether you’re knitting your first scarf or designing a custom sweater, the Stockinette Stitch – Pattern is a timeless skill that will always serve you well.
VIDEO TUTORIAL
Now we’d love to hear from you! Have you tried the Stockinette Stitch – Pattern in your projects? Share your experience, suggestions, or questions in the comments below. Your feedback helps us grow as a community and keeps the craft alive with passion and creativity.