Creating a quilt can be a magical experience, especially when working with designs as captivating as the Bewitching Black Magic Quilt Block.
This tutorial will guide you through the steps to craft a quilt block that lives up to its enchanting name.
Advertising
Known for its striking contrasts and mesmerizing patterns, the Black Magic quilt block is perfect for quilters who want to add a touch of mystery and elegance to their projects.
Image from google.
Whether you’re a seasoned quilter or a beginner looking for an exciting challenge, this Bewitching Black Magic Quilt Block – Tutorial will inspire you to explore new techniques.
The design’s bold geometry and color play make it a versatile choice for wall hangings, bed quilts, or even smaller projects like table runners. This tutorial simplifies the process into manageable steps so that anyone can achieve stunning results.
Before diving in, gather your materials: high-contrast fabrics, a rotary cutter, a quilting ruler, a sewing machine, and thread.
Advertising
You’ll also need a cutting mat and pins to keep everything aligned. Let’s explore the magic of this quilt block and bring your vision to life.
1. Understanding the Black Magic Quilt Block
The key to mastering this design lies in understanding its components and unique aesthetic.
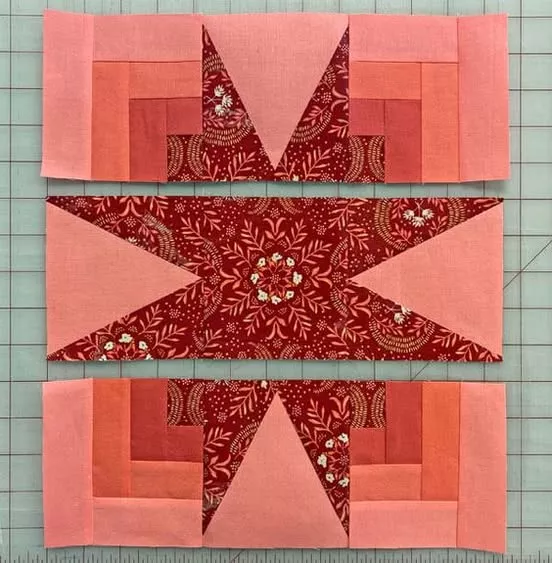
The Black Magic Quilt Block relies on high-contrast fabrics to achieve its dramatic effect. Black is often paired with white or vibrant colors to create a bold visual statement.
This block typically features geometric patterns such as triangles, squares, or diamonds arranged in a way that draws the eye to the center.
Start by selecting your fabrics. Solids or subtle prints work best to enhance the design’s striking contrasts.
Precision cutting is essential. Use a rotary cutter and ruler to ensure your pieces are accurate, as even small errors can affect the final look.
The block can be scaled to fit your project. Smaller blocks are ideal for intricate designs, while larger ones make a bold impact in quilts.
Experiment with color placement to create different effects. Reversing the light and dark fabrics can completely change the look of the block.
2. Cutting and Preparing Your Fabrics
Proper preparation ensures a smooth quilting process and a flawless finish.
Begin by washing and ironing your fabrics to prevent shrinking or wrinkling later on. Pressing fabric flat ensures accurate cutting.
Measure and cut your pieces using a rotary cutter and ruler. For this block, you’ll need triangles and squares of various sizes, depending on your chosen layout.
Lay out your pieces on a flat surface to visualize the design. This helps ensure you’re happy with your color placement before sewing.
Mark any seam allowances using a fabric marker. Typically, quilting uses a 1/4-inch seam allowance.
Use pins or clips to hold fabric pieces together during assembly, ensuring alignment as you sew.
Keep your workspace organized by grouping fabric pieces for each block to avoid confusion.
3. Assembling the Quilt Block
This step brings your quilt block to life with precision sewing and attention to detail.
Begin by sewing smaller components, like half-square triangles (HSTs) or quarter-square triangles (QSTs). These are foundational elements of the Black Magic Quilt Block.
Press your seams open or to one side, depending on your preference, to reduce bulk and make assembly easier.
Arrange your sewn components according to the design. Double-check placement before stitching them together.
Sew rows or sections together, aligning seams carefully to create sharp points and crisp lines.
After sewing, press the block again to keep it flat and neat. A well-pressed block improves accuracy when joining multiple blocks.
Trim any excess fabric to ensure your block is square. Accurate trimming is essential for seamless assembly in the larger quilt.
4. Tips for a Perfect Black Magic Quilt Block
Achieve professional results with these helpful tips.
Choose a high-quality thread that complements your fabric. Matching thread colors reduce visibility, while contrasting colors highlight the stitching.
Test your sewing machine tension on scrap fabric to ensure even stitches that won’t pucker or distort the block.
Work in good lighting to see fabric contrasts clearly, especially when working with dark colors like black.
Use a design wall or flat surface to arrange multiple blocks and experiment with layouts before committing to a final design.
Don’t rush! Taking your time ensures precision, particularly with intricate patterns.
Practice makes perfect. If a block doesn’t turn out as expected, learn from the process and try again. Quilting is a journey, and every block improves your skills.
FAQ
Q: What fabrics work best for the Black Magic Quilt Block?
A: Solids and high-contrast fabrics, such as black paired with white or bright colors, are ideal for this design. Subtle prints can also add texture without overwhelming the pattern.
Q: Can beginners make the Black Magic Quilt Block?
A: Absolutely! While the design can be intricate, this tutorial breaks it into manageable steps. Beginners can start with simpler layouts and progress to more complex patterns.
Q: How do I ensure my blocks are square?
A: Accurate cutting and consistent seam allowances are key. Use a ruler to check measurements and trim any excess fabric after assembling the block.
Q: What size should the finished block be?
A: The size depends on your project. Common sizes include 12-inch or 16-inch blocks, but the design can be scaled up or down.
Q: How do I join multiple blocks in a quilt?
A: Sew blocks together in rows, pressing seams as you go. Use sashing or borders between blocks for added dimension.
Q: Can I use this block for smaller projects?
A: Yes! The Black Magic Quilt Block works beautifully for table runners, pillows, or even tote bags.
Join our VIP broadcast list and gain access to exclusive patterns, all for free. As a VIP member, you’ll receive the best patterns daily, delivered directly to your device. ✨📱 It’s a unique opportunity to stay up-to-date with the latest trends and designs, curated just for you. Don’t miss out on enhancing your projects and discovering new inspirations with the best patterns every day! 🎨🔝
The Bewitching Black Magic Quilt Block – Tutorial offers quilters an opportunity to create striking, dynamic designs with ease. By following these steps, you’ll craft blocks that are as captivating as they are precise. Whether for a full quilt or a smaller project, this pattern brings elegance and drama to your work.
VIDEO TUTORIAL
We hope you’ve enjoyed this tutorial and found it helpful. If you try this pattern, please share your thoughts and suggestions. Your feedback helps us improve and inspire others in the quilting community. Happy quilting!