
Pie Carrier Sewing Pattern

Creating a beautiful quilt is a rewarding experience, and this Blazing Arrows Quilt Tutorial: A Step-by-Step Guide for Quilting Enthusiasts is designed to help you craft a stunning piece with precision and ease.
Whether you’re a seasoned quilter or just starting out, this guide will walk you through each stage of the process, ensuring a smooth and enjoyable quilting journey.
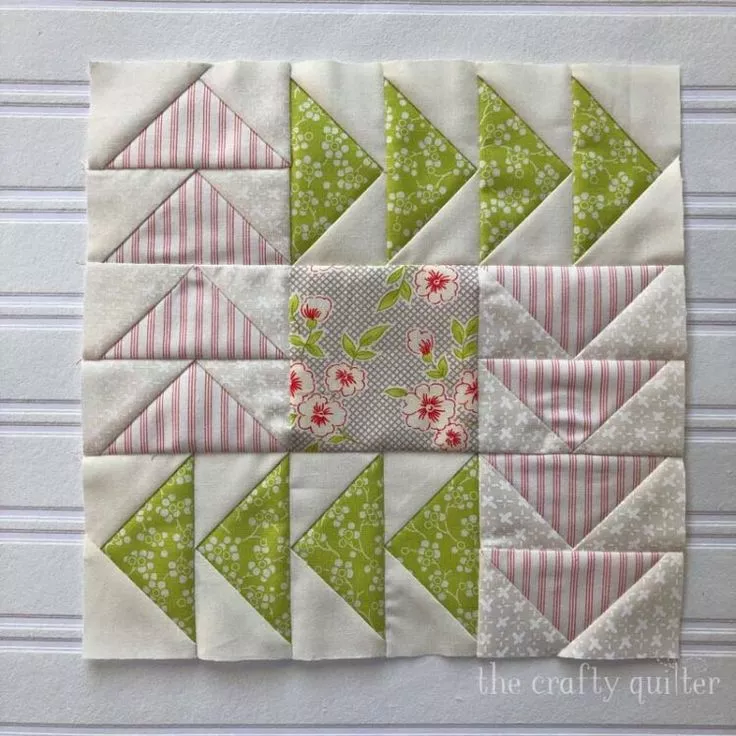
The Blazing Arrows Quilt pattern is known for its striking geometric design, making it a favorite among quilting enthusiasts.

This tutorial will cover everything from choosing the right fabric to assembling and finishing your quilt. By the end, you’ll have a handmade masterpiece that showcases your skills and creativity.
Before diving into the step-by-step process, it’s important to gather all necessary materials and prepare your workspace. Quilting requires patience and attention to detail, so setting up a comfortable and organized area will make the experience much more enjoyable.
Selecting the right fabric is essential for achieving a visually appealing Blazing Arrows Quilt. Consider using high-quality cotton fabrics with bold, contrasting colors to make the arrow design stand out.
Once your materials are ready, it’s time to assemble the quilt blocks that form the Blazing Arrows Quilt pattern. This step requires careful attention to alignment and symmetry.
With your blocks completed, the next step is putting them together to create the full Blazing Arrows Quilt design.
The final step in completing your Blazing Arrows Quilt is quilting the layers together and binding the edges for a polished finish.
Q: What size should my Blazing Arrows Quilt be?
A: The size depends on your preference, but standard lap quilts measure around 50” x 60”, while bed-sized versions can be larger.
Q: Can I use different fabrics for this quilt pattern?
A: Yes! Cotton is the most recommended fabric, but you can experiment with batiks, linen, or blends for a unique texture.
Q: How long does it take to complete a Blazing Arrows Quilt?
A: It depends on experience level and time commitment. Beginners may take a few weeks, while experienced quilters can complete it in a few days.
Q: What is the best quilting method for this pattern?
A: Straight-line quilting works well for beginners, but free-motion quilting can add intricate details to the design.
Q: How do I ensure my quilt points are sharp?
A: Accurate cutting, precise seam allowances, and proper pressing techniques will help maintain sharp points.
Q: Can I make this quilt without a sewing machine?
A: While possible, it would be time-consuming. A sewing machine ensures consistency and durability.
Join our VIP broadcast list and gain access to exclusive patterns, all for free. As a VIP member, you’ll receive the best patterns daily, delivered directly to your device. ✨📱 It’s a unique opportunity to stay up-to-date with the latest trends and designs, curated just for you. Don’t miss out on enhancing your projects and discovering new inspirations with the best patterns every day! 🎨🔝
By following this Blazing Arrows Quilt Tutorial: A Step-by-Step Guide for Quilting Enthusiasts, you’ll create a stunning quilt that showcases your craftsmanship and creativity. From fabric selection to quilting and binding, each step contributes to a masterpiece you can be proud of.
We’d love to hear about your quilting journey! Leave a comment below with your thoughts, experiences, or suggestions for future tutorials. Happy quilting!


