The Churn Dasher Quilt Block – Free Pattern is a timeless design that has been popular among quilters for generations.
This classic block, with its unique combination of squares and triangles, creates a stunning and dynamic effect that’s perfect for both beginners and advanced quilters alike.
If you’re looking to create a beautiful quilt with a traditional yet modern feel, this pattern is an excellent choice. Whether you’re new to quilting or an experienced quilter, the Churn Dasher Quilt Block will add a touch of charm to any project.
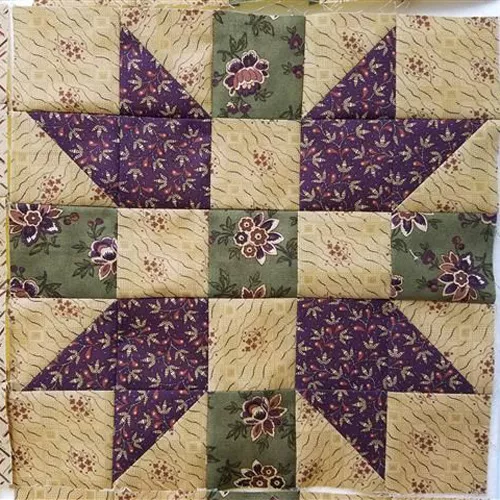
Image from google.
In this article, we will provide you with a step-by-step guide to creating the Churn Dasher Quilt Block. From selecting fabrics to putting the block together, we’ll cover all the essential details you need to know.
SEE MORE PATTERNS
You’ll also find tips on how to customize the block and incorporate it into various quilting projects. With this free pattern, you’ll be able to create stunning quilts that showcase the beauty and simplicity of this traditional block.
So, let’s dive into the Churn Dasher Quilt Block – Free Pattern and explore how you can create your own version.
Whether you want to make a single block for a small project or piece together several for a larger quilt, this guide will help you achieve your quilting goals. Ready to get started? Let’s begin!
1. Materials Needed for the Churn Dasher Quilt Block
Before you begin, it’s important to gather the right materials to create your Churn Dasher Quilt Block. Here’s a list of what you’ll need:
- Fabric: Choose two contrasting fabrics for the Churn Dasher block—one for the background and one for the dashers (the angled triangles). Opt for quilting cotton fabrics for their ease of use and durability. You can use a variety of colors and patterns to make your block stand out.
- Quilt Batting: While you won’t be using batting directly for the block itself, you’ll need it when piecing together a full quilt. Any standard quilt batting will work fine.
- Rotary Cutter and Mat: For precise cutting, a rotary cutter and self-healing mat are essential. These tools will help you achieve clean and accurate cuts, which is crucial for piecing your quilt block together.
- Quilting Ruler: A quilting ruler helps you measure and cut the fabric pieces accurately. A 6” x 24” ruler is ideal for cutting strips and squares.
- Thread: Choose a matching or contrasting thread depending on your fabric choice. Cotton thread is the most common for quilting, but you can also experiment with polyester thread for a slightly different finish.
- Iron and Ironing Board: Pressing your fabric pieces as you go ensures that the seams are crisp and the block lies flat. An iron is an essential tool for achieving a professional look for your Churn Dasher Quilt Block.
Once you’ve gathered all the necessary materials, you’re ready to start piecing together your block.
2. Step-by-Step Instructions for Creating the Churn Dasher Quilt Block
Now it’s time to dive into the steps for creating your Churn Dasher Quilt Block. Follow these instructions carefully to create a precise and beautiful block:
- Cutting the Pieces: Begin by cutting your fabric into the necessary pieces for the block. You’ll need several squares and triangles to form the block’s distinctive shape. For the Churn Dasher Quilt Block, you typically cut 5” squares for the center and corner pieces and 3” squares for the triangles.
- Making the Half-Square Triangles: The key feature of the Churn Dasher block is the half-square triangle units that form the dashed part of the design. To create these, you will need to sew two smaller squares together, then cut them diagonally to create two triangles. Press the seams flat for a crisp finish.
- Assembling the Block: Arrange the pieces in the traditional Churn Dasher Quilt Block layout, with the triangles positioned around the center square. The goal is to create a pattern that looks like a wheel or churn, with the dashed triangles surrounding the central square.
- Sewing the Pieces Together: Once the pieces are laid out, it’s time to sew them together. Begin by sewing the triangles to the center square, then continue piecing the sections together row by row. Use a quarter-inch seam allowance for consistent piecing.
- Pressing the Seams: After each seam, press the fabric flat with an iron. This ensures that the seams are smooth and that the block lies flat, preventing any puckering or distortion.
- Trimming and Squaring Up the Block: Once all the pieces are sewn together, it’s time to trim your block to the correct size. Use a quilting ruler and rotary cutter to ensure that your block is even on all sides.
You should now have a completed Churn Dasher Quilt Block! Repeat this process to make additional blocks if you’re creating a larger quilt.
3. Customizing the Churn Dasher Quilt Block
One of the best things about the Churn Dasher Quilt Block – Free Pattern is its versatility. While the traditional block is stunning on its own, you can easily customize it to suit your personal style. Here are some ideas for making your block unique:
- Play with Colors: The most obvious way to customize your block is by using different fabrics. While the classic Churn Dasher block often uses two contrasting fabrics, feel free to experiment with multiple colors. You could use a light background fabric and bright, bold dashers for a contemporary look.
- Use Patterned Fabrics: Instead of using solid fabrics for the triangles, try using patterned fabrics like florals, stripes, or even holiday prints. This will add an extra dimension to the block and make it even more eye-catching.
- Add Embellishments: For a special touch, add decorative stitching or embroidery around the edges of the triangles or the center square. This can elevate the block and give it a personal flair.
- Change the Block Size: The Churn Dasher Quilt Block can be adapted to different sizes. If you want a larger quilt, simply increase the size of the squares and triangles. You could also make smaller blocks for a more intricate design.
- Combine with Other Blocks: While the Churn Dasher block is beautiful on its own, it can also be combined with other traditional quilt blocks to create a mixed-pattern quilt. Try pairing it with blocks like the Nine Patch or Star block for a unique quilt design.
- Use Scraps: The Churn Dasher Quilt Block is a great project for using up fabric scraps. Mix and match different fabrics for a scrappy, eclectic look that will add personality to your quilt.
These customization tips will help you make the Churn Dasher Quilt Block your own and allow you to create a quilt that reflects your style and creativity.
4. How to Incorporate the Churn Dasher Block into a Quilt
Once you’ve created several Churn Dasher Quilt Blocks, you can start thinking about how to assemble them into a full quilt. Here are some ideas for incorporating this beautiful block into your quilt:
- Set a Layout: One of the most common ways to arrange the Churn Dasher blocks is in a grid pattern. You can alternate between blocks in the same orientation or rotate them for a more dynamic layout. Experiment with different arrangements to find the one that works best for your quilt.
- Sashing Between Blocks: If you want to separate the blocks a bit, you can add sashing between them. Choose a fabric that complements the colors in your blocks, such as a solid fabric that matches the background color.
- Borders: Once you’ve pieced together the quilt top, consider adding a border around the edge. A simple border in a complementary fabric can frame the quilt and give it a finished look.
- Quilting Techniques: Once your quilt top is complete, it’s time to quilt it! You can either hand-quilt or machine-quilt your project. Choose a quilting pattern that complements the Churn Dasher blocks, such as a simple straight-line quilting design or more intricate motifs.
- Binding: Finally, add a binding around the edges of your quilt to finish it off. Use a fabric that ties in with the overall design, whether it’s a matching solid color or a contrasting fabric that adds interest.
- Gift Giving: A quilt made with Churn Dasher blocks makes a thoughtful and personal gift. Whether it’s for a wedding, a housewarming, or a holiday gift, this quilt is sure to be cherished by anyone who receives it.
With these ideas, you’ll be able to turn your Churn Dasher Quilt Block into a stunning finished quilt that’s sure to impress.
FAQ: Frequently Asked Questions
1. Can I use a different fabric type for the Churn Dasher block?
Yes, while quilting cotton is the most common fabric for the Churn Dasher Quilt Block, you can experiment with other fabric types, such as linen or flannel. Just make sure to adjust your cutting and stitching techniques accordingly.
2. How do I ensure my Churn Dasher block is the correct size?
Use a quilting ruler and rotary cutter to measure and trim your fabric pieces accurately. Consistent seam allowances are crucial for ensuring the block’s size is correct.
3. Can I make a larger quilt with the Churn Dasher block?
Absolutely! You can increase the size of the squares and triangles to make a larger version of the Churn Dasher Quilt Block. This will allow you to create a bigger quilt without losing the block’s impact.
4. What’s the best way to press seams?
Press seams flat after each step. For the Churn Dasher block, it’s often recommended to press seams open to reduce bulk, especially when piecing the half-square triangles.
5. Can I make a scrappy Churn Dasher quilt?
Yes, using different fabrics for each triangle and square is a great way to create a scrappy Churn Dasher Quilt. This adds character and individuality to each block.
6. How can I make the Churn Dasher block more modern?
To give the block a modern twist, consider using bold, bright colors, geometric fabrics, or even a minimalist approach with two-tone blocks. Experiment with different layouts to make the design feel fresh and contemporary.
Join our VIP broadcast list and gain access to exclusive patterns, all for free. As a VIP member, you’ll receive the best patterns daily, delivered directly to your device. ✨📱 It’s a unique opportunity to stay up-to-date with the latest trends and designs, curated just for you. Don’t miss out on enhancing your projects and discovering new inspirations with the best patterns every day! 🎨🔝
JOIN NOW
Conclusion
The Churn Dasher Quilt Block – Free Pattern is a versatile and timeless design that can be customized in numerous ways.
From choosing the perfect fabrics to creating a stunning quilt top, this block offers endless possibilities for quilters of all skill levels. By following the instructions and tips provided in this guide, you can create a beautiful quilt that showcases the elegance and simplicity of the Churn Dasher block.
PATTERN HERE
We hope this tutorial has inspired you to try it out for your next project! Please feel free to share your thoughts and suggestions in the comments below. Happy quilting!


