
Pie Carrier Sewing Pattern

The Curved Log Cabin Quilt Tutorial – Step-by-Step Guide for Quilters is a fantastic project that offers a fresh take on the traditional Log Cabin quilt block.
Known for its straight lines and rectangular shapes, the Log Cabin block has been around for centuries. However, in this tutorial, we will add a new twist by introducing curves, making it an exciting challenge for quilters of all skill levels.
This version of the Curved Log Cabin Quilt will allow you to experiment with both traditional and modern quilting techniques while creating a stunning and unique quilt design.
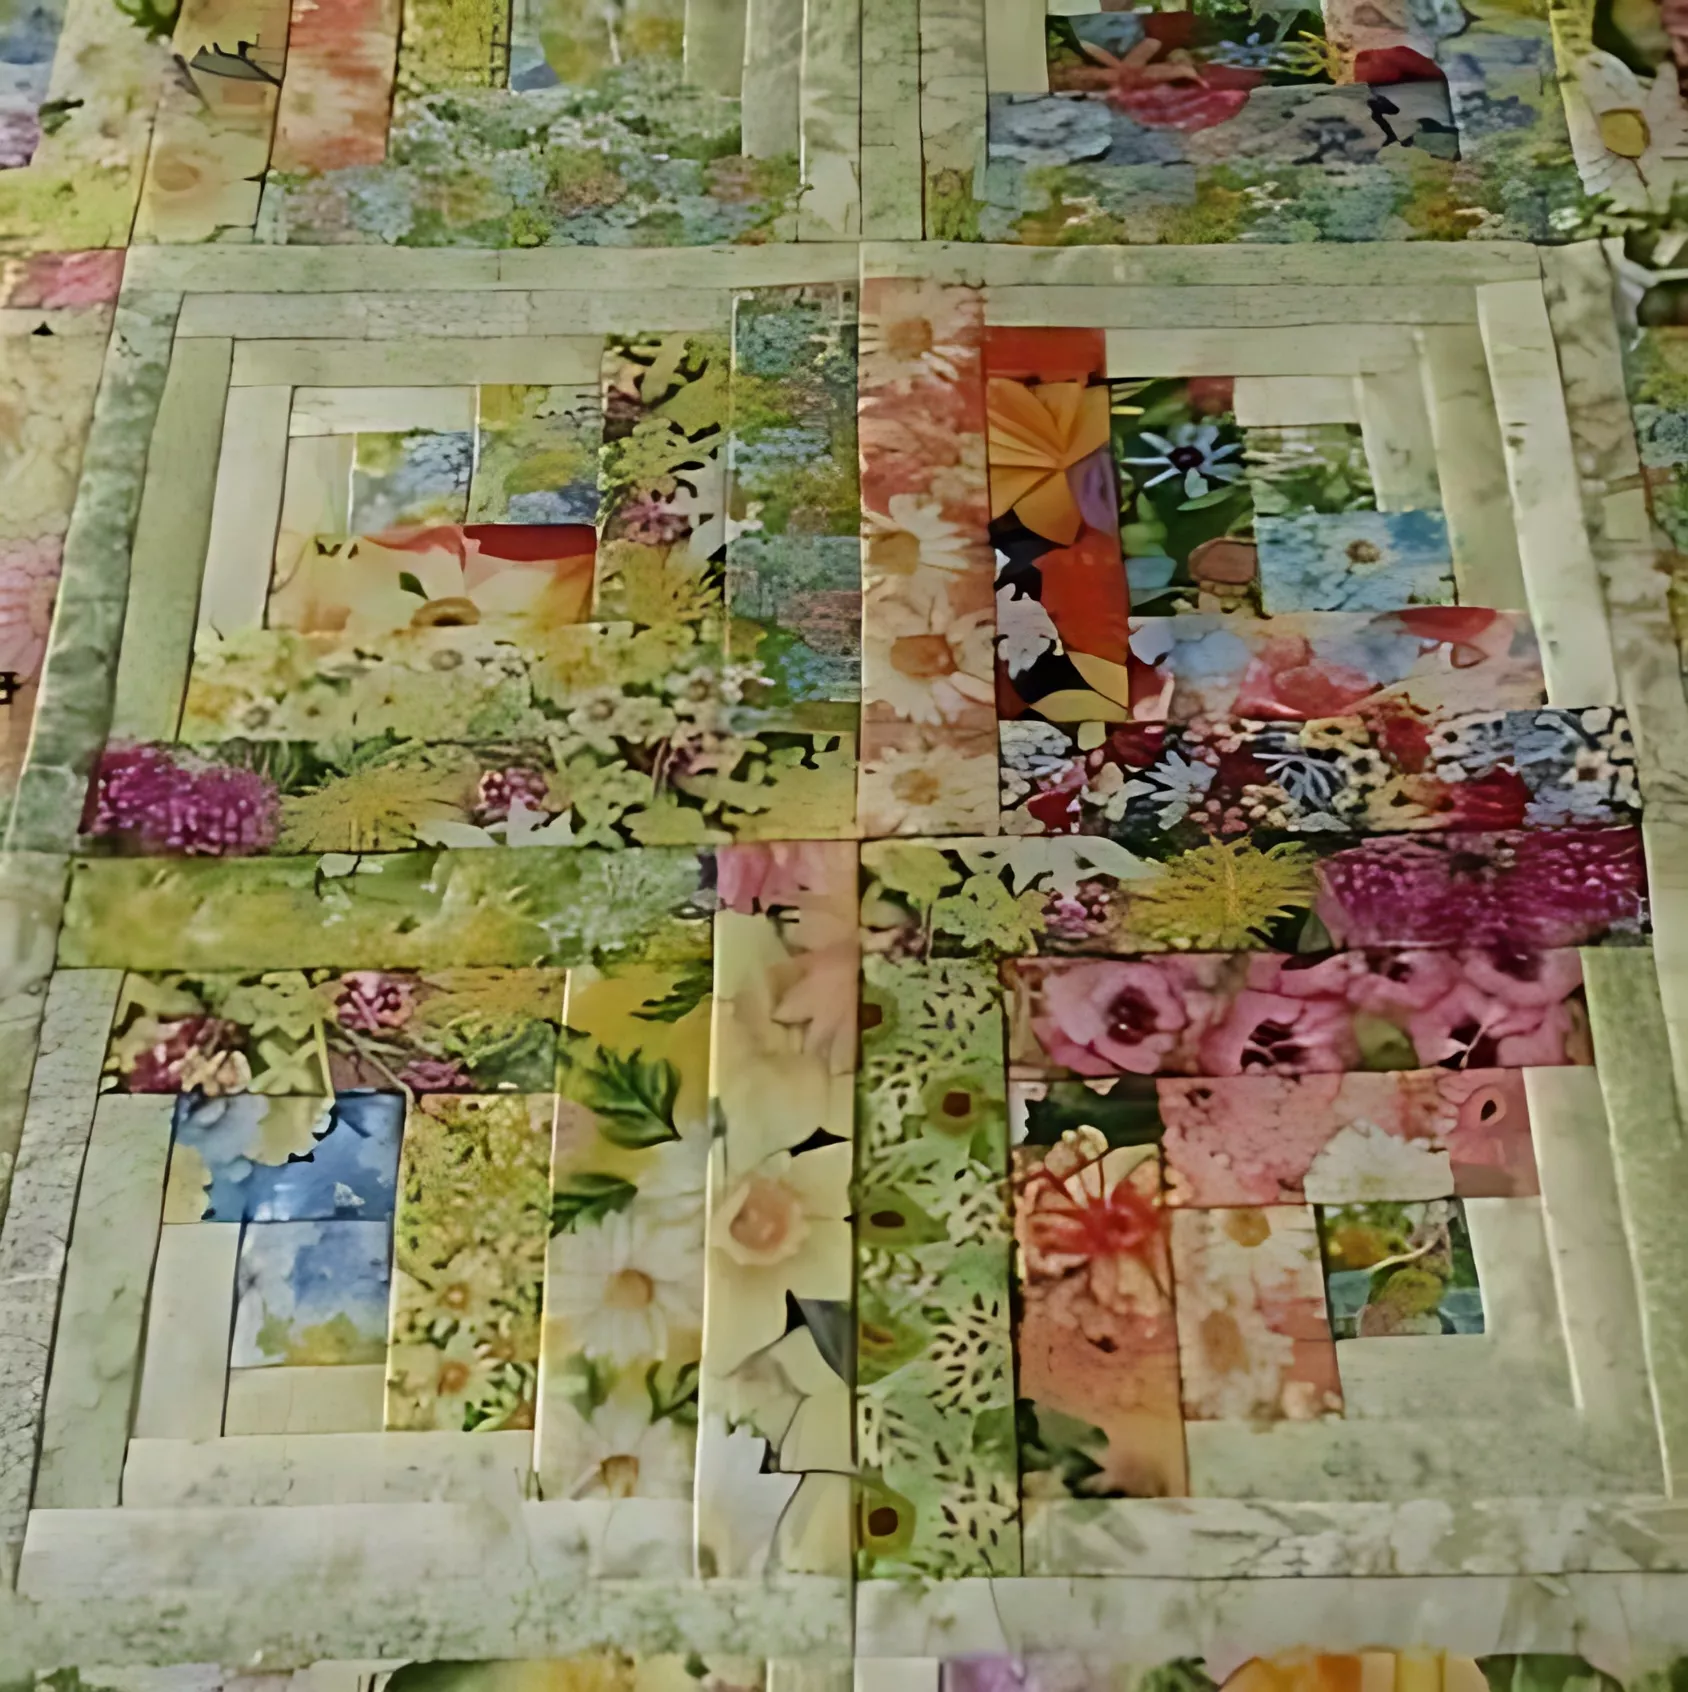
Image from google.
If you’re familiar with the traditional Log Cabin quilt, you’ll recognize the structure. In the Curved Log Cabin quilt, instead of using straight lines to form the blocks, we will incorporate gentle curves that add a beautiful fluidity to the design.
This technique can seem intimidating at first, but with the right tools and guidance, you’ll quickly master the process and produce a quilt that is both striking and sophisticated.
Whether you’re a beginner quilter or someone with years of experience, this step-by-step guide will make the process smooth and enjoyable.
The Curved Log Cabin Quilt tutorial is structured to ensure that you can follow along easily, breaking down the project into manageable steps.
In this guide, you will learn how to select fabrics, cut your pieces, sew the blocks together, and assemble the quilt top. Let’s dive into the world of curved quilting and explore how to create this eye-catching design.
Before you begin working on your Curved Log Cabin Quilt, it’s important to gather all the necessary materials and tools. The right supplies will make the process smoother and more enjoyable, ensuring that your quilt turns out beautifully.
First, you’ll need a selection of fabric. The Curved Log Cabin Quilt typically uses a combination of two fabric types: a solid color for the center of the block (the cabin) and contrasting fabrics for the curved pieces. Choose fabrics that complement each other, whether you prefer a bold contrast or a more harmonious blend. The fabrics should be of medium weight, such as quilting cotton, as they hold their shape well and are easy to work with.
Next, you’ll need a rotary cutter, quilting ruler, and cutting mat. These tools are essential for cutting fabric into the precise shapes needed for your quilt. For curved quilting, it’s especially important to have accurate cuts, as any misalignment can affect the final design. A curved ruler is also helpful, though it’s not strictly necessary.
A sewing machine with a quarter-inch foot will be useful for piecing the blocks together. You will also need a walking foot for sewing the quilt layers together later, as this ensures the layers feed evenly through the machine. Additionally, a pressing mat and iron are vital for pressing your seams as you go to ensure a neat and tidy quilt.
Lastly, don’t forget about batting and backing fabric for the quilt layers. Choose a batting that suits the final use of the quilt – whether you want it lightweight or thicker for extra warmth. For the backing, you can select a fabric that matches the front or provides a striking contrast to highlight the intricate design of your quilt.
Now that you have everything ready, let’s begin the process of creating the Curved Log Cabin Quilt!
The next step in your Curved Log Cabin Quilt journey is cutting the fabric. For this technique, it’s crucial to measure and cut your pieces accurately, as the curves need to align perfectly to achieve the desired look.
Start by cutting the center of the Log Cabin block, which is usually a square. This square forms the “heart” of the block, and from here, the curved pieces will be added around it. For the center square, cut a piece of fabric that is approximately 3 inches by 3 inches. This is a standard size, but you can adjust it based on your desired block size.
Once you’ve cut the center square, it’s time to prepare the curved pieces. For the Curved Log Cabin Quilt, you’ll need to cut fabric strips that are slightly wider than the usual Log Cabin strips. These strips will be sewn into curves around the center square, so they should be at least 2.5 inches wide, depending on the size of your block.
To create the curved pieces, use a template or a curved ruler to cut the fabric strips into gently curved shapes. This step requires careful cutting, as the curves need to flow smoothly to ensure that they match up when pieced together. If you’re new to curved piecing, you might find it helpful to practice on a scrap piece of fabric before cutting your main strips.
After cutting the strips, organize them by color to keep track of which pieces will be placed next to each other in the block. You will need to trim the strips to specific lengths as you add each curve, so it’s important to keep your fabric organized.
With your fabric cut and ready to go, you can now move on to the next step of piecing the blocks together.
Piecing the Curved Log Cabin Quilt blocks is where the magic happens. It might seem daunting at first to work with curved pieces, but with the right technique, you’ll see that it’s easier than it looks.
Start by sewing the curved pieces around the center square. Begin with one curved strip and carefully align it with the edge of the center square. Use pins to hold the fabric in place, and then sew the strip to the square with a quarter-inch seam. When working with curves, it’s important to sew slowly, guiding the fabric through the machine so the curves stay smooth and aligned.
After attaching the first curved strip, press the seam flat. This step is essential for maintaining the smoothness of the curve. Use a pressing mat and a hot iron to set the seam and avoid any puckering. Repeat the process, adding each curved strip around the center square. Be sure to press each seam as you go to keep the block neat.
As you continue to add strips, the curve will become more pronounced, and the block will start to take shape. You may need to trim some of the excess fabric after attaching each strip to keep the edges neat and ensure that each new piece fits snugly against the previous one.
It’s also a good idea to check the alignment of the blocks as you go. Lay out your blocks in a grid pattern to see how the curves flow together. If necessary, adjust the placement of the fabric to create the smooth, continuous curve effect across the quilt.
Once you have finished piecing all the blocks, press the seams once more to make sure the entire quilt top is flat and smooth.
With all the blocks pieced together, the next step is to assemble the quilt top and quilt the layers. This process requires attention to detail to ensure the quilt comes together perfectly.
Start by laying out the blocks in the final arrangement. The Curved Log Cabin Quilt often features a traditional grid pattern, but you can play with the layout to create a more modern or asymmetrical look. Once you’re happy with the layout, sew the blocks together to form rows, then sew the rows together to complete the quilt top.
After assembling the quilt top, it’s time to add the backing fabric and batting. Lay the quilt top on a flat surface, and then place the batting underneath. Add the backing fabric on top of the batting, aligning the edges carefully. Baste the layers together using pins or quilting spray to hold everything in place.
Now, you’re ready to quilt the layers. For the Curved Log Cabin Quilt, straight-line quilting or a gentle wave pattern complements the curves in the design. If you’re feeling adventurous, free-motion quilting can add an additional layer of texture. Whichever quilting technique you choose, make sure to quilt the layers evenly to avoid puckering.
Finally, add the quilt binding. Cut strips of fabric for the binding, fold them, and sew them around the edges of the quilt. Press the binding to create sharp folds, and sew it onto the quilt, ensuring a neat finish.
1. How do I sew curves without puckering?
To avoid puckering, pin the curved fabric pieces carefully and sew slowly. Press the seams after each step to keep the curves smooth.
2. Can I use any fabric for the Curved Log Cabin Quilt?
Yes, but it’s best to use quilting cotton, as it holds its shape well and is easy to manipulate when piecing the curves.
3. How do I get the curves to fit perfectly?
Use a curved ruler or template to cut the fabric accurately. Sewing slowly and pressing after each seam will help achieve a smooth curve.
4. How big should the blocks be for the Curved Log Cabin Quilt?
The size of the blocks can vary depending on your preference. A common block size is 12 inches by 12 inches, but you can adjust it as needed.
5. Can I make this quilt by hand?
Yes, but hand-piecing curved blocks may take longer and require more precision. Using a sewing machine is recommended for faster results.
6. What type of batting is best for a Curved Log Cabin Quilt?
A medium-weight cotton batting is ideal, as it provides warmth without adding too much bulk to the quilt.
Join our VIP broadcast list and gain access to exclusive patterns, all for free. As a VIP member, you’ll receive the best patterns daily, delivered directly to your device. ✨📱 It’s a unique opportunity to stay up-to-date with the latest trends and designs, curated just for you. Don’t miss out on enhancing your projects and discovering new inspirations with the best patterns every day! 🎨🔝
The Curved Log Cabin Quilt Tutorial – Step-by-Step Guide for Quilters has provided you with all the information you need to create a stunning quilt with a modern twist on a classic design. By carefully selecting fabrics, cutting the pieces accurately, and piecing the blocks together with precision, you can create a beautiful quilt that’s both unique and functional.
We hope you enjoyed this tutorial! Feel free to share your feedback and any suggestions for future quilt patterns. Happy quilting!


