
Pie Carrier Sewing Pattern

If you are a quilting enthusiast looking for a captivating and creative project, the Escher Quilt Free Pattern is the perfect choice. Inspired by the famous works of Dutch graphic artist M.C. Escher, this quilt design uses optical illusions and intricate geometric shapes to create a stunning visual effect that amazes anyone who sees it.
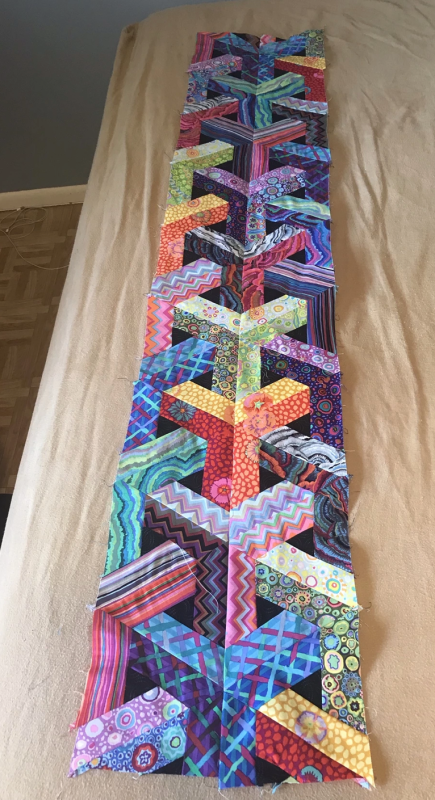
The beauty of the Escher Quilt Free Pattern lies in its ability to play with perception. With clever use of colors, values, and placement, the quilt appears to have depth and dimension, making flat pieces of fabric seem like they are interwoven in three-dimensional space.
This pattern is both a technical and artistic challenge, offering rewarding results for quilters of all skill levels.
In this comprehensive guide, you will learn everything you need to create the Escher Quilt Free Pattern, from understanding its unique structure to choosing the right materials and assembling your quilt step by step.
We will also explore creative customization ideas to make your Escher quilt truly one of a kind.
The Escher Quilt Free Pattern is a quilt design inspired by the mathematical and artistic concepts popularized by M.C. Escher. It features interlocking shapes, tessellations, and optical illusions that create the illusion of depth, motion, and complexity.
At its core, the pattern often uses simple geometric shapes—like parallelograms, diamonds, and triangles—that are arranged in such a way that they form an intricate mosaic. When combined with precise color placement, these shapes produce a mind-bending three-dimensional effect.
This pattern is designed to be accessible to quilters who enjoy precision work and who are ready for a rewarding challenge. Despite the complex appearance, the construction process is surprisingly achievable with careful planning.
The Escher Quilt Free Pattern typically involves working with a limited color palette focused on light, medium, and dark tones. This shading technique is crucial to achieving the illusion of dimension and depth.
Many versions of the Escher quilt use a repeated hexagon or cube-like layout that tricks the eye into perceiving multiple layers or interlocking structures. This makes it not only a functional quilt but also a piece of art.
Quilters are often drawn to this pattern because it pushes creative boundaries, combines mathematics with artistry, and results in a quilt that is both visually stunning and a conversation starter.
Before diving into the sewing process, gathering the right materials is essential for a successful Escher Quilt Free Pattern project. The choice of fabric, tools, and preparation methods directly impacts the accuracy and appearance of the final quilt.
Start by selecting high-quality quilting cotton in three distinct values: light, medium, and dark. These values are critical because they create the shadows and highlights that make the 3D effect pop.
In addition to fabric, you will need standard quilting supplies such as a rotary cutter, self-healing cutting mat, quilting ruler (especially one suited for cutting angles like 60 degrees), sewing machine, pins or clips, and a neutral-colored thread.
Templates are often helpful for this pattern, especially when dealing with precise shapes like parallelograms or diamonds. Some quilters prefer to create their own templates using cardboard or plastic, while others use acrylic rulers designed specifically for 60-degree angles.
Accurate cutting is vital. Even small mistakes in measurement can disrupt the illusion effect. Take your time measuring each piece, and consider starching your fabric lightly to prevent stretching.
It’s highly recommended to lay out your pieces on a design wall before sewing. This step allows you to experiment with placement and ensure that your shading is correct to achieve the 3D illusion.
Lastly, ensure your workspace is organized, well-lit, and comfortable, as the Escher Quilt Free Pattern requires attention to detail over multiple sewing sessions.
The process of assembling the Escher Quilt Free Pattern begins with understanding the basic unit of the quilt, which is typically a hexagon or cube made from three diamond-shaped pieces in light, medium, and dark shades.
Start by cutting out all your diamond shapes using a 60-degree ruler or template. You’ll need an equal number of each shade—light, medium, and dark—to maintain balance in the overall design.
Arrange three diamonds together to form a single hexagon. The placement of light, medium, and dark determines the direction of the 3D effect, so it’s important to be consistent with this throughout the quilt.
Sew the diamonds together carefully along the bias edges. Using a scant 1/4-inch seam and pressing seams accurately helps keep the pieces aligned without distortion.
Once individual hexagons are completed, begin joining them into rows. Pay close attention to the alignment so the 3D cubes appear continuous across the quilt surface.
When joining rows, it’s common to offset them slightly to maintain the flow of the tessellation. Some Escher quilt variations also add filler triangles along the edges to square off the quilt.
Finally, after the top is assembled, prepare your backing and batting, then quilt as desired. Many quilters choose simple straight-line quilting that follows the shapes to enhance the 3D illusion without distracting from it.
One of the best aspects of the Escher Quilt Free Pattern is how adaptable it is to personal taste. While the classic approach uses solid light, medium, and dark tones, there are countless ways to make this quilt uniquely yours.
Experiment with gradients. Instead of a single shade for light, medium, and dark, use fabrics that subtly shift in color to add depth and visual interest to your quilt.
For a modern twist, try using prints rather than solids. Small-scale prints can add texture without overpowering the illusion, while geometric prints can enhance the visual complexity.
Play with the size of the shapes. By enlarging or shrinking the diamonds, you can create a different scale for the cubes, allowing for a larger throw or a more intricate wall hanging.
Consider adding a border that complements the 3D design. A simple border in a matching dark tone can frame the quilt beautifully, or you can extend the illusion into the border itself.
Add quilting details that follow the edges of the cubes to emphasize the geometry. Alternatively, free-motion quilting with swirls or patterns can add contrast to the rigid structure of the Escher design.
You can also explore color theory further by using unexpected combinations like metallics, pastels, or even monochromatic palettes to produce different moods and effects with the Escher Quilt Free Pattern.
Is the Escher Quilt Free Pattern difficult for beginners?
It can be a bit challenging due to the precision required, but confident beginners who are comfortable with accurate cutting and sewing can certainly complete it.
How do I choose colors for the 3D effect?
You’ll need three distinct values: light, medium, and dark. The key is contrast between these values to create the illusion of depth.
What quilting ruler is best for this pattern?
A 60-degree triangle ruler or diamond-shaped template is highly recommended to accurately cut the pieces for this quilt.
Can I make the Escher Quilt Free Pattern in different sizes?
Yes! You can adjust the size of the diamonds to make a larger or smaller quilt. Simply scale the template or ruler cuts accordingly.
How should I quilt the finished top?
Most quilters prefer simple straight-line quilting that follows the cube edges to maintain the visual illusion, but free-motion quilting can add texture if desired.
Do I need a design wall for this project?
While not required, a design wall is very helpful for laying out pieces and ensuring that your light, medium, and dark fabrics are placed correctly to achieve the desired effect.
The Escher Quilt Free Pattern is more than just a quilt—it’s a captivating work of art that combines mathematical precision with creative expression. By carefully selecting fabrics, mastering the assembly of geometric shapes, and paying close attention to value placement, you can create a stunning quilt that appears to leap off the fabric in three dimensions.
We hope this guide has inspired you to start your own Escher quilt journey. If you found this article helpful, please leave your honest opinion in the comments and share any suggestions or experiences you have. Your feedback is invaluable and helps us continue providing creative quilting content for everyone!


