
Pie Carrier Sewing Pattern

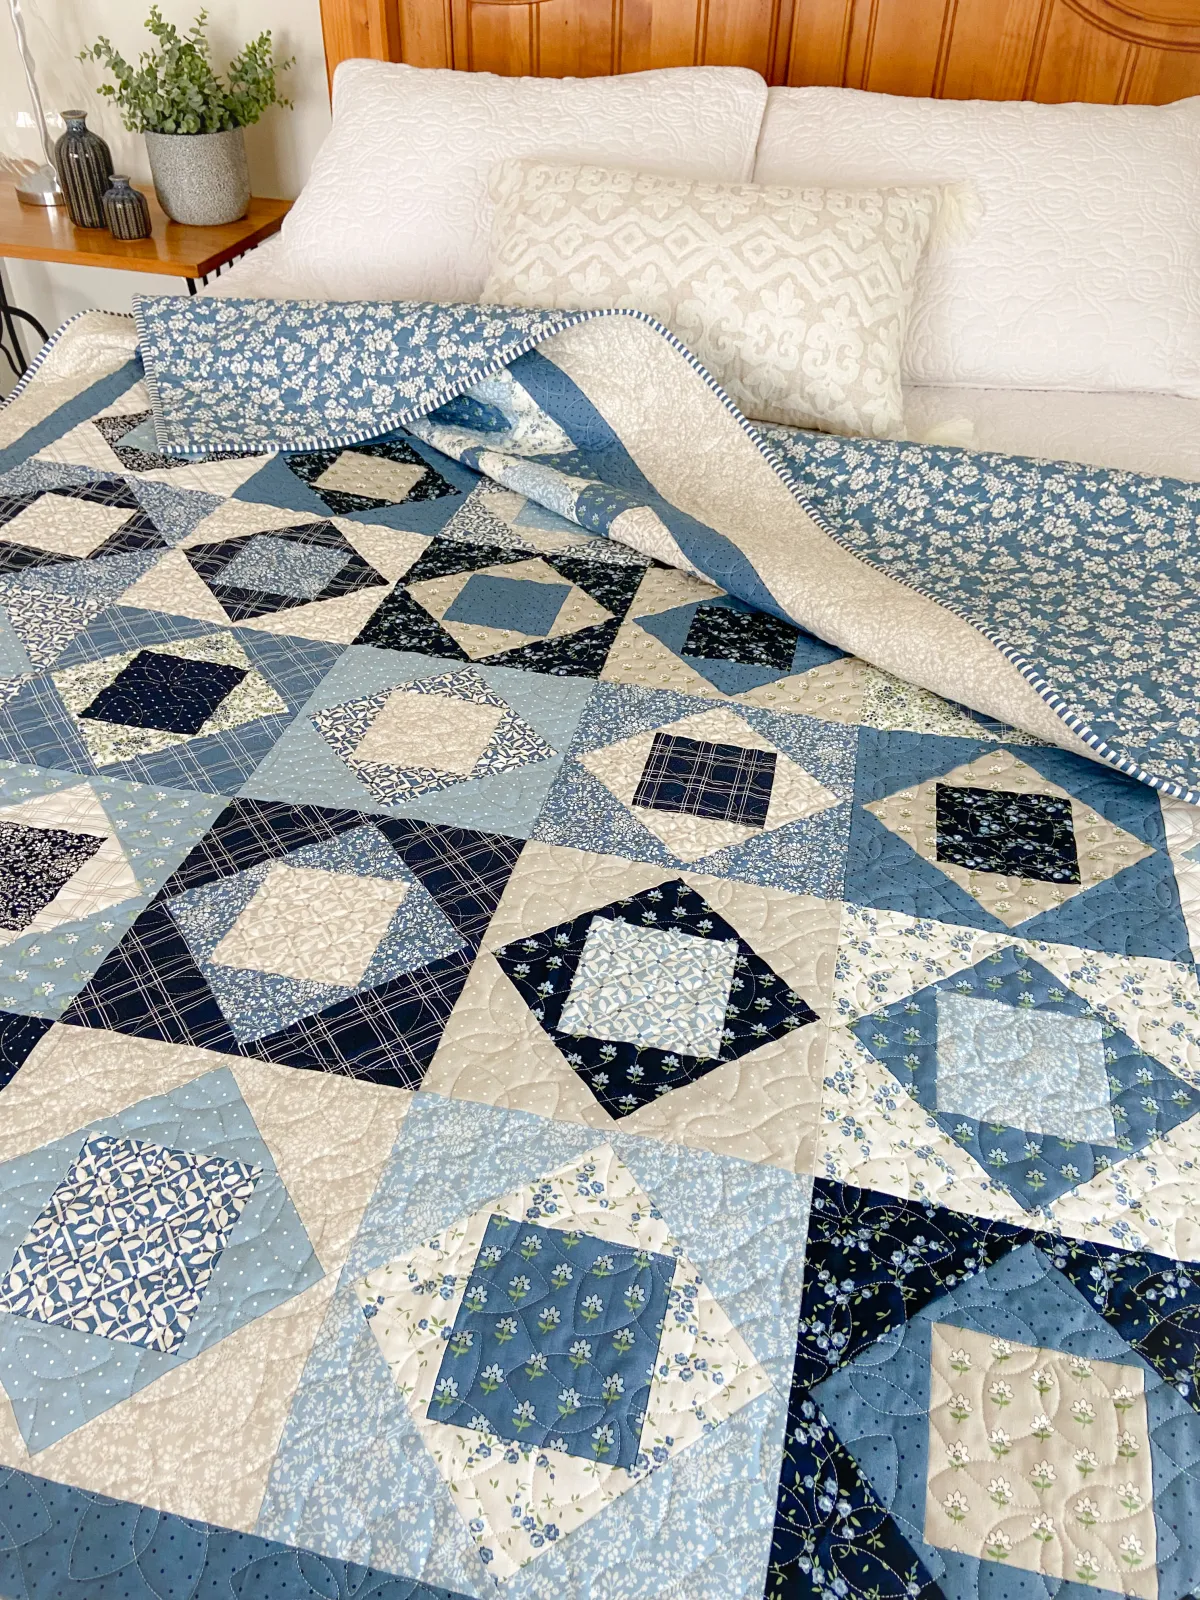
The Floating Squares – Quilt Pattern is one of those designs that immediately captures attention with its modern yet timeless appeal. Unlike traditional quilt blocks that follow strict geometric rules, this pattern creates the illusion of movement and depth, as if the squares are gently floating across the quilt top.
For quilters who enjoy experimenting with design but still want an approachable project, this pattern strikes the perfect balance between creativity and simplicity.
Many quilters love the Floating Squares – Quilt Pattern because it allows for endless variations with fabric choices. Whether you prefer bold solids, soft pastels, or playful prints, each selection completely transforms the finished quilt.
This makes the project versatile for different occasions, such as gifting, home décor, or even as a beginner-friendly entry into modern quilting. The effect is always visually striking, yet the construction is straightforward enough that even those new to quilting can find success.
Beyond its visual beauty, the Floating Squares – Quilt Pattern is a wonderful opportunity to practice key quilting techniques. It emphasizes precision in cutting and piecing, but it also leaves room for personalization and improvisation.
This combination makes it appealing for quilters of all skill levels who want to challenge themselves without feeling overwhelmed. Before diving into the specific steps, let’s explore how this pattern can be approached and adapted to fit different quilting journeys.
The heart of the Floating Squares – Quilt Pattern lies in the way the squares seem to “hover” within the fabric background. Instead of being strictly aligned in rows or columns, the squares are positioned slightly off-center, creating the illusion of movement and dimension. This effect makes the quilt dynamic and modern, appealing to those who want something different from classic block arrangements.
Choosing fabrics for this design is one of the most exciting parts of the process. Bold contrasts between background and squares can highlight the floating effect, while subtle tone-on-tone choices create a more delicate, whimsical appearance. Solids often work beautifully, but prints can add character and personality to each square.
The pattern itself is quite forgiving, which is why it is often recommended for beginners. Even if seams don’t line up perfectly, the floating design naturally disguises small imperfections. This allows new quilters to practice confidently while still producing a quilt that looks polished and professional.
Intermediate and advanced quilters also enjoy the Floating Squares – Quilt Pattern because it invites customization. By adjusting the size and arrangement of the squares, you can create anything from a small wall hanging to a king-sized quilt. It’s a flexible foundation that adapts to your vision.
Another advantage is that this pattern requires minimal fabric waste compared to some traditional quilting techniques. The straightforward cutting process makes it efficient and budget-friendly, which is always a plus for those working with limited materials.
Ultimately, the concept of floating squares is about achieving visual impact through thoughtful design, fabric selection, and arrangement. Once these foundations are understood, the quilting journey becomes much more rewarding.
To begin the Floating Squares – Quilt Pattern, you’ll need a variety of fabrics for both background and squares, along with standard quilting tools. A rotary cutter, ruler, and cutting mat are essential for achieving precise cuts, which help maintain clean lines in the finished design.
Start by cutting your background fabric into larger squares or rectangles, depending on the size of your quilt. These will serve as the canvas where your floating squares will be placed. Next, cut smaller pieces of fabric to form the floating squares themselves.
Positioning the squares is where the creativity begins. You can place them consistently in each block, or you can vary their location to make the quilt more dynamic. The key is to ensure that the squares remain off-center enough to create the floating illusion.
Once the placement is decided, sew the smaller square pieces into the larger background fabric, creating your quilt blocks. Chain piecing can speed up the process if you are working with many blocks at once. Accuracy matters, but don’t stress over perfection—this design is forgiving by nature.
After assembling the blocks, arrange them on a design wall or flat surface. This step allows you to visualize the quilt top as a whole and make adjustments before final sewing. Sometimes shifting just one block can completely change the flow of the quilt.
Finally, sew the blocks together row by row, press your seams carefully, and add borders if desired. With this foundation, you are ready to move on to quilting and finishing techniques that will highlight the beauty of your floating squares.
The quilting stage is where the Floating Squares – Quilt Pattern truly comes to life. Because the design is modern and spacious, there are many opportunities to play with quilting motifs. Straight-line quilting can enhance the geometric feel, while free-motion quilting adds texture and artistic flair.
For beginners, simple diagonal lines or stitch-in-the-ditch methods work beautifully and keep the focus on the floating effect. These techniques are manageable even on a domestic sewing machine, making them accessible without specialized tools.
Intermediate quilters may enjoy experimenting with echo quilting around each square. This technique emphasizes the floating effect by creating ripples of stitching that seem to radiate outward from the squares. It gives the design more depth and dimension.
Another creative approach is to use contrasting thread colors. Light thread on dark backgrounds, or bold hues on neutral tones, can accentuate the floating illusion and add visual drama to the finished quilt.
Don’t overlook the binding, as it frames the quilt and contributes to the overall design. A bold binding can act as a statement, while a subtle one blends seamlessly with the background. Both choices can be effective depending on your design goals.
When all elements are combined—fabric choice, quilting style, and binding—the finished quilt becomes more than just a project; it becomes a reflection of personal creativity. The Floating Squares – Quilt Pattern offers endless room for expression at every stage of the process.
One of the greatest strengths of the Floating Squares – Quilt Pattern is its flexibility. Quilters can adapt it to fit personal style, fabric availability, and even seasonal themes. The floating design lends itself well to endless reinterpretations.
For a modern look, try making the quilt with only solid fabrics in bold, contrasting colors. This creates a striking, graphic appearance that suits contemporary home décor.
Alternatively, a scrappy version can be made using leftover fabrics from other projects. Each square can represent a different memory or moment, transforming the quilt into a personal story stitched together.
Seasonal variations are also popular. For example, soft pastels and floral prints can evoke springtime, while rich earth tones and plaids create a cozy autumn look. A holiday-themed quilt with reds, greens, and whites would be perfect for winter celebrations.
Changing the scale of the squares can also produce dramatic effects. Larger squares feel bold and modern, while smaller ones create a more delicate, intricate appearance. Mixing different sizes within the same quilt adds even more dimension.
Finally, this pattern can be adapted into smaller projects beyond quilts, such as table runners, cushion covers, or wall hangings. These variations are perfect for trying new techniques on a smaller scale before committing to a full quilt.
No matter the variation, the Floating Squares – Quilt Pattern invites quilters to experiment, explore, and make the design uniquely their own.
What skill level is needed for the Floating Squares – Quilt Pattern?
This pattern is beginner-friendly but also enjoyable for intermediate and advanced quilters because of its flexibility and creative potential.
How much fabric do I need for a Floating Squares quilt?
The fabric requirement depends on the desired quilt size, but you will need background fabric, fabric for the squares, and additional yardage for borders, backing, and binding.
Can I make a Floating Squares quilt with scraps?
Yes! This pattern is perfect for scrap quilting, as the floating squares can be cut from small pieces of leftover fabric.
What type of quilting works best for this pattern?
Straight-line quilting enhances the geometric design, while free-motion or echo quilting can add extra depth and movement.
How do I keep my squares aligned when sewing?
Using a quilting ruler, rotary cutter, and consistent seam allowances will help. However, the design is forgiving, so small misalignments won’t affect the overall look.
Can I make smaller projects with this pattern?
Absolutely. Many quilters use the Floating Squares – Quilt Pattern for smaller items like wall hangings, pillow covers, or table runners.
The Floating Squares – Quilt Pattern is a versatile, creative, and beginner-friendly design that combines visual impact with ease of construction. From fabric choices to quilting styles, every decision allows for personalization, making each project unique. Whether you prefer bold modern designs, scrappy sentimental quilts, or seasonal variations, this pattern adapts beautifully.
I hope this article has inspired you to try your own Floating Squares – Quilt Pattern and explore its endless possibilities. If you’ve made one before, or if you’re planning to start, I’d love to hear your thoughts. Please share your opinion and suggestions in the comments—your experiences can inspire others on their quilting journey too.


