
Pie Carrier Sewing Pattern

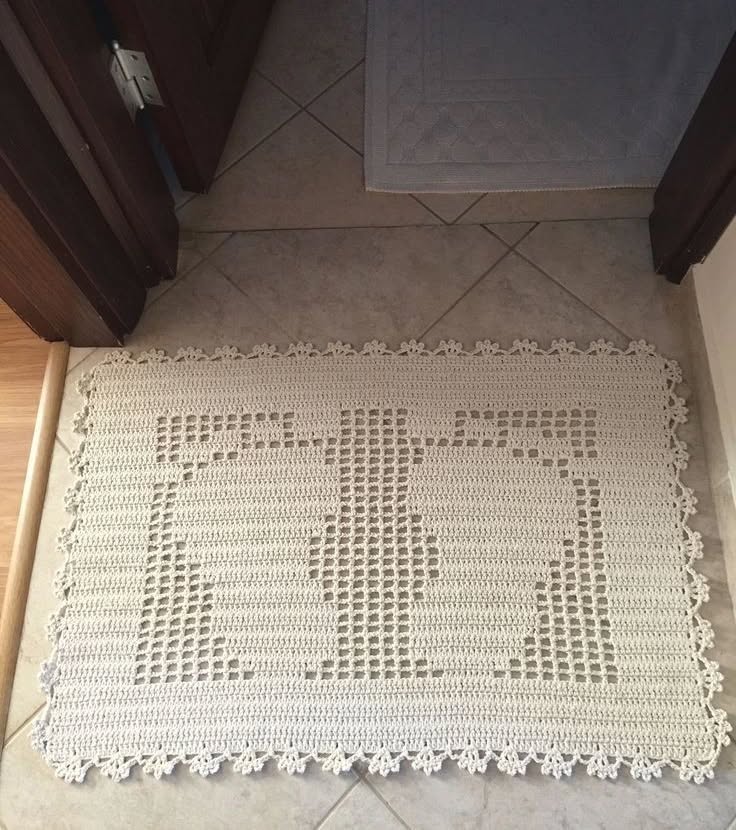
If you’ve ever wanted to create a beautiful and practical handmade project, this FOOT MAT – STEP BY STEP tutorial is exactly what you need. Whether you’re a beginner or someone with more experience in DIY crafts, this pattern is simple, fun, and incredibly rewarding.
The best part? You’ll end up with a foot mat that’s not just functional, but also adds a warm, personal touch to any space in your home.
The FOOT MAT – STEP BY STEP method is designed with clarity in mind. Each stage is broken down so that anyone can follow along without feeling overwhelmed.
Using just a few materials and some creativity, you’ll be able to complete a foot mat that not only looks great but is also durable enough for everyday use. Plus, it’s a great way to repurpose yarns or fabrics you already have at home.
This guide also focuses on providing a clear structure for crafting your mat, keeping everything well-organized and in line with the best SEO practices.
The language is human, friendly, and designed to help even the most hesitant crafters feel confident. Whether you’re making this mat for yourself, as a gift, or to sell, the FOOT MAT – STEP BY STEP approach will become your go-to method.
The first and most important step in the FOOT MAT – STEP BY STEP journey is choosing the right materials. Your mat’s quality and comfort depend heavily on what you use. Most people prefer thick cotton or bulky yarns for a cozy and absorbent finish.
Make sure your hook or needle size is suitable for the yarn weight. If you’re crocheting or knitting, match your tools accordingly. Using a too-small hook can make the mat stiff, while a too-large one can make it loose and floppy.
Select colors that suit your home’s decor. Neutrals are always a safe option, but bold colors can add a cheerful and vibrant touch to your space. If you want a reversible foot mat, consider using a combination of light and dark tones.
Prepare a stable base or anti-slip backing if your mat will be used on tile or hardwood floors. This makes it safer to use and prevents slipping accidents. Some crafters add a rubber or felt layer to the back for extra durability.
Don’t forget the measuring tape! Accurate measurements will ensure your mat fits the area where you plan to use it. Whether you want a small mat for your bathroom or a larger one for the front door, size matters.
Finally, gather your scissors, tapestry needle, and stitch markers. Having everything ready before starting allows you to follow the FOOT MAT – STEP BY STEP process without interruptions, making the experience smooth and enjoyable.
Begin by creating a strong foundation. In most mat patterns, this involves crocheting or knitting a base chain or row. This will determine the length of your mat, so take your time to count the stitches carefully.
The FOOT MAT – STEP BY STEP method emphasizes evenness. Your first row should be tight but not too tight—this helps your mat maintain a flat shape and improves overall texture.
If you’re crocheting, consider using a single or half-double crochet for a solid and sturdy base. These stitches are ideal for beginners and provide a firm texture perfect for mats.
Continue with your chosen stitch for several rows to build thickness. You can alternate rows using different colors or textures to add visual interest. Striped designs are especially popular and easy to achieve with minimal effort.
Remember to keep your edges straight. One common mistake is accidentally increasing or decreasing stitches at the edges. Check every few rows to make sure you’re staying consistent.
As you work through this FOOT MAT – STEP BY STEP process, take breaks and lay the mat flat to observe its shape. This helps catch any shaping errors early on, saving time and effort later.
A simple foot mat becomes a standout piece when you add texture and design elements. You can use different stitch patterns or fabric strips to create a more eye-catching appearance.
Try mixing in puff stitches, bobbles, or basket-weave patterns for extra texture. These not only enhance the look but also give the mat a cushy feel underfoot, making it both decorative and functional.
If you like a more rustic or eco-friendly vibe, consider using upcycled fabric strips woven into your crochet or knit work. This not only adds color but also gives your mat a unique, handcrafted look.
The FOOT MAT – STEP BY STEP method also suggests adding borders for a polished finish. A single or double row around the edges helps the mat hold its shape and gives it a more professional appearance.
Personalize your mat with initials, patterns, or symbols using color changes or embroidery. This is especially fun when making gifts or seasonal mats. Imagine a snowflake design for winter or a flower for spring!
For those who love detail, tassels or fringe can be added to the ends. Just be sure they’re secure and placed where they won’t be tripped over. These extra touches make your FOOT MAT – STEP BY STEP project truly one of a kind.
Once your mat is the size and texture you want, it’s time to finish off your work. This means weaving in loose ends and adding any final touches. A neat finish shows off your effort and skill.
Use a large-eye needle or a hook to weave in your yarn tails along the edges or inside stitches. Make sure the ends are hidden well and won’t unravel with use or washing.
If you used mixed materials or different yarns, test your mat with a gentle hand wash to make sure the colors don’t bleed. Always follow the yarn or fabric care instructions to avoid shrinking or fading.
Dry the mat flat to keep its shape. Avoid wringing or hanging, as this can stretch or distort your work. The FOOT MAT – STEP BY STEP process encourages patience even in finishing to ensure the best outcome.
Place the mat in its new home and step back to admire your creation. You can use it in the kitchen, bathroom, hallway, or even outdoors. It’s versatile, beautiful, and entirely made by you!
With proper care, your foot mat can last for a long time. Wash it regularly and store it properly if not in use. All these steps ensure your handmade mat stays looking great and continues to bring joy.
1. Can I make a foot mat without a crochet hook or knitting needles?
Yes, you can! Many people use finger-weaving or braiding techniques with fabric strips. However, for a more structured and durable mat, using tools is highly recommended.
2. What is the best yarn for a foot mat?
Cotton and bulky yarns are ideal for mats. They’re absorbent, strong, and easy to clean. Avoid very soft yarns like acrylic baby yarns—they’re not sturdy enough for daily foot traffic.
3. How long does it take to make a foot mat?
Depending on the size and your skill level, a simple mat can take 2–5 hours. More detailed mats with texture or colorwork may take longer, especially if you’re adding a border or decoration.
4. Is this a good project for beginners?
Absolutely! The FOOT MAT – STEP BY STEP guide is perfect for beginners because it’s repetitive and easy to follow. It builds confidence while producing something useful.
5. Can I wash my handmade foot mat in the washing machine?
If you used machine-washable yarn and secured your ends well, yes. However, it’s always safest to use a gentle cycle or hand wash, especially if the mat has added embellishments.
6. How can I prevent my mat from slipping?
Add a rubber or felt backing, or use anti-slip spray or rug grips underneath the mat. These additions are easy to find and make your mat safer for everyday use.
Creating your own mat with the FOOT MAT – STEP BY STEP method is both satisfying and practical. We’ve walked through everything from selecting materials and making foundation rows to adding texture and finishing your mat. You now have the knowledge to create something functional, beautiful, and personal.
If you’ve followed along, we hope this guide has inspired you to start your project today. Handmade foot mats make lovely gifts, are perfect for home use, and are a great way to relax while creating.
We’d love to hear from you! Please leave a sincere comment below and share your experience or suggestions. What kind of foot mat did you make? Do you have tips or questions to share with other readers? Let’s keep the crafting community thriving—one stitch at a time!


