
Creating a Giant Dahlia Quilt is an incredible journey into the art of quilting. This iconic design is known for its stunning circular patterns that resemble a blooming dahlia flower.
Whether you’re an experienced quilter or a beginner, this tutorial will guide you step-by-step to craft your own masterpiece.
With this Giant Dahlia Quilt – Tutorial, you’ll gain confidence and master techniques that bring your quilt to life.
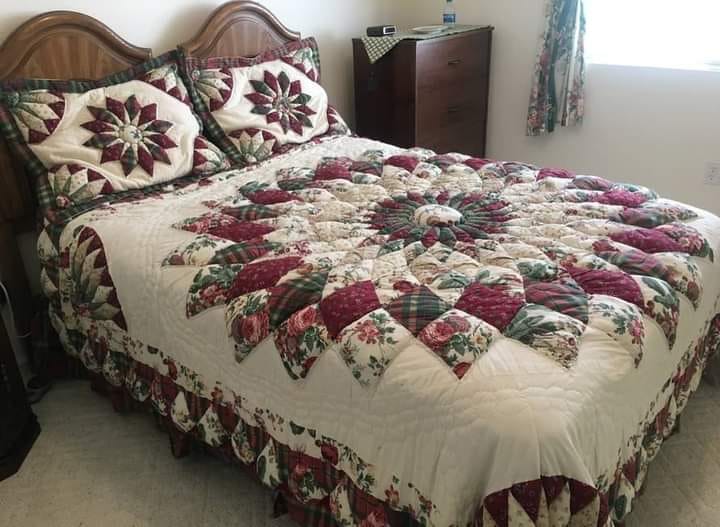
The beauty of the Giant Dahlia Quilt lies in its intricate patterns and vibrant color combinations.
Before diving into the sewing process, it’s essential to understand the materials, tools, and preparation involved. This ensures your quilt turns out exactly as you envision it—a true reflection of your creativity.
Let’s start with the basics and move on to creating this stunning quilt block.
1. Materials Needed for the Giant Dahlia Quilt
To begin your Giant Dahlia Quilt, gather the following materials to ensure a smooth quilting process:
- Fabric Choices: Select three or more complementary fabrics. The dahlia design shines with bold, contrasting colors.
- Quilting Templates: Templates for the dahlia pattern can be purchased or hand-drawn using durable materials like cardboard.
- Cutting Tools: A rotary cutter and self-healing cutting mat are essential for precise cuts.
- Thread and Needles: Match your thread color to your fabric and use quilting-specific needles for durability.
- Pins and Clips: These keep your fabric aligned while sewing.
- Sewing Machine: A machine with a quilting foot attachment is ideal for piecing and stitching.
Preparation is key. Before cutting your fabric, wash and press it to remove any creases or shrinkage. A clean and organized workspace will help you focus and enjoy the process.
2. Cutting and Preparing the Fabric
The next step in this Giant Dahlia Quilt – Tutorial is cutting and organizing the fabric pieces. Precision is crucial in this phase.
- Use Templates: Lay your templates on the fabric and trace carefully with a fabric-safe marker.
- Cut Accurately: Use a rotary cutter to cut along the traced lines. Sharp, clean edges will make assembly easier.
- Label the Pieces: Number or label each piece to avoid confusion during assembly.
- Organize by Color: Group the fabric pieces by color and size to streamline the sewing process.
- Check for Consistency: Ensure each piece matches the template dimensions to avoid alignment issues.
- Prepare the Center Circle: The center of the dahlia acts as the focal point. Choose a bold fabric to highlight this section.
By organizing your materials, you’ll find the sewing process much more enjoyable and efficient.
3. Sewing the Dahlia Pieces Together
Piecing the dahlia is where the magic begins. Follow these steps to assemble your quilt block:
- Arrange the Pieces: Lay out the pieces on a flat surface to visualize the design.
- Sew in Sections: Start with smaller sections, such as individual petals, and gradually combine them.
- Pin and Align: Use pins to hold the edges together, ensuring the curves align perfectly.
- Sew Slowly: Stitch along the curves slowly, pivoting the fabric as needed.
- Press the Seams: Use an iron to press each seam flat. This helps the quilt lie smoothly.
- Assemble the Center: Attach the central piece, ensuring it’s symmetrical and firmly secured.
Take your time with this step. Accuracy in stitching will enhance the overall appearance of your quilt.
4. Finishing the Giant Dahlia Quilt
The final steps bring your quilt to completion. Here’s how to finish your Giant Dahlia Quilt:
- Add Borders: Frame the dahlia with complementary fabric borders to enhance the design.
- Create the Quilt Sandwich: Layer the quilt top, batting, and backing fabric.
- Baste the Layers: Secure the layers together using basting spray or safety pins.
- Quilt the Layers: Stitch along the dahlia’s seams or add custom quilting designs.
- Bind the Edges: Attach binding to the quilt’s edges for a polished finish.
- Final Press: Give the quilt a final press to remove any creases and enhance its appearance.
Once completed, your quilt will be a vibrant representation of your effort and creativity.
FAQ
Q: Can I use a different fabric type for the Giant Dahlia Quilt? A: Yes, cotton is the most popular choice, but you can experiment with fabrics like linen or silk. Just ensure they’re durable and easy to work with.
Q: How long does it take to complete the Giant Dahlia Quilt? A: The time depends on your experience level. Beginners may take several weeks, while experienced quilters might complete it in a few days.
Q: Are there pre-made kits available? A: Many quilting stores offer pre-made kits with templates and fabric included, making it easier for beginners.
Q: Can I hand-sew this quilt instead of using a machine? A: Absolutely! Hand-sewing is a traditional method and adds a personal touch. However, it may take longer to complete.
Q: How can I customize my dahlia design? A: Experiment with different color schemes, fabric textures, and border styles to make the quilt uniquely yours.
Q: Do I need special tools to create this quilt? A: While basic quilting tools are sufficient, having a rotary cutter and quilting templates will make the process easier.
Join our VIP broadcast list and gain access to exclusive patterns, all for free. As a VIP member, you’ll receive the best patterns daily, delivered directly to your device. ✨📱 It’s a unique opportunity to stay up-to-date with the latest trends and designs, curated just for you. Don’t miss out on enhancing your projects and discovering new inspirations with the best patterns every day! 🎨🔝
Conclusion
Creating a Giant Dahlia Quilt is a rewarding experience that combines artistry and craftsmanship. This tutorial guides you through each step, from gathering materials to finishing the quilt, ensuring you have the knowledge and confidence to succeed.
We hope this Giant Dahlia Quilt – Tutorial inspires you to embark on your quilting journey. Share your thoughts, experiences, and suggestions in the comments below. Your feedback helps us create even better content for quilting enthusiasts like you. Happy quilting!


