
Pie Carrier Sewing Pattern

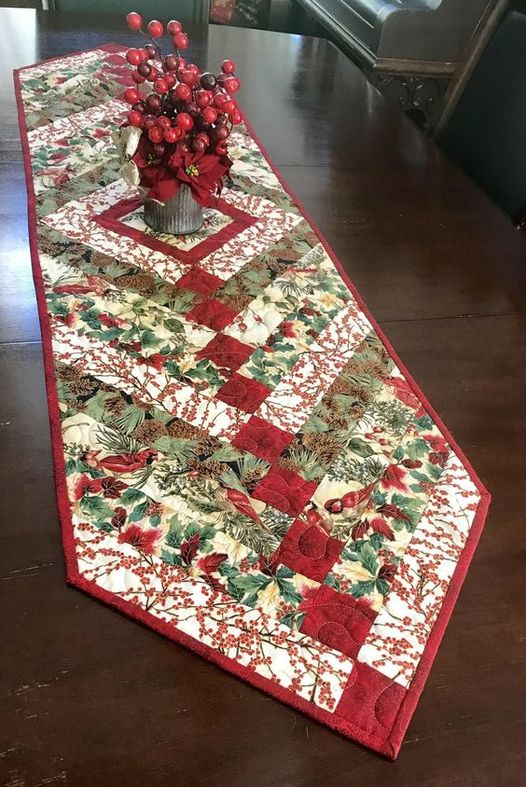
Creating a Herringbone Table Runner is a fantastic way to add a touch of elegance and craftsmanship to your dining space. This classic pattern is well-loved for its geometric appeal and versatility.
Whether you are a seasoned quilter or a beginner looking for a rewarding project, the Herringbone Table Runner offers the perfect blend of creativity and practicality.
This pattern is inspired by the traditional herringbone design, which has been used in textiles and architecture for centuries.
Its distinctive V-shaped motif creates a visually appealing effect that adds depth and texture to any decor.
By choosing the right fabric colors and textures, you can customize your table runner to match any seasonal theme or personal style.
One of the best aspects of this project is its adaptability. Whether you want a vibrant, modern design or a more rustic, country-inspired aesthetic, the Herringbone Table Runner can be tailored to your preferences. It is also an excellent way to use fabric scraps and experiment with color combinations.
Before you begin crafting your Herringbone Table Runner, gather all the essential materials. Proper preparation ensures a smooth quilting experience and a high-quality finished product.
Having these materials ready before starting your project will make the process much easier. Using high-quality fabric will also ensure a beautiful and long-lasting table runner.
Precision cutting and thoughtful arrangement are crucial for achieving the perfect Herringbone Table Runner.
Taking the time to prepare and arrange your fabric properly will lead to a stunning finished product.
The sewing process is where your Herringbone Table Runner truly starts to come to life.
By following these steps carefully, you will create a flawless Herringbone Table Runner that looks professionally made.
Finalizing your Herringbone Table Runner involves quilting, binding, and pressing.
1. What fabric is best for a Herringbone Table Runner? Cotton fabric is highly recommended as it is easy to work with and provides a professional finish.
2. Can I make a reversible table runner with this pattern? Yes! Choose a complementary fabric for the backing to make your runner reversible.
3. What quilting design works best for this pattern? Straight-line quilting enhances the herringbone pattern without overpowering it.
4. How do I prevent fabric from shifting while sewing? Use fabric clips or pins and press seams consistently to maintain alignment.
5. Can I resize this pattern for a different table size? Absolutely! Adjust the number of fabric strips and overall dimensions to fit your table.
Join our VIP broadcast list and gain access to exclusive patterns, all for free. As a VIP member, you’ll receive the best patterns daily, delivered directly to your device. ✨📱 It’s a unique opportunity to stay up-to-date with the latest trends and designs, curated just for you. Don’t miss out on enhancing your projects and discovering new inspirations with the best patterns every day! 🎨🔝
The Herringbone Table Runner is a stunning and functional quilting project that adds beauty to any dining space. With the right materials, careful cutting, and precise sewing, you can create a unique piece that showcases your creativity.
Whether making it for yourself or as a thoughtful gift, this project is a fantastic way to enhance your quilting skills. Have you tried this pattern? Share your thoughts and suggestions below!


