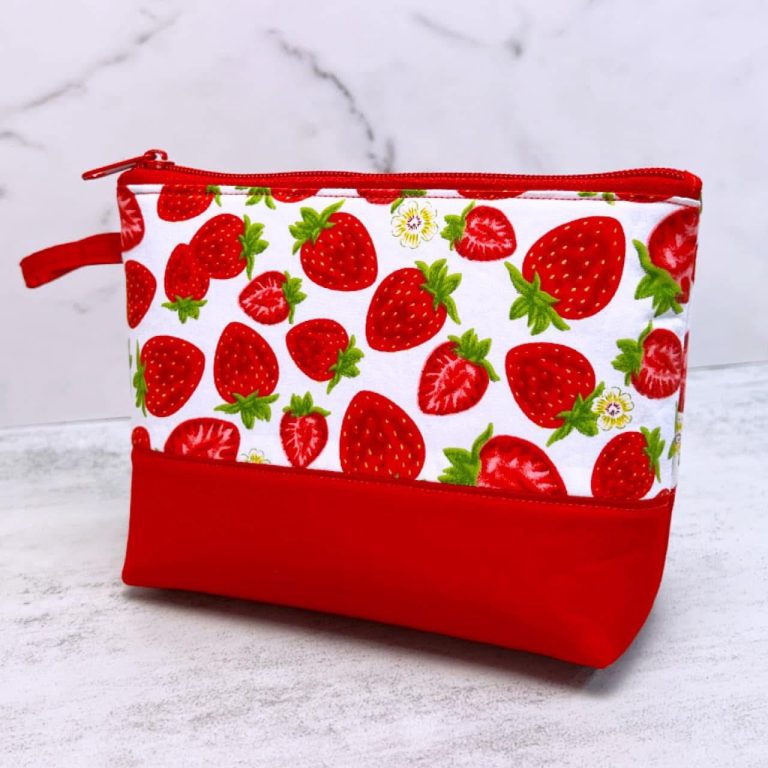
Cute Zipper Pouch Bag - Free Pattern

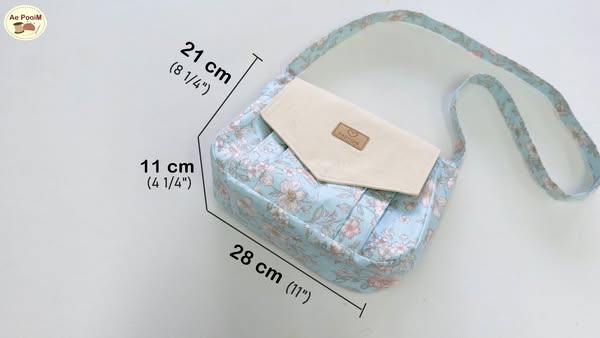
If you’re wondering how to make a cute sling bag with front pockets – free pattern, you’re in the right place! In this step-by-step tutorial, you’ll learn how to create a stylish and functional sling bag using simple sewing techniques.
This project is perfect for both beginners and experienced sewists who are looking to make a handmade accessory that stands out.
How to make a cute sling bag with front pockets – free pattern is more than just a craft—it’s a fun and practical way to express your creativity. Sling bags are lightweight, versatile, and great for daily use. By adding front pockets, you’ll enhance the convenience and style of your bag.
Whether you use it for running errands or as a gift for someone special, this DIY bag will quickly become a favorite.
In this article, we’ll cover everything you need to make your own sling bag, from selecting materials to assembling the final piece. We’ll also share sewing tips and tricks to help you get the best results, ensuring your bag is not only cute but also durable and well-made.
To start your project, gather all the essential materials. You will need durable fabric like canvas or cotton for the exterior and a coordinating lining fabric. Choose colors and patterns that suit your personal style or the occasion. Make sure the fabric is easy to sew and strong enough to support everyday use.
You’ll also need a sewing machine, thread that matches your fabric, scissors or a rotary cutter, pins or clips, and an iron. Having a good-quality zipper or magnetic snap for the bag closure is important for both security and style. Don’t forget to get some interfacing to add structure to the bag body and pockets.
Another key component is the strap. You can use ready-made webbing or make your own adjustable strap with matching fabric. A slider and D-rings are helpful if you want your sling bag to be adjustable, giving you versatility in how you wear it.
Lastly, print out or draft the free pattern for your sling bag. The pattern should include all the necessary shapes: the main body, front pockets, lining, and flap if your design includes one. Cutting your fabric carefully according to the pattern is crucial for a professional result.
Once all your materials are ready, organize your workspace and keep your tools within reach. This will save time and make the sewing process much more enjoyable and efficient.
Now that you’ve chosen your materials and printed your free pattern, it’s time to cut your fabric. Lay out each piece of fabric on a flat surface, pin your pattern pieces in place, and cut carefully. Precision is key here—you want your pieces to align perfectly when assembling the bag.
Start with the exterior pieces first, including the main panels and the pieces for the front pockets. Make sure to mark any notches, darts, or fold lines indicated on the pattern. These markings will help during the construction process, especially for pocket placement.
Cut the lining fabric next, using the same pattern pieces. If your lining includes interior pockets, now is a good time to cut and prepare those pieces too. Don’t forget to also cut your interfacing pieces. Interfacing will give the bag structure and durability, especially on the front panels and pockets.
Before you start sewing, fuse the interfacing to the wrong side of your fabric using an iron. Follow the manufacturer’s instructions and be patient—this step is important to ensure a clean and sturdy result.
If you’re using a directional print, make sure all pieces are aligned correctly before sewing. Nothing’s worse than realizing a cute print is upside down after the bag is finished!
At this point, you can also prepare any decorative elements such as piping, tags, or appliqués. Adding personal touches will make your bag truly unique.
Begin by sewing the front pockets onto the exterior panel. Fold the pocket pieces in half, right sides together, and sew around the edges, leaving an opening to turn them right side out. Turn, press, and topstitch the edges for a polished look. Position and sew the pockets onto the front panel following the pattern guide.
Next, construct the main body of the sling bag by sewing the front and back exterior panels together. Don’t forget to include the gusset or side pieces if your pattern has them. Reinforce the corners for durability, especially if you plan to carry heavier items.
Assemble the lining in the same way but leave a small opening at the bottom for turning the bag later. You can also add interior pockets to the lining if you want extra organization.
Once the exterior and lining are ready, attach them by placing them right sides together and sewing around the top edge. If your bag has a flap or closure, insert it between the two layers before sewing. This ensures a clean and functional finish.
After sewing the top edge, turn the bag right side out through the opening in the lining. Use a pencil or chopstick to gently push out the corners for a crisp shape. Then sew the opening in the lining closed by hand or machine.
Press the top seam of your bag flat and topstitch around it for a professional look. This also helps the bag maintain its shape with use.
It’s time to attach the strap and add those finishing details that bring your cute sling bag with front pockets to life. If you’re using hardware like D-rings and sliders, thread the strap through and sew it securely. Double stitch or even box stitch the ends to ensure they hold up over time.
If you’re making your strap from fabric, fold the strip in half lengthwise, press, then fold each edge into the center and press again. Sew along both edges to finish. For an adjustable strap, make sure the slider and loops are correctly positioned before stitching the ends.
Once the strap is in place, test it out to make sure it sits comfortably across your body or shoulder. Adjust the length as needed. A well-fitted sling bag should feel lightweight and secure.
Add decorative elements such as buttons, bows, or embroidery to personalize your bag even more. You can also apply a fabric protector spray to help your bag resist dirt and water, making it more practical for daily use.
Give your bag a final press, trim any loose threads, and admire your handmade creation. Congratulations—you’ve just learned how to make a cute sling bag with front pockets – free pattern and created something unique and functional!
Take a moment to reflect on your project. Not only have you made a fashionable accessory, but you’ve also gained valuable sewing skills that can be applied to other projects in the future.
1. Can I sew this sling bag by hand instead of using a sewing machine?
Yes, you can sew the bag by hand, but it will take more time and may not be as durable. Use strong thread and small, tight stitches for the best result.
2. What is the best fabric for making a sling bag?
Canvas, denim, or cotton duck are excellent choices for the exterior. Choose a lighter cotton or polyester for the lining to avoid bulk.
3. How do I add a zipper or snap closure to the bag?
Most patterns will indicate where to place closures. Zippers are typically sewn into the top seam between the exterior and lining, while snaps can be attached after turning the bag right side out.
4. Can I wash the finished sling bag?
Yes, but check the fabric type first. Most cotton or canvas bags can be hand-washed or spot-cleaned. Avoid machine drying to prevent shrinkage or damage to the strap hardware.
5. Is this pattern suitable for beginners?
Absolutely! The free pattern is simple and beginner-friendly, with clear steps and minimal pieces. Just take your time and follow each stage carefully.
6. Can I resize the pattern to make a larger or smaller bag?
Yes, you can scale the pattern up or down using a printer or photocopier. Be sure to adjust all pieces equally, including pockets and straps.
We hope this guide on how to make a cute sling bag with front pockets – free pattern has inspired you to create your own stylish and functional accessory. From choosing your fabrics to adding personal touches, each step contributes to a bag that’s both beautiful and useful. Whether you’re making it for yourself or as a handmade gift, this project is sure to bring joy and satisfaction.
Have you tried making this bag? We’d love to hear from you! Leave a sincere opinion or suggestion in the comments to help others on their creative journey. Happy sewing!


