How to make a fabric Scandinavian heart – free pattern is a delightful and simple project that brings a touch of Nordic charm into your home.
These fabric hearts are not only beautiful and festive, but they also make perfect handmade decorations for your Christmas tree, as gifts, or even as part of a cozy winter display.
If you’re someone who loves crafting and sewing, learning how to make these hearts will be a fun and rewarding experience.
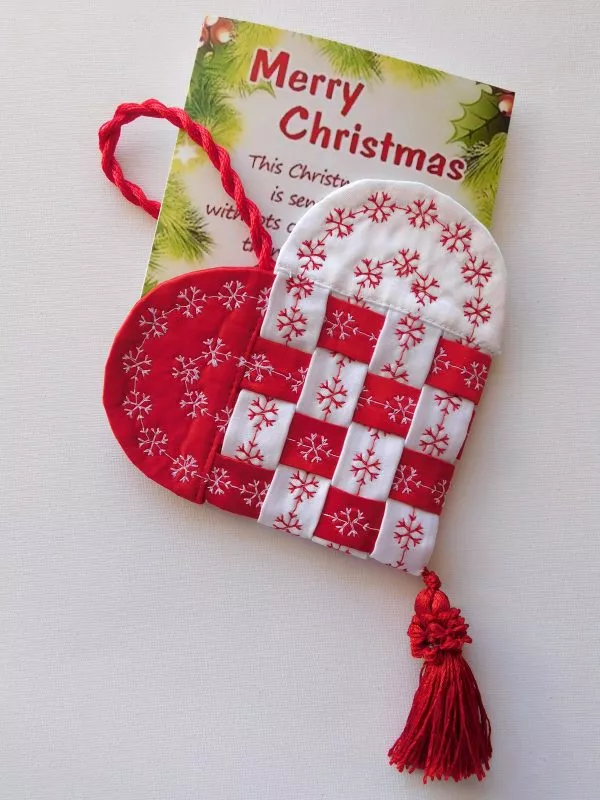
Image from google.
The Scandinavian heart is a popular motif, especially during the holiday season. It’s often associated with the Nordic tradition of creating handcrafted ornaments that add warmth and charm to any setting.
SEE MORE PATTERNS
Whether you are a beginner or an experienced sewer, this free pattern will guide you through each step of making a fabric Scandinavian heart. With the right materials, a little time, and a lot of love, you can make these hearts that will brighten up any space.
One of the best parts about making these fabric Scandinavian hearts is their versatility. You can choose different fabrics, patterns, and colors that reflect your style or the season.
Whether you prefer a traditional red and white pattern or want to add a modern twist with different prints, the options are endless. The beauty of this pattern lies in its simplicity, making it accessible for crafters of all skill levels.
Now, let’s get started! Before we dive into the step-by-step guide, here are a few things you’ll need to gather to make your very own fabric Scandinavian heart.
1. Materials Needed for Making a Fabric Scandinavian Heart
To create your fabric Scandinavian heart, you’ll need the following materials:
- Fabric
Choose two types of fabric that complement each other. You can use cotton, linen, or even felt. A festive print works wonderfully for holiday-themed hearts, but feel free to experiment with other fabrics to match your home decor.
- Scissors
A good pair of fabric scissors is essential to get clean, precise cuts. Sharp scissors will make your sewing process easier and your finished heart look neat.
- Needle and Thread
A sewing needle and matching thread are necessary for stitching the edges of the heart. You can use hand-sewing techniques or a sewing machine, depending on your preference and experience.
- Pins
Pins will help hold the fabric in place while you sew. They are especially useful when working with multiple layers of fabric.
- Stuffing
To give the Scandinavian heart its shape, you will need some stuffing. You can use polyester fiberfill or any soft, lightweight stuffing material.
- Ribbon or String
A small piece of ribbon or string is needed to create a hanging loop for your heart. This will allow you to easily hang your heart from your Christmas tree, door handles, or any other spot in your home.
With your materials ready, you’re all set to begin making your own Scandinavian hearts. Let’s move on to the next step: cutting the fabric.
2. Cutting the Fabric for Your Heart
The first step in making your fabric Scandinavian heart is to cut out the shapes. Here’s how to do it:
- Create a Template
To get started, create a template for the heart. You can either draw it freehand or print a template from the internet. The heart shape should have two parts: the front and the back. Make sure both pieces are symmetrical so that they fit together properly.
- Cut the Fabric Pieces
Once you have your template, pin it to your fabric and carefully cut out two identical heart shapes from each fabric. You’ll need four pieces of fabric in total: two for the front and two for the back. This allows you to create a durable and reversible heart ornament.
- Add a Hanging Loop
Cut a small piece of ribbon or string, about 3 to 4 inches long. This will be used to create the hanging loop for the heart. Pin the ribbon to the top of one of the heart pieces, ensuring it’s placed in the center.
- Prepare for Sewing
Once all your fabric pieces are cut and your ribbon is pinned in place, you’re ready to move on to the sewing step. Make sure the fabric pieces are aligned properly and that the ribbon is securely attached.
- Double Check Your Fabric Choices
If you’re using different prints for the front and back of the heart, take a moment to check that the prints complement each other. For example, if one side is a bright red with white snowflakes, the other side could be a subtle gingham check for contrast.
- Begin with Hand-Sewing or Machine-Sewing
If you’re using a sewing machine, set it to a basic straight stitch. If hand-sewing, choose a running stitch or a whip stitch. Whichever method you choose, be sure to sew slowly and carefully to ensure neat, consistent stitches.
Now that your fabric pieces are cut and ready, let’s move on to the sewing process.
3. Sewing the Fabric Heart Together
Once you have your fabric pieces and materials prepared, it’s time to sew the heart together. Here’s how:
- Pin the Pieces Together
Begin by pinning the front and back pieces of the heart together, right sides facing in. The ribbon should be placed between the two layers at the top of the heart. Pin all around the edges, making sure everything is lined up neatly.
- Start Sewing
Start sewing from one side of the heart, using a small, even stitch. Make sure you leave a small opening at the bottom of the heart so you can stuff it later. If you’re hand-sewing, use a running stitch to make the seam as invisible as possible.
- Sew Around the Edge
Continue sewing around the edges of the heart, being careful not to catch the ribbon in the seam. If you’re using a sewing machine, move slowly to ensure the fabric doesn’t shift or bunch up.
- Check for Gaps
Before finishing, double-check your stitching to ensure there are no gaps. If there are, go over them again to reinforce the seam. This will help keep the stuffing inside and make your heart more durable.
- Turn the Heart Right-Side Out
Once you’ve finished sewing, carefully turn the heart right-side out. Use a pencil or another blunt object to gently push out the corners and edges, ensuring the heart is evenly shaped.
- Prepare for Stuffing
Now that your heart is fully stitched, it’s time to stuff it. Lightly stuff the heart with your chosen material, making sure not to overfill it. A soft, squishy heart will look more charming and will be easier to hang.
Now that your heart is sewn and stuffed, let’s move on to adding the finishing touches.
4. Finishing Your Fabric Scandinavian Heart
The final step in making your fabric Scandinavian heart is to add the finishing details. Here’s how to complete your ornament:
- Stuff the Heart
Gently stuff the heart with polyester fiberfill or another soft stuffing material. Be sure not to overstuff, as it can cause the fabric to stretch. The goal is for the heart to be firm but still soft and flexible.
- Close the Opening
Once you’ve finished stuffing the heart, sew up the small opening at the bottom. Use a whip stitch to carefully close the gap, making sure the seam is tight and secure.
- Add Decorative Touches
To make your heart even more charming, consider adding decorative elements. You can sew on small buttons, beads, or even embroidery for extra detail. A few stitches of contrasting thread can add a lovely touch to the design.
- Tie the Ribbon
Tie the ribbon at the top of the heart into a bow. This will allow you to hang your heart from a tree, door handle, or any other place you’d like to display it. The ribbon can also add a festive touch, so choose a color that complements your fabric.
- Give it a Final Press
Use an iron to press the heart lightly, ensuring it maintains its shape. Be careful not to press too hard, as this could flatten the fabric. A gentle press will help your heart look neat and polished.
- Hang and Enjoy
Now that your fabric Scandinavian heart is complete, it’s time to hang it up and enjoy your handmade creation! Whether you place it on the Christmas tree or use it as part of a holiday centerpiece, this charming ornament is sure to bring warmth and beauty to any setting.
FAQ
1. Can I use different fabrics for this project?
Yes! You can use a variety of fabrics such as cotton, felt, or even linen. Mixing different textures and patterns can give your heart a unique, personalized touch.
2. How do I make the heart larger or smaller?
To adjust the size, simply scale up or down the template you use for cutting. If you want a larger heart, increase the size of the pattern, and for a smaller heart, reduce it accordingly.
3. Can I machine sew the fabric heart?
Yes, you can definitely use a sewing machine. A straight stitch is ideal for this project, and it will save time compared to hand-sewing.
4. How do I attach the ribbon for hanging?
You can pin the ribbon in place before sewing the two fabric pieces together, ensuring that the loop is positioned at the top of the heart. After sewing, tie the ribbon into a bow for a festive touch.
Join our VIP broadcast list and gain access to exclusive patterns, all for free. As a VIP member, you’ll receive the best patterns daily, delivered directly to your device. ✨📱 It’s a unique opportunity to stay up-to-date with the latest trends and designs, curated just for you. Don’t miss out on enhancing your projects and discovering new inspirations with the best patterns every day! 🎨🔝
JOIN NOW
Conclusion
In this article, we’ve walked through how to make a fabric Scandinavian heart using a free pattern. We’ve covered the materials you’ll need, how to cut the fabric, sew the pieces together, and add the finishing touches. Whether you’re a beginner or a seasoned crafter, this project is a fun and simple way to add handmade charm to your holiday decorations.
PATTERN HERE
We hope this guide was helpful to you! Please feel free to leave your thoughts, suggestions, or any questions in the comments section below. We’d love to hear how your Scandinavian hearts turned out! Happy crafting!


