
If you’re wondering how to make a house quilt block, you’re not alone. This charming design is one of the most popular patterns in quilting, as it’s perfect for adding a cozy, homey feel to any quilt.
The house quilt block has become a beloved choice for quilters who want to create a warm and inviting aesthetic in their quilts.
Whether you’re a beginner quilter or someone with more experience, this guide will walk you through everything you need to know to make your own house quilt block.
Creating a house quilt block is a fun and rewarding project, and the best part is that it can be adapted in many ways to suit your style.
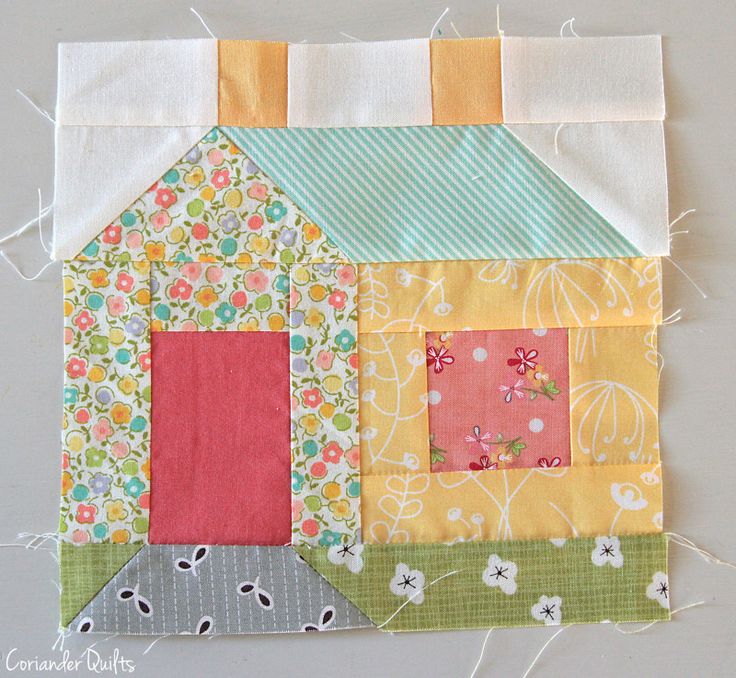
The design typically features a simple house, often with a roof, door, and windows, but there are countless variations you can explore.
In this article, we’ll go over the steps involved in making a house quilt block, from fabric selection to assembly, and provide tips for personalizing your design.
Before we dive into the details, it’s important to remember that quilting is a creative endeavor. Each quilter brings their own flair to their projects, and house quilt blocks are no exception.
While the basic structure of the block may remain the same, you can make it your own by experimenting with different fabric choices, colors, and embellishments.
By the end of this article, you’ll have all the knowledge you need to make your house quilt block unique and beautiful.
1. Selecting Fabrics for Your House Quilt Block
The first step in making a house quilt block is choosing the right fabrics. The fabric you select will have a huge impact on the overall look and feel of your block. For a traditional house block, you’ll typically want to choose fabrics that evoke a sense of warmth and coziness. You may opt for a mix of solid and patterned fabrics to create contrast and visual interest. Commonly, quilters select a variety of colors for the roof, walls, door, and windows of the house.
For the roof, consider using dark or earthy tones like brown, gray, or deep reds to give the impression of shingles or a solid, protective structure. The walls of the house are typically made from lighter, warmer colors such as cream, beige, or soft pastels, but you could also experiment with vibrant hues to add a modern touch to the design. The windows and doors are usually made from contrasting colors to make them stand out, like bright blue or yellow for the window, and rich wood tones or black for the door.
Another thing to consider when selecting fabrics is the texture. While 100% cotton is the most common fabric for quilting, don’t hesitate to incorporate fabrics with different textures, such as flannel or linen, to create a more tactile and interesting quilt block. The texture can add depth and dimension to your house quilt block, making it feel even more special and unique.
When choosing fabrics for a house quilt block, it’s also important to keep the scale of the prints in mind. If you’re using patterned fabrics, choose prints that won’t overwhelm the overall design. Small prints or subtle patterns work best, allowing the structure of the house to remain the focal point. Conversely, if you want to create a more whimsical or playful feel, consider using larger prints or bold colors.
Lastly, you can also think about the overall theme of the quilt. Are you making a quilt for a specific season, holiday, or event? Tailor your fabric choices to match the theme. For example, you might choose seasonal fabrics like florals for spring, snowflakes for winter, or warm autumn hues for a fall-inspired quilt. These personalized choices will make your house quilt block more meaningful.
2. Cutting the Fabric Pieces for the House Quilt Block
Now that you’ve selected your fabrics, the next step in creating a house quilt block is cutting the fabric pieces to the right size. Accuracy is key here, so be sure to use a ruler and rotary cutter to ensure clean, straight cuts. You’ll need to cut several pieces for each part of the house, including the roof, walls, door, and windows.
Start with the basic shape of the house. You’ll need a square or rectangular piece for the base of the house, and a triangle for the roof. The roof can be cut from a rectangle that is later trimmed into a triangle shape. For the door, cut a smaller rectangle, and for the windows, cut two small squares or rectangles. Be sure to check your pattern for the exact measurements.
As you cut each piece, make sure to cut them with a bit of extra fabric around the edges, known as a seam allowance. This allows you to sew the pieces together without worrying about the fabric shrinking or shifting. Most quilt patterns use a ¼-inch seam allowance, but be sure to check your specific pattern for the correct measurement.
Once you’ve cut all the pieces, lay them out on a flat surface to make sure you have everything you need before starting to sew. This is a great opportunity to double-check the placement of the pieces and make any adjustments to the design if you wish. Once you’re happy with the layout, you’re ready to start sewing your house quilt block together.
Remember, accuracy in cutting will help ensure that the seams line up properly and that your house quilt block will be neat and well-constructed. Take your time with the cutting process, and don’t rush. The more careful you are now, the easier the next steps will be.
3. Assembling the House Quilt Block
With your fabric pieces cut, the next step is to assemble your house quilt block. Begin by sewing together the roof and base of the house. Align the edges of the roof fabric with the top edge of the house’s base fabric and sew them together. Use a ¼-inch seam allowance for a precise, neat seam.
Once the roof and base are sewn together, attach the walls of the house. If you’re using contrasting colors for the windows and door, sew those pieces onto the walls first. When attaching the door and windows, make sure they’re centered on the wall pieces. You can pin the pieces in place before sewing them to ensure they remain in position as you sew.
Next, sew the door and windows onto the house’s wall fabric. If you’re working with small pieces, such as window panes, use a small stitch length to ensure the details are clear and neat. After this, you can sew the walls to the base of the house, making sure the seams are aligned.
After the basic structure of the house is complete, add any additional decorative elements, such as a chimney or embellishments like buttons or embroidery. You can also use quilted details to add texture and depth to your house quilt block, such as quilting around the roof or door to make them stand out.
Once all the pieces are sewn together, press the seams to ensure they lay flat. This will help to avoid puckering in the final quilt and give your house quilt block a polished, professional look.
4. Completing the House Quilt Block and Adding to Your Quilt
After assembling the house quilt block, you can add it to the rest of your quilt blocks. If you’re making a larger quilt, you may want to repeat the process for additional blocks, arranging them in a pattern that suits your vision. It’s important to plan the layout of your quilt ahead of time to ensure that the colors and designs flow together seamlessly.
When adding the blocks together, be sure to match the seams carefully to maintain a smooth, even appearance. Use a ¼-inch seam allowance for joining the blocks, and press the seams as you go to keep them flat and tidy.
Once all the blocks are assembled, you can add borders to your quilt. The borders can be a simple strip of fabric or a more complex design, depending on your preferences. Borders help frame the quilt and provide a finishing touch to the overall design.
Finally, quilt the entire quilt top to bind the layers together. You can choose to hand quilt, machine quilt, or even send your quilt to a professional long-arm quilter for finishing. The quilting process adds texture and dimension to the quilt and ensures that the layers stay together.
Add the quilt binding to the edges of the quilt to complete the project. The binding should complement the colors of the quilt and add a neat, finished look. Once the binding is in place, your house quilt block quilt is ready to be enjoyed.
FAQ: How to Make a House Quilt Block
Q: What size should I cut the pieces for a house quilt block?
A: The size of the pieces depends on your pattern, but common measurements for a basic house quilt block include 6.5-inch squares for the base, 6.5-inch triangles for the roof, and 2.5-inch rectangles for the door and windows. Always check your pattern for specific measurements.
Q: What fabric works best for a house quilt block?
A: 100% cotton is the most popular fabric for quilt blocks, including house quilt blocks, as it is easy to work with, durable, and comes in a variety of colors and prints. You can also experiment with different textures, such as flannel or linen.
Q: How can I personalize my house quilt block?
A: You can personalize your house quilt block by using fabrics that reflect your style or adding embellishments like embroidery, buttons, or appliqué details. You can also experiment with different roof shapes, door designs, or window arrangements.
Q: Can I make a large quilt using house quilt blocks?
A: Yes! House quilt blocks can be used to create large quilts. By repeating the block and arranging them in a grid or another pattern, you can make a quilt of any size. Just be sure to measure and plan the layout ahead of time.
Q: Is it difficult to make a house quilt block?
A: Making a house quilt block can be challenging for beginners, but it’s a great project to build your quilting skills. Take your time with each step, and don’t hesitate to ask for help if needed. With patience, you’ll be able to create a beautiful quilt block.
Join our VIP broadcast list and gain access to exclusive patterns, all for free. As a VIP member, you’ll receive the best patterns daily, delivered directly to your device. ✨📱 It’s a unique opportunity to stay up-to-date with the latest trends and designs, curated just for you. Don’t miss out on enhancing your projects and discovering new inspirations with the best patterns every day! 🎨🔝
Conclusion
In this article, we’ve explored how to make a house quilt block, from fabric selection and cutting to assembly and finishing. Whether you’re a beginner or an experienced quilter, creating a house quilt block is a fun and rewarding project that allows you to express your creativity.
VIDEO TUTORIAL
By following the steps outlined in this guide, you’ll be well on your way to making beautiful quilt blocks for your next project. We’d love to hear your thoughts and suggestions in the comments—feel free to share your experiences and any tips you have for others. Happy quilting!


