
Creating a Mosaic Quilt is a fantastic way to combine colors and patterns into a stunning work of art. This Mosaic Quilt Tutorial will guide you through the process of designing, cutting, and assembling a quilt with a mesmerizing mosaic effect.
Whether you’re a beginner or an experienced quilter, this tutorial will help you craft a unique and beautiful quilt with ease.
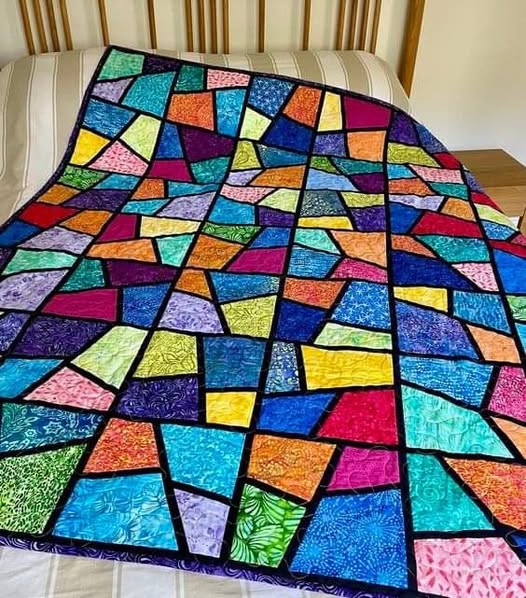
The Mosaic Quilt Pattern is inspired by traditional tile mosaics, using small fabric pieces arranged in intricate designs. This quilting technique allows for endless creativity, making it a perfect project for those who love to experiment with color and texture.
In this guide, we will cover everything from fabric selection to assembling the quilt top, ensuring you achieve a flawless finish.
Before diving into the step-by-step process, make sure to gather all necessary materials. You’ll need a variety of fabric squares, a rotary cutter, a cutting mat, quilting rulers, and a sewing machine. Once you have everything ready, let’s start quilting!
1. Choosing the Right Fabrics for Your Mosaic Quilt
Selecting the right fabrics is crucial in achieving a visually appealing Mosaic Quilt. Since this quilt relies heavily on color contrast and pattern coordination, it’s important to pick fabrics that complement each other.
First, decide on a color scheme that aligns with your vision. You can go for a bold, vibrant palette with bright colors or a more subtle, muted tone. If you’re unsure, consider using a color wheel to find harmonious combinations.
Next, choose fabric prints that add depth to your quilt. Mixing solids with patterned fabrics can enhance the mosaic effect, making each section of the quilt stand out beautifully.
When selecting fabric quality, opt for high-quality quilting cotton. This type of fabric is durable, easy to work with, and provides a professional finish.
Another factor to consider is fabric texture. Mixing different textures, such as cotton with linen, can create an interesting visual and tactile experience.
Lastly, pre-wash your fabrics before cutting. This helps prevent shrinkage and ensures that colors do not bleed when the quilt is washed later.
2. Cutting and Arranging the Fabric Pieces
Once you’ve chosen your fabrics, it’s time to cut them into the desired shapes for your Mosaic Quilt Pattern. Precision is key to ensuring a seamless and professional-looking quilt.
Start by using a rotary cutter and quilting ruler to cut the fabric into uniform squares or triangles, depending on your mosaic design. Keeping consistent measurements will make the assembly process smoother.
Next, arrange your fabric pieces on a flat surface to visualize the final design before sewing. Experiment with different layouts to find the most visually appealing arrangement.
Consider using a design wall or pinning fabric pieces to a board. This will allow you to step back and assess the overall look before committing to a specific pattern.
To keep your design organized, label each row or column with small sticky notes. This will help you remember the order when sewing the pieces together.
If you’re following a specific quilt pattern, refer to it carefully to ensure accuracy in your layout and piece placement.
3. Assembling the Mosaic Quilt Top
Now that your fabric pieces are arranged, it’s time to start sewing them together to form the quilt top. Proper assembly techniques will ensure that your quilt is sturdy and visually appealing.
Begin by sewing the fabric pieces into rows. Use a 1/4-inch seam allowance to maintain consistency and prevent fabric stretching.
After sewing each row, press the seams open or to one side using an iron. This helps reduce bulk and creates a flatter quilt top.
Next, join the rows together, making sure that the seams align perfectly for a neat finish. Pinning the pieces before sewing can help maintain alignment.
If your design includes intricate details, consider chain piecing to speed up the sewing process while keeping pieces organized.
Once the quilt top is fully assembled, give it a final press to ensure all seams lay flat. This step is essential before moving on to the quilting stage.
4. Quilting and Finishing Touches
The final stage of this Mosaic Quilt Tutorial involves quilting and adding the finishing touches to complete your masterpiece.
Choose a quilting pattern that complements your mosaic design. You can opt for straight-line quilting for a modern look or free-motion quilting for a more artistic effect.
When selecting batting, consider the desired thickness and warmth of your quilt. Cotton batting is a great option for a lightweight quilt, while wool or polyester batting adds extra warmth.
Baste your quilt layers together using pins, spray adhesive, or basting stitches to keep them in place during quilting.
Once the quilting is complete, trim the edges and prepare to attach the binding. Cut binding strips, fold them in half, and sew them around the edges to give your quilt a clean, finished look.
Finally, give your quilt a gentle wash and press to remove any wrinkles, and enjoy your beautiful handmade Mosaic Quilt!
FAQ – Common Questions About Mosaic Quilts
Q: Is a mosaic quilt difficult to make?
A: Not at all! With careful planning and precise cutting, even beginners can create a stunning Mosaic Quilt.
Q: What size should my fabric pieces be for a mosaic quilt?
A: The size depends on your design. Smaller pieces create a more intricate look, while larger pieces make the project quicker and easier.
Q: Can I use scraps to make a mosaic quilt?
A: Absolutely! A Mosaic Quilt is a great way to use fabric scraps and create a unique patchwork design.
Q: What is the best way to arrange fabric pieces for a mosaic quilt?
A: Lay out your pieces on a design board or large table to experiment with different patterns before sewing.
Q: How do I ensure my seams align perfectly?
A: Use pins or fabric clips, sew slowly, and press seams carefully to achieve perfect alignment.
Q: Can I hand quilt a mosaic quilt instead of using a machine?
A: Yes! Hand quilting adds a unique, personal touch to the quilt, although it takes more time and patience.
Join our VIP broadcast list and gain access to exclusive patterns, all for free. As a VIP member, you’ll receive the best patterns daily, delivered directly to your device. ✨📱 It’s a unique opportunity to stay up-to-date with the latest trends and designs, curated just for you. Don’t miss out on enhancing your projects and discovering new inspirations with the best patterns every day! 🎨🔝
Conclusion
This Mosaic Quilt Tutorial has guided you through every step of creating a beautiful and unique quilt. From selecting the perfect fabrics to quilting the final design, this project is a rewarding experience for quilters of all levels. Whether you’re making this quilt for yourself or as a heartfelt gift, the mosaic pattern offers endless creative possibilities.
Have you tried making a mosaic quilt? Share your thoughts, experiences, and suggestions in the comments below. Happy quilting!


