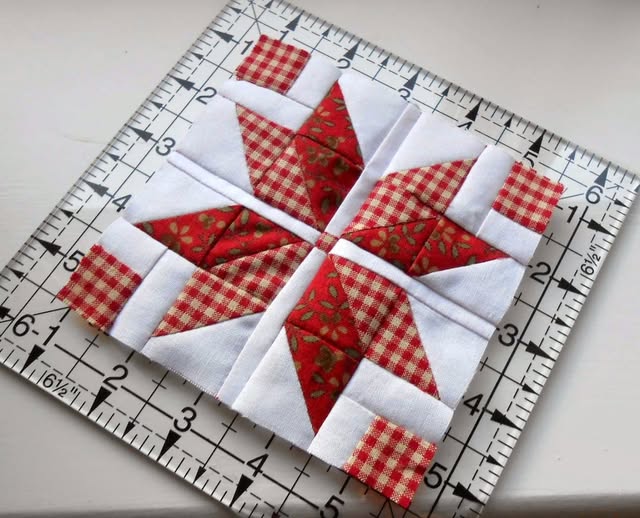
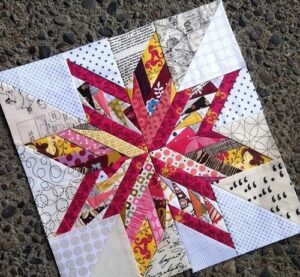
The Nordic Quilt Block – Tutorial is a perfect project for quilters who love timeless, geometric patterns inspired by Scandinavian design. With its clean lines, symmetrical layout, and elegant simplicity, the Nordic Quilt Block combines traditional craftsmanship with modern minimalism.
This block is not only visually stunning but also beginner-friendly, making it an ideal addition to any quilt collection. Whether you’re creating a cozy winter quilt or a minimalist wall hanging, this tutorial will guide you through every step with clarity and encouragement.
The beauty of the Nordic Quilt Block lies in its balance and harmony. Inspired by traditional Nordic motifs often found in knitting, embroidery, and folk art, this block features crisp shapes that come together to form a striking star-like pattern.

Its structure emphasizes precision and contrast, often using soft neutral fabrics or icy blue tones to reflect the cool elegance of Nordic design. Each seam and color choice contributes to the calm yet striking personality of this pattern.
In this Nordic Quilt Block – Tutorial, you will learn how to select fabrics that enhance the clean Nordic look, cut your pieces accurately, and assemble your block with precision. We’ll also explore creative color variations, quilting tips, and finishing ideas to make your project truly unique.
This guide is written in an approachable and detailed way so that quilters of all skill levels—especially beginners—can enjoy the process and take pride in their finished block.
1. Understanding the Nordic Quilt Block Design
The Nordic Quilt Block draws inspiration from the Scandinavian approach to art: simplicity, symmetry, and natural beauty. Its design often resembles a snowflake or a stylized star, making it perfect for winter-themed quilts. While the layout may appear intricate at first, it follows a simple grid structure that is easy to piece together once you understand its composition.
A traditional Nordic Quilt Block is built using basic shapes—squares, half-square triangles (HSTs), and sometimes flying geese units. These elements come together to create a central motif surrounded by symmetrical extensions. This method allows for endless variations depending on your choice of fabrics and colors.
When choosing your fabrics, think about the Nordic color palette: whites, grays, blues, and subtle reds are common. For a modern twist, some quilters prefer monochrome or pastel shades. Whatever your choice, contrast is key—so that the central pattern stands out beautifully.
To achieve perfect points and alignments, precision cutting is essential. Use a sharp rotary cutter and a quality quilting ruler to ensure all pieces are uniform. Consistency in cutting will make sewing and assembling the block much smoother.
Pressing seams properly is another crucial step. Always press seams toward the darker fabric to avoid shadows on lighter tones. For best results, use a dry iron and press gently to maintain the block’s shape.
Once you’ve mastered the construction technique, you can use the Nordic Quilt Block as a foundation for larger projects such as bedspreads, table runners, or decorative pillows. Its timeless charm makes it versatile for various home décor projects.
2. Step-by-Step Guide to Creating the Nordic Quilt Block
Let’s begin the Nordic Quilt Block – Tutorial by preparing all the materials you’ll need. Start by selecting four coordinating fabrics that reflect the Nordic theme—one dark, one medium, one light, and one background fabric. You will also need a rotary cutter, cutting mat, quilting ruler, pins, and a sewing machine.
Cut your fabrics according to the measurements of your desired block size. A standard size for this block is 12 inches finished, but you can adjust as needed. Make sure all your pieces are accurately cut before you start sewing.
Begin by assembling the half-square triangles. Pair one light and one dark fabric square right sides together, draw a diagonal line, sew ¼ inch on each side of the line, and cut along the center. Press open the triangles and trim them to the correct size. These units will form the star points in your Nordic Quilt Block.
Next, piece together the center square. You can use a single fabric for a clean look or create a patchwork effect with smaller pieces. Align the seams carefully so that the central motif looks crisp and well-defined.
Once the central unit is ready, attach the half-square triangles around it to form the star shape. Make sure to keep your seam allowance consistent and check your points for accuracy as you go. A ¼-inch seam foot can help maintain even stitching.
Finish by sewing the block’s outer squares and rectangles. These will frame your design and complete the clean, geometric appearance that defines the Nordic Quilt Block. Give your block a final press, checking that it measures correctly and lies flat.
3. Color Variations and Creative Ideas
One of the most enjoyable aspects of working with the Nordic Quilt Block is experimenting with color combinations. While the traditional Nordic palette emphasizes soft neutrals, you can create a completely different mood by playing with bold or warm tones.
For a cozy winter feel, use icy blues, whites, and silvers. This combination evokes snowy Scandinavian landscapes and looks beautiful when quilted with white thread. Add subtle texture using tone-on-tone fabrics to give depth without overwhelming the minimalist design.
If you prefer something modern and striking, opt for black, white, and gray combinations. The contrast between light and dark will highlight the geometric symmetry of the Nordic Quilt Block beautifully.
For a festive touch, try incorporating reds and greens—colors often seen in Nordic Christmas décor. A quilt made from these blocks would look stunning as a holiday table topper or wall hanging.
You can also personalize your Nordic Quilt Block by varying the scale of the design. Make smaller blocks for intricate quilts or enlarge them for bold, dramatic patterns. The modular nature of this block means it adapts easily to any project size.
Finally, don’t be afraid to add texture through quilting stitches. Straight-line quilting enhances the clean look, while subtle curves can soften the geometric lines and create a more organic feel.
4. Finishing Your Nordic Quilt Block Project
After completing your Nordic Quilt Block, it’s time to turn your creation into a finished piece. Start by squaring up your block—use your ruler to trim any uneven edges to the correct size. Precision here ensures all your blocks will fit together perfectly in your final quilt.
When joining multiple blocks, consider alternating colors or rotating the designs for visual interest. This technique adds movement and dimension to your quilt layout while maintaining symmetry.
Choose a batting and backing fabric that complement your quilt’s color scheme. For example, use a soft flannel backing for warmth or a crisp cotton for a lightweight finish.
Quilt your layers together using simple straight lines or a snowflake-inspired pattern. Quilting stitches not only hold the layers in place but also add personality and texture to your project.
Finish your quilt with a clean binding around the edges. Binding in a contrasting color can frame the Nordic Quilt Block design beautifully, while a matching tone will keep the focus on the pattern itself.
Finally, label your quilt with your name and the date. It’s a lovely way to remember your creative journey and gives your handmade piece a personal touch.
FAQ – Nordic Quilt Block
What size should I make my Nordic Quilt Block?
A standard size is 12 inches finished, but you can easily scale it up or down depending on your project.
Is the Nordic Quilt Block suitable for beginners?
Yes, this pattern is perfect for beginners who want to practice precision piecing and symmetrical design.
What fabrics work best for a Nordic Quilt Block?
Cotton fabrics in cool or neutral tones work beautifully. Look for quality quilting cottons that press well and hold their shape.
Can I use scraps to make the Nordic Quilt Block?
Absolutely! Scrappy versions look charming and unique, especially when the colors are balanced within the Nordic palette.
How can I make my points align perfectly?
Accurate cutting, consistent seam allowances, and careful pressing are key to achieving crisp points in your block.
What kind of quilting design suits the Nordic Quilt Block?
Straight-line quilting or simple geometric patterns enhance the clean aesthetic of the Nordic design.
Conclusion
The Nordic Quilt Block – Tutorial combines timeless elegance with modern simplicity, offering quilters an enjoyable and rewarding experience. Its geometric charm, versatility, and Scandinavian inspiration make it a must-try project for both new and experienced quilters. Whether you use it in a full quilt, pillow cover, or wall hanging, the Nordic design will bring a touch of serene beauty to your home.
We hope this Nordic Quilt Block – Tutorial has inspired you to start your own project and explore the peaceful world of Scandinavian quilting. Share your thoughts, suggestions, or experiences below—we’d love to hear your honest opinion and see how your version of this beautiful block turns out.


