
Pie Carrier Sewing Pattern

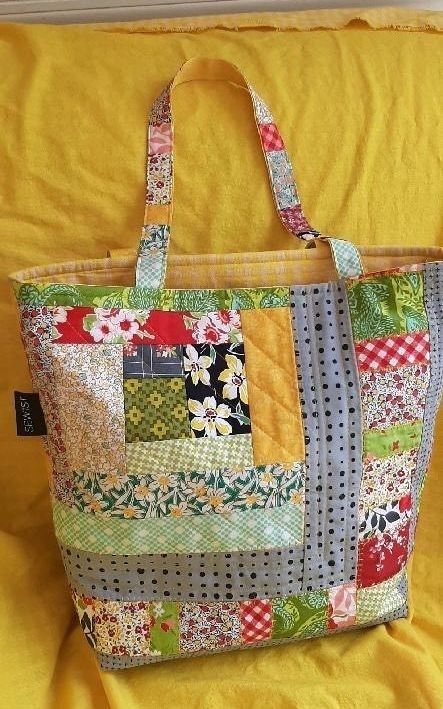
The Patchwork Carryall Pattern is an excellent project for quilters and crafters looking to create a versatile and stylish bag. With its patchwork design, this pattern allows you to combine different fabrics, creating a unique and personalized carryall.
Whether you’re making a bag for daily use or a gift for a loved one, this pattern will surely impress. In this article, we will explore how to make your own Patchwork Carryall, step by step, offering tips and advice along the way to help you complete the project with ease.
Creating a Patchwork Carryall bag can be both fun and rewarding. Not only will you have a functional accessory, but you’ll also have the opportunity to experiment with colors, patterns, and textures. It’s a great way to practice patchwork techniques and improve your quilting skills.
In addition, a carryall bag is practical and can be used for various purposes, whether for groceries, travel, or everyday use.
Before diving into the tutorial, let’s discuss the tools and materials you will need to make this patchwork carryall bag. The pattern itself is simple, but having the right materials and tools can make the process much smoother.
With a little patience and attention to detail, you’ll soon have a beautiful handmade bag that’s both functional and fashionable.
To begin making your Patchwork Carryall, it’s important to gather all the necessary materials. The fabric choices you make will play a key role in the final look of your bag. For this project, you will need:
Once you have all your materials, you can start preparing your fabric and cutting it into the appropriate pieces.
The next step in creating your Patchwork Carryall is to cut your fabric into squares or strips, depending on the design you’re following. Be sure to measure carefully and cut straight lines for uniformity. You can use a rotary cutter and mat for precise cutting, ensuring that all pieces are the same size.
Start by cutting your fabric into squares, typically 4 to 6 inches, depending on your design. The more intricate your pattern, the smaller your fabric pieces will need to be. Once you have all your squares or strips ready, arrange them in a pleasing design. This is where you can get creative! Consider alternating solid colors with patterned fabrics for contrast or creating a gradient effect with shades of the same color.
Once you’ve arranged your fabric pieces, it’s time to sew them together. Be sure to press your seams as you go to keep everything neat and flat.
Now that your fabric pieces are ready, it’s time to assemble the Patchwork Carryall. Begin by sewing the fabric pieces together. Use a quarter-inch seam allowance, which is standard for quilting, to join your fabric squares. Make sure to align the edges carefully to avoid uneven seams.
Once the patchwork panel is complete, press it flat to set the seams. Next, you’ll need to add the fusible interfacing to give your bag structure. Cut the interfacing to match the size of your patchwork panel, then iron it onto the back of the fabric according to the manufacturer’s instructions.
After the interfacing is applied, you can start assembling the sides of your bag. Cut two pieces of fabric for the bag’s lining and sew them together, leaving space at the top for a zipper or closure. If you’re adding a zipper, be sure to install it before finishing the assembly. Once the sides are sewn, you can attach the patchwork panel to the lining to complete the exterior.
The final step in creating your Patchwork Carryall is to add any personal touches and finalize the details. This is where you can get creative by adding decorative elements like embroidery, appliqué, or even a custom label. You can also personalize the handles by choosing a contrasting fabric or adding leather straps for a more sophisticated look.
Once you’ve added your decorative touches, sew the bag together and turn it inside out. Be sure to trim any excess fabric and make sure all seams are secure. If you want to add a closure, you can attach a snap, button, or magnetic clasp. Finally, give your bag a good press to smooth out any wrinkles and finish the project.
Q1: Can I use any fabric for this pattern?
Yes, you can use any type of fabric, but cotton is ideal for patchwork due to its ease of use and durability. You can also mix different types of fabric, but keep in mind that heavier fabrics may affect the overall structure of the bag.
Q2: How can I make my Patchwork Carryall larger?
To make your bag larger, simply increase the size of your fabric pieces. You can also add more rows or columns to your patchwork panel to create a bigger design.
Q3: What kind of thread should I use?
It’s best to use quilting thread for durability, but any strong cotton or polyester thread will work well for this project. Be sure to choose a thread that complements your fabric.
Q4: Can I add a pocket to the bag?
Yes! You can add a pocket to the inside or outside of your Patchwork Carryall for extra functionality. Just cut an additional piece of fabric and sew it into the lining or outer side before assembling the bag.
Q5: How do I care for my patchwork bag?
To care for your Patchwork Carryall, gently hand wash it or machine wash it on a delicate cycle. Be sure to air dry or tumble dry on a low setting to prevent shrinkage.
Join our VIP broadcast list and gain access to exclusive patterns, all for free. As a VIP member, you’ll receive the best patterns daily, delivered directly to your device. ✨📱 It’s a unique opportunity to stay up-to-date with the latest trends and designs, curated just for you. Don’t miss out on enhancing your projects and discovering new inspirations with the best patterns every day! 🎨🔝
The Patchwork Carryall Pattern is a perfect project for those looking to create a functional and stylish bag. By following the steps outlined above, you can make your own personalized carryall using patchwork techniques.
Whether you are a seasoned quilter or just starting out, this project allows you to practice your skills while creating something beautiful and useful. Don’t forget to add your personal touch with decorative elements to make your bag truly one-of-a-kind.
We hope you enjoyed this tutorial and feel inspired to create your own Patchwork Carryall. Feel free to share your finished projects with us, and don’t forget to leave your thoughts and suggestions in the comments below. Happy sewing!


