
A Patchwork Christmas Table Runner is the perfect addition to your holiday decor. This simple yet beautiful project will bring festive charm to your table during the Christmas season.
If you love quilting or sewing, creating a patchwork table runner is an excellent way to express your creativity and add a handmade touch to your holiday celebrations. In this article, we’ll guide you through a Free Pattern for making your very own patchwork Christmas table runner.
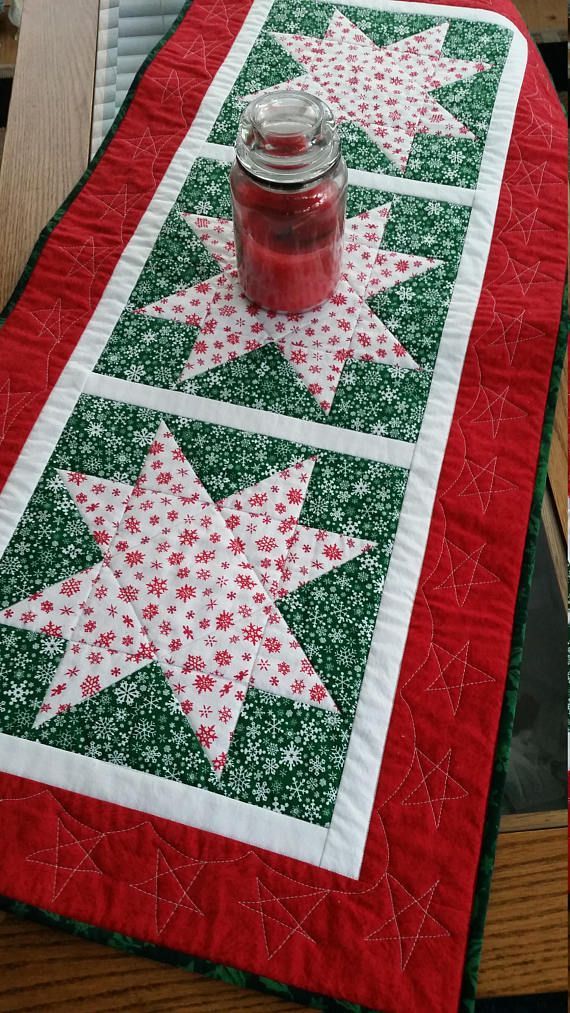
The joy of creating a patchwork piece lies in the variety of fabrics you can use to craft something unique. From traditional reds and greens to more modern and eclectic fabric choices, the possibilities are endless.
Whether you’re new to quilting or have years of experience, this pattern is simple enough for beginners, but still allows you to showcase your creativity. Let’s explore the steps involved in making a Patchwork Christmas Table Runner and how you can customize it to fit your style and home decor.
As we go through the process, keep in mind that the Free Pattern can be adjusted to your preferred size or design.
With just a few basic sewing techniques and the right materials, you’ll have a festive table runner to impress your guests during the holiday season. So, gather your supplies, and let’s get started on making your Patchwork Christmas Table Runner.
1. Materials You’ll Need for Your Patchwork Christmas Table Runner
Before you start creating your Patchwork Christmas Table Runner, you’ll need to gather some essential materials. Here’s a list of what you’ll need to bring this beautiful project to life:
- Fabric
Choose a variety of Christmas-themed fabrics. For the most traditional look, opt for reds, greens, whites, and golds. You can also include patterns like plaid, stripes, or snowflakes to add interest. The key to a great patchwork design is variety, so feel free to experiment with different textures and prints. - Sewing Machine
While hand-sewing is an option, using a sewing machine will make the process quicker and more efficient. Ensure your machine is set up with a straight stitch, as this will be the primary stitch used for assembling the table runner. - Rotary Cutter and Mat
To make precise cuts, a rotary cutter and cutting mat are essential. These tools help ensure your patchwork pieces are even and well-shaped, which is crucial for achieving a professional-looking finished product. - Quilt Batting
Quilt batting is placed between the top and bottom layers of your table runner to give it thickness and a quilted texture. Cotton batting is a great option, as it provides a soft and comfortable feel, while still being durable enough for a table runner. - Thread
Choose a thread color that complements your fabric selection. White, green, or gold threads are great choices for holiday-themed patchwork, but feel free to choose a color that suits your style. - Pins or Basting Spray
To keep your pieces in place while sewing, you can use pins or basting spray. Pins are great for securing the fabric pieces, while basting spray is ideal for holding the layers together temporarily.
2. Step-by-Step Instructions for Making Your Patchwork Christmas Table Runner
Now that you have your materials, let’s go through the steps for creating your Patchwork Christmas Table Runner. Follow these instructions to create a festive piece that will add charm to your table.
- Cutting Your Fabric Pieces
Start by cutting your fabric into square or rectangular pieces. You can use a 4-inch by 4-inch square or adjust the size based on how large you want each patch to be. Cutting your fabric with a rotary cutter ensures clean, precise edges for your patchwork design. - Arranging the Pieces
Once your fabric is cut, lay out the pieces in a pattern that you like. Try alternating between different colors and prints to create a balanced look. Play around with the arrangement until you find something that looks good to you. This is the fun part, so get creative! - Sewing the Rows Together
Once you’ve arranged your pieces, start sewing them into rows. Begin by placing two fabric pieces right sides together and sewing along the edge. Use a ¼-inch seam allowance to ensure your patches line up properly. Continue sewing pieces together until you’ve completed each row. - Joining the Rows
After all your rows are sewn, it’s time to sew the rows together. Align the seams of each row and pin them in place. Sew each row to the next, using a ¼-inch seam allowance to keep everything even. Once all the rows are joined, you’ll have the main patchwork section of your table runner. - Attaching the Quilt Batting
Next, place your patchwork fabric on top of the quilt batting. The batting will give your table runner a soft, padded feel. Pin or baste the layers together, ensuring they stay in place while you sew. - Quilting the Table Runner
To add texture and keep the layers secure, quilt your table runner. You can quilt in a straight line, create a grid pattern, or even do free-motion quilting for a more personalized look. Use a quilting stitch that complements the overall design and adds visual interest.
3. Adding the Finishing Touches to Your Patchwork Christmas Table Runner
Once the main construction of your Patchwork Christmas Table Runner is complete, it’s time to add the finishing touches that will give your table runner a polished, professional look. Here’s what to do next:
- Trimming the Edges
Use a rotary cutter to trim any excess fabric from the edges of the table runner. This step will help even out the edges and create a clean finish. Make sure to trim carefully to avoid cutting into your quilted sections. - Adding the Binding
To finish the edges of your table runner, you’ll need to add binding. Cut strips of fabric that are approximately 2.5 inches wide. Attach the binding around the edges of the table runner, folding it over and sewing it into place. This will give your table runner a clean and finished look. - Pressing the Table Runner
After the binding is attached, press the table runner with an iron. Pressing helps set the seams and makes your project look crisp and polished. Be sure to press gently, especially if you’ve used delicate fabrics. - Decorating the Table Runner
If desired, you can add extra embellishments like embroidered designs, buttons, or appliqué to further enhance the holiday theme. This is where you can get creative and add a personal touch to your patchwork Christmas table runner. - Adding a Label
For a professional touch, consider adding a small label to your table runner. This can be a cute holiday-themed label or your own custom label with your name and the date the project was completed. - Displaying Your Table Runner
Once your Patchwork Christmas Table Runner is complete, it’s time to display it! Place it in the center of your dining table or on a side table to add a festive touch to your home. It will be the perfect centerpiece for your holiday meals and gatherings.
4. Tips and Tricks for a Successful Patchwork Christmas Table Runner
Creating a Patchwork Christmas Table Runner can be a fun and rewarding project, but there are a few tips and tricks that can help ensure your success:
- Use Quality Fabrics
The quality of your fabric will make a significant difference in the finished look of your table runner. Choose fabrics that are durable and easy to work with. - Measure Twice, Cut Once
Make sure to measure your fabric pieces carefully before cutting. Accurate measurements will help ensure that your patchwork pieces fit together perfectly. - Experiment with Colors
Don’t be afraid to mix and match different colors and prints. A good balance of patterns and solids will give your table runner an interesting and festive look. - Practice Your Quilting Stitches
If you’re new to quilting, practice your stitching on a scrap piece of fabric before quilting the table runner. This will help you gain confidence and ensure your quilting is even. - Add Personal Touches
Consider adding personalized touches like embroidered names, holiday motifs, or a unique color scheme to make your table runner truly one-of-a-kind. - Take Your Time
Patchwork quilting requires patience, especially if you’re new to the craft. Don’t rush through the process – take your time and enjoy the creative journey.
FAQ
1. How long will it take to make a patchwork Christmas table runner?
On average, it can take anywhere from 4 to 8 hours to complete the table runner, depending on your skill level and the complexity of the design.
2. Can I adjust the size of the table runner?
Yes! You can easily adjust the size of the table runner by increasing or decreasing the number of fabric pieces and the overall length.
3. What fabrics are best for making a patchwork Christmas table runner?
Cotton fabrics are ideal for quilting projects, as they are easy to work with and come in a wide variety of patterns and colors.
4. Do I need a special sewing machine for this project?
No special sewing machine is required, but a machine with a straight stitch setting is necessary for piecing together the patches.
5. Can I make a patchwork runner without a quilt batting?
Yes, you can skip the quilt batting if you prefer a thinner table runner, but using batting adds a nice, padded texture.
6. What if I’m a beginner at quilting?
This project is beginner-friendly! Take your time, follow the steps, and don’t hesitate to ask for help if needed.
Join our VIP broadcast list and gain access to exclusive patterns, all for free. As a VIP member, you’ll receive the best patterns daily, delivered directly to your device. ✨📱 It’s a unique opportunity to stay up-to-date with the latest trends and designs, curated just for you. Don’t miss out on enhancing your projects and discovering new inspirations with the best patterns every day! 🎨🔝
Conclusion
In this article, we walked through the process of creating a Patchwork Christmas Table Runner using a Free Pattern. We covered everything from selecting fabrics to quilting and finishing touches. Whether you’re a beginner or an experienced quilter, this project offers endless opportunities for creativity and will add a festive touch to your holiday decor.
We hope you enjoyed this tutorial and feel inspired to make your own patchwork table runner. If you have any feedback or suggestions, feel free to share them in the comments. We’d love to hear about your experiences and see your beautiful creations!


