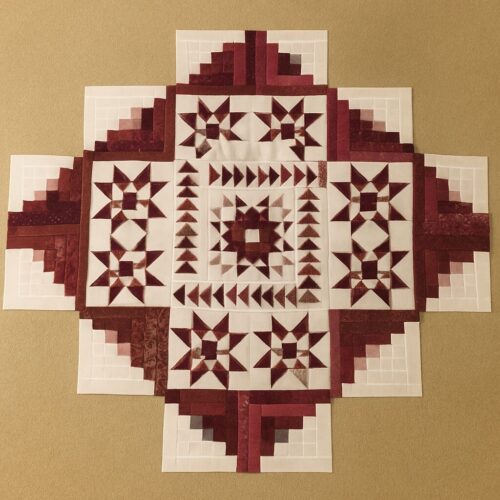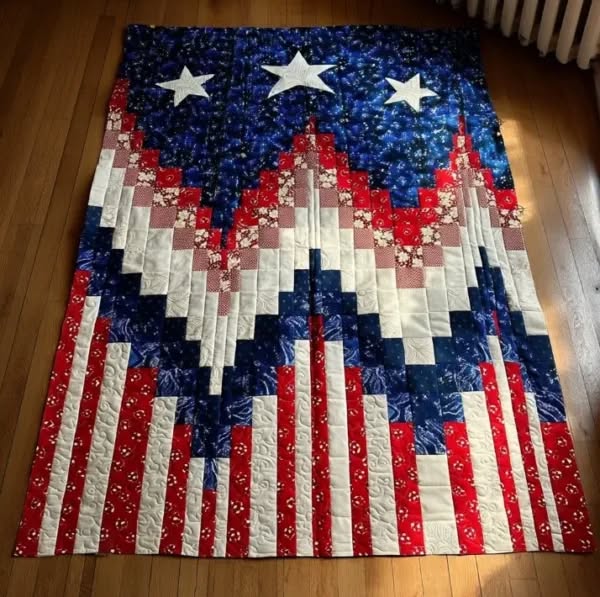
Joyful Radiance - Quilt Pattern

If you’re looking for a fun and timeless quilt project, this Quilt Block Tutorial: Red & White Checkerboard Frame is the perfect place to start. Whether you’re a beginner or an experienced quilter, the bold contrast and clean geometry of the red and white checkerboard design bring instant charm to any quilt.
This pattern is not only easy to follow but also ideal for creating eye-catching borders or centerpiece blocks.
The Quilt Block Tutorial: Red & White Checkerboard Frame is based on classic color contrast and symmetry. Red and white have been paired in quilting traditions for centuries, evoking both vintage aesthetics and modern minimalism.
The checkerboard pattern is especially loved for its versatility—use it in baby quilts, table runners, wall hangings, or full-sized bed quilts. And best of all, this project uses simple squares and half-square triangles, making it beginner-friendly.
This tutorial walks you through each step of creating your own red & white checkerboard frame quilt block, including fabric selection, cutting, assembling, and final touches. Along the way, we’ll focus on clean construction and tips for accurate piecing. By the end of this article, you’ll have not just a finished block, but also a strong understanding of how to incorporate it into a full quilt layout. Let’s begin crafting your next heirloom.
To make your Quilt Block Tutorial: Red & White Checkerboard Frame a smooth experience, gather your materials before you start. You’ll need quilting cotton in red and white, a rotary cutter, cutting mat, quilting ruler, thread, and an iron. It’s best to choose high-quality cotton for both contrast and durability.
Start with pre-washed and pressed fabric to ensure your blocks don’t shrink unevenly after the quilt is completed. For each block, you’ll cut equal amounts of 2.5-inch squares in red and white. You can also use charm squares or jelly rolls to speed up the process if you have those on hand.
The rotary cutter and ruler combo is key for accuracy. Clean cuts make clean seams. A consistent 1/4” seam allowance throughout the project will ensure all your blocks align perfectly. Using a sewing machine with a 1/4” foot can help you achieve that precision.
A small iron or seam roller near your sewing area can help speed things up, as pressing between steps keeps seams flat and accurate. Remember: pressing, not ironing, is the quilting mantra—move your iron gently to avoid warping the fabric.
Have a design wall or large space where you can lay out your pieces before sewing. This allows you to see the checkerboard pattern come to life and adjust placement before final assembly. It also helps with planning multiple blocks in a quilt layout.
A fine-point fabric marking pen can help when making half-square triangles. Marking diagonal lines on white squares before sewing them to red ones will give you a visual guide for perfect points. These simple tools can make a huge difference in the finished look.
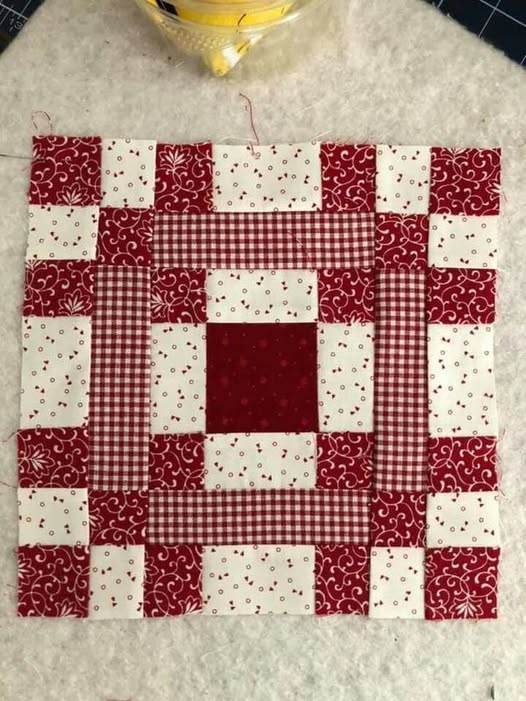
The key to a successful Quilt Block Tutorial: Red & White Checkerboard Frame is precise cutting and preparation. Start by cutting your red and white fabrics into 2.5” x 2.5” squares. For one block, you’ll need 16 red squares and 16 white squares to create the central checkerboard.
If you’re planning on making multiple blocks, it’s a great idea to stack your fabrics and cut them together using a sharp rotary blade. This saves time and ensures uniformity. Lay your squares out in a checkerboard formation—red, white, red, white—alternating each row.
To maintain this pattern, always start each new row with the opposite color of the square above it. This consistent alternation is what gives the block its checkerboard effect. You can pin rows together to keep the sequence correct while sewing.
Chain piecing is your best friend here. Sew the squares into rows without cutting the thread between each pair. Once your rows are completed, press seams in alternating directions—one row to the left, the next to the right. This will help seams nest perfectly.
Once your rows are pressed, sew them together, aligning the seams carefully. Nesting seams reduce bulk and create a smoother finish. Pin each intersection to avoid slipping while sewing. This step is key for achieving sharp corners in the checkerboard design.
Give the finished checkerboard center a good press, making sure everything lies flat. It should measure 8.5” x 8.5” before adding the frame. Double-check the measurements before moving on—you want all blocks to align perfectly in your final quilt.
The framed look in the Quilt Block Tutorial: Red & White Checkerboard Frame adds visual interest and allows your central checkerboard to stand out. You’ll need red and white strips for the frame, and we’ll be using the same 2.5” strip width for consistency.
Begin by cutting two red and two white strips measuring 8.5” x 2.5” for the inner frame sides, and two red and two white strips measuring 12.5” x 2.5” for the top and bottom. Alternate red and white to continue the checkerboard feel in a more subtle way.
Attach the side strips first. Lay one red and one white strip on opposite sides of the checkerboard center and sew using a 1/4” seam. Press seams toward the border. Repeat for the remaining two side strips. Now your block is beginning to look framed.
Next, add the top and bottom strips. These longer strips will expand the visual impact of the block. Again, use opposing red and white colors to keep balance. Sew these strips, press seams outward, and admire your beautifully framed checkerboard.
To ensure your quilt block remains square, measure the block diagonally after each step. Small errors can accumulate, so it’s best to fix them early. If necessary, trim very slightly to square the edges after the frame is attached.
You now have a completed Red & White Checkerboard Frame quilt block measuring approximately 12.5” square. This versatile block can be repeated, rotated, or alternated with solid blocks to create a stunning full-size quilt top.
Once you master the Quilt Block Tutorial: Red & White Checkerboard Frame, the design possibilities are endless. Use these blocks alone for a minimalist aesthetic, or alternate them with star blocks, log cabins, or simple sashing strips.
For a classic look, consider creating an entire quilt using just the checkerboard frame blocks. Rotate every other block for a diagonal flow that adds movement. This layout is perfect for bed quilts and gives a cohesive, traditional feel.
You can also use these blocks as borders or cornerstones around a larger central motif. Imagine a quilt with appliqué or embroidery in the center, framed by these bold red and white blocks—perfectly balanced and eye-catching.
If you’re feeling adventurous, try using scrappy reds with a single white fabric for a more textured, modern quilt. The mix of red patterns will add personality, while the white checker pieces unify the look. This style works well for stash-busting projects.
Another option is to set the blocks on point, turning the checkerboard frames into diamond shapes across the quilt. This adds a dynamic twist and can be softened with wide sashing in a neutral color to let the blocks shine.
No matter how you arrange them, these blocks work well with quilting motifs like loops, crosshatch, or feathers. The geometry of the checkerboard pairs beautifully with both simple and ornate quilting designs, making it an adaptable choice for every skill level.
What size is the finished Red & White Checkerboard Frame quilt block?
The finished block measures approximately 12.5 inches square, which becomes 12 inches after being sewn into a quilt top.
Can I make this block in other colors?
Absolutely! While red and white give it a bold, classic look, you can substitute any contrasting colors—navy and cream, black and white, or even seasonal hues.
Is this block beginner-friendly?
Yes, this pattern is ideal for beginners. It uses basic squares and straight seams, with a focus on accurate cutting and piecing.
How many blocks do I need for a full quilt?
That depends on the size of the quilt. For a 60” x 72” throw quilt, you’d need 30 blocks (5 across by 6 down) using 12” finished blocks.
Do I need special tools for this tutorial?
No special tools are required, but a rotary cutter, ruler, and cutting mat will improve accuracy. A 1/4” foot on your sewing machine is helpful for consistent seams.
How should I quilt the finished top?
You can use straight-line quilting to emphasize the geometry or go with free-motion designs for contrast. Even simple stitch-in-the-ditch quilting works beautifully with this pattern.
This Quilt Block Tutorial: Red & White Checkerboard Frame teaches you how to create a beautiful, timeless quilt block that combines bold color with classic design. You’ve learned how to cut, piece, and frame the checkerboard block, as well as explored ideas for layouts and creative variations.
With just a few basic supplies and a love for quilting, you can turn simple squares into stunning quilt projects that are perfect for gifts, decor, or personal keepsakes. The red and white combination never goes out of style, and this framed block offers endless possibilities.
If you enjoyed this tutorial or have any tips and ideas of your own, we’d love to hear from you! Please leave a sincere comment below with your feedback or suggestions for future patterns. Happy quilting!