
Pie Carrier Sewing Pattern

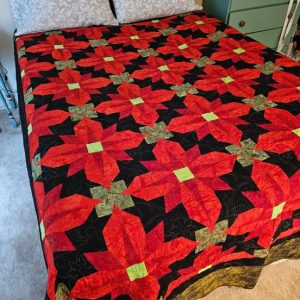
The art of quilting is a timeless craft that brings together creativity, precision, and passion. In this Quilt by Tori Harmon Ellis – TUTORIAL, we explore the techniques and inspiration behind a stunning quilt design.
Whether you’re a seasoned quilter or a beginner, this guide offers valuable insights and practical steps to create a masterpiece inspired by Tori Harmon Ellis’s distinctive style.
Quilting is more than just stitching fabrics together; it’s about telling a story through patterns, colors, and textures.
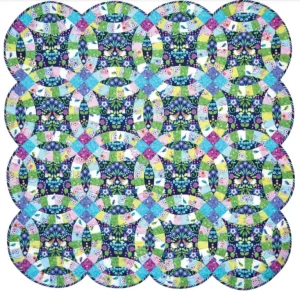
Tori Harmon Ellis is celebrated for her ability to combine modern and traditional elements, creating quilts that are both functional and artistic.
By following this tutorial, you’ll learn how to replicate her techniques and infuse your unique touch into the project.
Let’s dive into the process of crafting a quilt inspired by Tori Harmon Ellis. From selecting materials to mastering the stitches, this guide has everything you need to know.
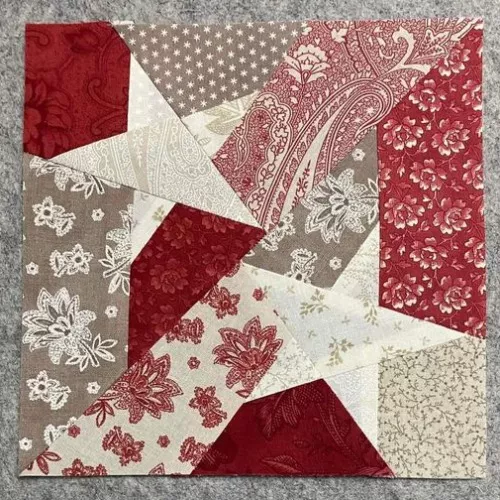
Before beginning your quilt project, it’s essential to understand the hallmark style of Tori Harmon Ellis.
Understanding these elements will help you channel her artistic vision into your own quilt.
Choosing the right materials is crucial for a successful quilting project inspired by Tori Harmon Ellis.
With the right materials at hand, you’re ready to start piecing together your quilt.
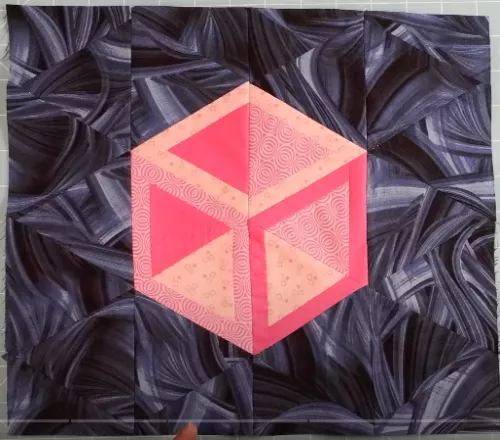
The quilt top is the most prominent part of your project and reflects the design inspired by Tori Harmon Ellis.
This step sets the foundation for the remaining stages of your quilt.
Finishing touches transform your quilt into a polished masterpiece.
Completing these steps brings your Quilt by Tori Harmon Ellis to life, showcasing your dedication and creativity.
1. What is the best fabric for quilting?
Cotton is the most popular choice for quilting due to its durability, ease of use, and variety of patterns available.
2. Can beginners make a quilt like Tori Harmon Ellis’s designs?
Yes! By starting with simpler patterns and following tutorials, beginners can create beautiful quilts inspired by Tori’s style.
3. How long does it take to complete a quilt?
The time required depends on the complexity of the design and the quilter’s skill level. It can range from a few days to several weeks.
4. Do I need a sewing machine to quilt?
While a sewing machine speeds up the process, hand quilting is also a viable and traditional method.
5. How do I choose a color scheme for my quilt?
Consider the purpose of the quilt and the recipient’s preferences. Use a color wheel to find complementary or harmonious colors.
6. What is the purpose of quilt batting?
Batting provides insulation, thickness, and structure to the quilt, making it functional and cozy.
Join our VIP broadcast list and gain access to exclusive patterns, all for free. As a VIP member, you’ll receive the best patterns daily, delivered directly to your device. ✨📱 It’s a unique opportunity to stay up-to-date with the latest trends and designs, curated just for you. Don’t miss out on enhancing your projects and discovering new inspirations with the best patterns every day! 🎨🔝
Creating a Quilt by Tori Harmon Ellis is a fulfilling journey that combines artistry with craftsmanship. By following this tutorial, you’ll gain the skills and confidence to produce a quilt that’s both beautiful and meaningful.
We’d love to hear about your quilting experience! Share your thoughts, suggestions, and photos of your creations in the comments. Happy quilting!


