The Ribbon Dance Quilt – Tutorial is a beautiful and vibrant quilt design that captures the elegance of flowing ribbons in motion.
With its dynamic layout and a combination of bright, colorful fabrics, this quilt brings energy and charm to any room.
Whether you’re a seasoned quilter or a beginner, this tutorial will guide you through each step of the process, making it simple and enjoyable to create your own Ribbon Dance Quilt.
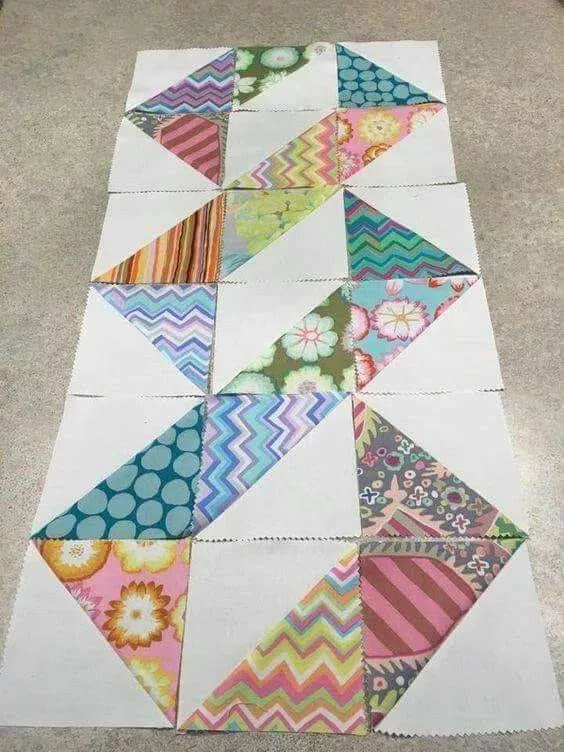
Image from Google.
The beauty of the Ribbon Dance Quilt lies in its ability to look both intricate and simple at the same time.
SEE MORE PATTERNS
The swirling ribbons are made with basic piecing techniques, but when arranged in the final pattern, they create a lively and eye-catching design.
This quilt can be customized to suit any occasion or personal style by simply adjusting the fabric choices. It’s a fantastic project for anyone looking to add a personal touch to their quilt collection.
In this article, we will break down the steps for making your very own Ribbon Dance Quilt. From choosing the right fabrics to assembling the quilt top, we’ll cover it all, so you can confidently create this stunning piece.
1. Materials Needed for the Ribbon Dance Quilt
Before diving into the Ribbon Dance Quilt – Tutorial, it’s essential to gather all the necessary materials to ensure a smooth quilting process.
- Fabric Selection
Choosing the right fabric is one of the most important steps in creating a Ribbon Dance Quilt. You’ll need fabric for the ribbon design, the background, and borders. For the ribbons, vibrant colors like red, yellow, and blue work well to create a dynamic contrast against a neutral background. You can also choose solid or patterned fabrics depending on your aesthetic preferences.
- Quilt Batting
Quilt batting adds thickness and warmth to your quilt. Choose a batting that is suitable for the intended use of your quilt, whether for decorative or functional purposes. Cotton batting is a great all-purpose choice.
- Quilt Backing Fabric
The backing fabric will cover the back of your quilt. For a balanced look, choose a fabric that complements the ribbon design. You can go for a solid color or a print that ties in with your quilt’s overall theme.
- Rotary Cutter and Ruler
To ensure precision, you’ll need a rotary cutter and quilting ruler to cut your fabric. These tools will allow you to cut the fabric into the necessary shapes with straight lines, ensuring your quilt pieces align perfectly.
- Thread and Needle
Opt for quilting thread that complements your fabric choices. Cotton thread is the best choice for most quilting projects. A quilting needle is also essential, as it helps prevent damage to the fabric.
- Iron and Ironing Board
An iron and ironing board are critical tools in quilting. Press your seams as you go to keep the quilt pieces flat and ensure accuracy in piecing. Ironing will also help give your quilt a professional finish.
Now that you have all the materials needed, let’s begin creating your Ribbon Dance Quilt!
2. Step-by-Step Instructions for the Ribbon Dance Quilt
Once you have your materials ready, it’s time to start assembling your Ribbon Dance Quilt. This section will guide you through the process, step by step.
- Cutting the Fabric
The first step is to cut the fabric into the required pieces. Start by cutting strips for the ribbons. For this pattern, you’ll need to cut several long strips in varying widths to create the ribbons. The background fabric will be cut into squares or rectangles, depending on your design. Be sure to measure carefully to ensure your pieces fit together correctly.
- Piecing the Ribbon Blocks
Begin by piecing together the ribbon strips. Arrange the fabric strips in a way that mimics the flow of a ribbon. Sew the strips together using a quarter-inch seam allowance. Take your time to ensure that the strips are aligned, as this will affect the final design.
- Assembling the Quilt Top
Once you have completed the ribbon blocks, start arranging them on your design wall or a flat surface. Experiment with different layouts before you begin sewing them together. When you’re happy with the arrangement, sew the blocks together to form the quilt top. Make sure the seams are pressed flat to prevent puckering.
- Adding the Borders
After completing the quilt top, add borders to frame the quilt and give it a finished look. Cut the border fabric into strips, then sew them to the edges of the quilt top. The width of the border can vary depending on your preference, but a typical border width is around 4-6 inches.
- Preparing the Quilt Sandwich
Next, it’s time to prepare the quilt sandwich. Lay the backing fabric on a flat surface, then place the quilt batting on top. Finally, place the quilt top on the batting, making sure all layers are aligned. Pin or baste the layers together to hold them in place while you quilt.
- Quilting the Layers Together
Now, you can begin quilting your Ribbon Dance Quilt. Whether you choose to machine quilt or hand quilt, quilting will hold the layers together and add texture to the quilt. For machine quilting, you can use straight lines, zigzags, or even a free-motion quilting design to enhance the ribbon movement. Hand quilting can add a more personal touch, and you can experiment with quilting patterns that echo the ribbons.
3. Tips for Perfecting Your Ribbon Dance Quilt
To make your Ribbon Dance Quilt even more stunning, here are some helpful tips to keep in mind as you work through the tutorial:
- Use a Design Wall for Layout
A design wall is an invaluable tool when arranging quilt blocks. It allows you to step back and view the entire quilt before sewing the pieces together. This way, you can ensure that your ribbon blocks flow naturally and are placed symmetrically.
- Cut Fabric Carefully
Accurate cutting is crucial in quilting, especially when creating the ribbon effect. Use a rotary cutter and ruler to cut your fabric into precise strips and pieces. Consistency in your cutting will result in a quilt that’s neat and professional-looking.
- Press as You Go
Pressing your seams as you go will ensure that your quilt top remains flat and smooth. It’s easy to skip this step, but pressing is essential for achieving crisp seams and making the piecing process easier.
- Choose the Right Fabrics
The fabric you choose can make or break your Ribbon Dance Quilt. Opt for fabrics that contrast well with each other to make the ribbons pop. Avoid fabrics that are too similar in color or pattern, as they may make the design look flat.
- Don’t Rush the Quilting
The quilting process is where your quilt comes to life. Whether you machine quilt or hand quilt, take your time and enjoy the process. The more attention you pay to the details, the more beautiful your finished quilt will be.
- Add Embellishments for Extra Flair
If you want to make your Ribbon Dance Quilt even more unique, consider adding embellishments like embroidery, applique, or decorative stitching. These additions can enhance the ribbon design and make your quilt stand out.
4. Creative Variations of the Ribbon Dance Quilt
While the Ribbon Dance Quilt looks beautiful as it is, there are plenty of ways to get creative and make the pattern your own.
- Play with Color Combinations
Experiment with different color schemes to create a quilt that suits your style. You could go for a modern, monochromatic look with shades of gray or a vibrant, rainbow-colored quilt that captures the energy of a dance.
- Incorporate Different Fabric Textures
Mixing fabrics with different textures, such as velvet or linen, can add depth and interest to your quilt. Experiment with different fabric types to see how they affect the overall look.
- Create a Mini Quilt
If you’re short on time or want to make a smaller project, consider creating a mini Ribbon Dance Quilt. This can be a great way to test out the design before committing to a larger quilt.
- Add Applique Shapes
For an extra creative touch, add applique shapes to your Ribbon Dance Quilt. You could include stars, flowers, or other symbols that tie into the ribbon theme.
- Use Quilting for Detail
Try adding intricate quilting patterns inside the ribbon blocks or borders to add texture and detail. Free-motion quilting or echo quilting are great options for adding interest to your design.
- Change the Quilt’s Shape
While this tutorial follows a standard rectangular design, feel free to experiment with different shapes for your quilt. You could make a square quilt, or even a wall hanging, to fit your specific needs.
FAQ
1. Is the Ribbon Dance Quilt suitable for beginners?
Yes! While it may take some time to master the piecing and quilting techniques, beginners can definitely create a Ribbon Dance Quilt with some patience and attention to detail.
2. How do I choose the right fabric for the ribbons?
For the ribbons, choose vibrant, contrasting fabrics that will stand out against the background. Bold, solid colors or geometric patterns work well for this design.
3. Can I use pre-cut fabric for this project?
Absolutely! Pre-cut fabric like jelly rolls or charm squares can save time and make cutting easier. Just ensure that the pieces are the correct size for your pattern.
4. How do I quilt the layers together?
You can machine quilt or hand quilt the layers together. For machine quilting, try straight lines or free-motion quilting for a fun effect. Hand quilting adds a personal touch and can make the quilt feel even more special.
5. What is the best way to finish the edges?
Once you’ve quilted your layers together, bind the edges with a fabric that complements the quilt design. You can use a traditional binding or make a folded-edge finish for a cleaner look.
6. How can I make this quilt larger or smaller?
To adjust the size of your quilt, simply add or subtract blocks to fit your desired dimensions. You can also adjust the border size if you want to change the overall shape.
Join our VIP broadcast list and gain access to exclusive patterns, all for free. As a VIP member, you’ll receive the best patterns daily, delivered directly to your device. ✨📱 It’s a unique opportunity to stay up-to-date with the latest trends and designs, curated just for you. Don’t miss out on enhancing your projects and discovering new inspirations with the best patterns every day! 🎨🔝
JOIN NOW
Conclusion
Creating the Ribbon Dance Quilt is an enjoyable and rewarding process. With its flowing ribbons and vibrant design, this quilt is sure to be a standout piece in any home. By following the steps in this tutorial, you’ll be able to craft a beautiful quilt that showcases your creativity and quilting skills.
PATTERN HERE
Remember, quilting is all about enjoying the process and adding your personal touch to the design. We hope this tutorial has inspired you to start your own Ribbon Dance Quilt! Please leave your thoughts and suggestions in the comments below, and let us know how your project turned out. Happy quilting!


