
Pie Carrier Sewing Pattern

If you’re looking to add a touch of charm to your Christmas tree this year, Santa Log Cabin Ornaments are a perfect DIY project.
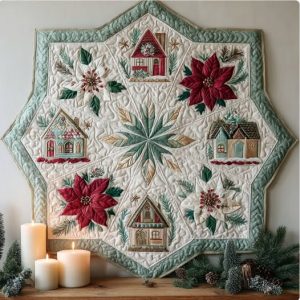
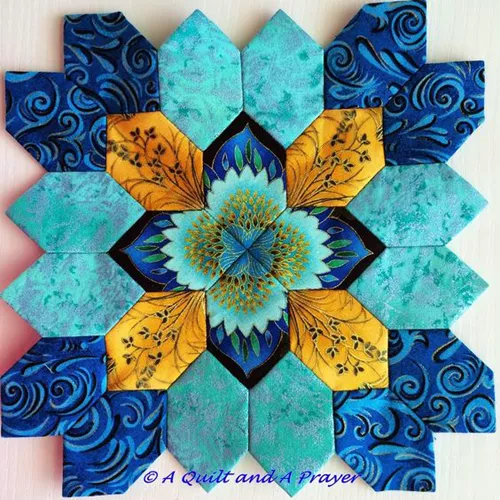
These unique and festive decorations are inspired by the log cabin quilt pattern, giving a traditional and rustic feel to your holiday decor.
With this tutorial, you can create handmade ornaments that are not only beautiful but also meaningful, as they reflect the effort and love you put into making them.
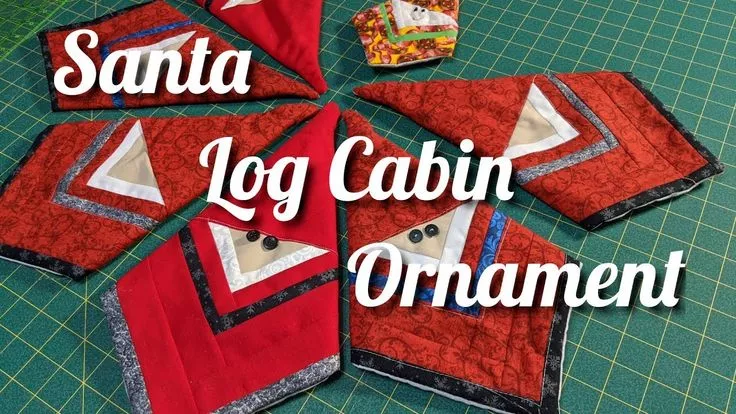
Image from google.
Using simple materials and techniques, you can craft these Santa Log Cabin Ornaments with ease.
They’re an excellent way to repurpose fabric scraps, making them both eco-friendly and budget-conscious. These ornaments can be customized to fit your preferred color scheme, making them versatile enough to match any holiday aesthetic.
In this article, we’ll guide you step-by-step through creating your own Santa Log Cabin Ornaments, ensuring the process is straightforward and enjoyable.
Whether you’re a seasoned crafter or just starting, this project is a delightful way to embrace the holiday spirit. Let’s dive into the tutorial and start crafting!
Before starting your Santa Log Cabin Ornaments, gather the following materials to ensure a smooth crafting process. Having everything ready will make it easier to focus on the creative aspects of this project.
Choose fabrics in festive colors like red, green, white, and gold. Cotton or quilting fabrics work best because they are easy to handle and durable.
You can use a sewing machine for a quicker process or a needle and thread if you prefer hand-stitching.
A rotary cutter is ideal for cutting precise strips of fabric, while a cutting mat protects your surface and provides measurement guidelines.
A ruler is essential for ensuring accurate measurements when cutting and assembling your log cabin pattern.
Select a strong thread that matches or complements your fabric colors.
You’ll need a small piece of batting or felt to give your ornaments a soft, padded look.
Use ribbon or twine to create a loop for hanging your ornament. Choose a color that matches the festive theme of your project.
The log cabin pattern relies on precise cutting and placement of fabric strips. This section will guide you through preparing your materials for assembly.
Pick out the fabrics you want to use for the ornament. For a Santa-inspired look, choose red and white fabrics for his suit and hat, along with black and gold for his belt and buckle.
Using your rotary cutter and ruler, cut fabric strips into widths of approximately 1 inch. The lengths will vary depending on the size of your ornament, but aim for strips between 3 and 6 inches long.
The center of a log cabin pattern is traditionally a square. Cut a small red square (about 2 inches by 2 inches) to represent Santa’s coat.
Lay out the fabric strips in the order you’ll sew them onto the center square. This step helps visualize the pattern and ensures the colors are balanced.
Cut a small piece of batting or felt slightly larger than the finished size of your ornament. This will serve as the base and provide padding.
Cut a piece of ribbon or twine about 6 inches long and set it aside for later use.
Now that your materials are ready, it’s time to assemble the Santa Log Cabin Ornaments.
Place the first fabric strip along one edge of the center square. Sew it in place using a ¼-inch seam allowance.
After sewing, press the seam flat with an iron to ensure the fabric lies smoothly.
Repeat the process, adding fabric strips clockwise around the center square. Each new strip should overlap the previous one, forming a spiral pattern.
After completing each round of fabric strips, trim any excess to maintain a neat, square shape.
Place the assembled log cabin block onto the batting or felt, aligning the edges. Sew around the perimeter to secure them together.
Fold the ribbon or twine into a loop and sew it securely to the top of the ornament.
Adding decorative elements to your Santa Log Cabin Ornaments can enhance their festive appeal. Here are a few ideas:
Use embroidery thread to stitch small details, such as Santa’s buttons or snowflakes.
Sew on beads or sequins to add a touch of sparkle to your ornaments.
Use fabric paint to draw additional details like Santa’s face or a festive greeting.
Attach a small fringe or lace trim to the edges of the ornament for a more decorative finish.
Consider adding initials or a year to the ornament using embroidery or fabric paint.
If you’re gifting these ornaments, attach a small tag with a holiday message.
Q: Can beginners make these ornaments?
A: Yes! The tutorial is beginner-friendly, and the log cabin pattern is easy to follow with basic sewing skills.
Q: Can I use glue instead of sewing?
A: While sewing provides a more durable finish, fabric glue can be used as an alternative for a no-sew version.
Q: How long does it take to make one ornament?
A: Each ornament takes about 30–45 minutes, depending on your experience level and complexity of the design.
Q: Can I wash these ornaments?
A: Handwashing is recommended to preserve the shape and decoration of the ornaments.
Q: What other themes can I use?
A: You can adapt this tutorial to create ornaments with other themes, such as snowflakes, reindeer, or stars.
Q: Where can I display these ornaments?
A: These ornaments are perfect for Christmas trees, wreaths, or as part of a holiday centerpiece.
Join our VIP broadcast list and gain access to exclusive patterns, all for free. As a VIP member, you’ll receive the best patterns daily, delivered directly to your device. ✨📱 It’s a unique opportunity to stay up-to-date with the latest trends and designs, curated just for you. Don’t miss out on enhancing your projects and discovering new inspirations with the best patterns every day! 🎨🔝
Santa Log Cabin Ornaments are a delightful DIY project that brings warmth and creativity to your holiday decor. This tutorial provides easy-to-follow steps to craft unique ornaments using the log cabin pattern. With a little time and effort, you can create decorations that add a personal touch to your festive celebrations.
We hope you enjoyed this tutorial! Please share your thoughts and suggestions in the comments below. We’d love to hear how your ornaments turned out and any creative ideas you have for personalizing them. Happy crafting!


