
Creating your own scissors case is a great way to keep your tools organized and protected, whether you’re a crafter, sewer, or professional.
The scissors case tutorial you’re about to explore will provide you with all the steps to make a stylish and functional case that fits your needs.
Whether you’re storing small embroidery scissors or larger fabric shears, this tutorial will show you how to create a custom-fit case that is both practical and aesthetically pleasing.
In this scissors case tutorial, we will cover everything from selecting the right fabric to sewing the case together. We’ll guide you step-by-step, making sure that even beginners can follow along and create their own case with ease.
You’ll also learn some helpful tips on how to customize the case to suit your personal preferences, whether you want a simple design or something more intricate.
Before diving into the instructions, it’s important to note that the scissors case you’ll be making is not just a protective cover; it’s also an accessory that can be personalized in terms of size, color, and style.
So, whether you’re making a case for your own tools or as a gift for someone else, this project offers plenty of room for creativity. Let’s begin the journey to making your own scissors case!
1. Choosing the Right Materials for Your Scissors Case
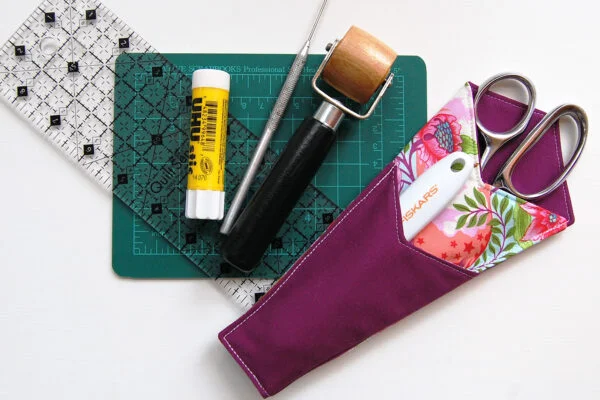
The first step in creating a perfect scissors case is selecting the right materials. The fabric you choose will not only determine the look of your case but also its durability. A sturdy fabric like cotton or canvas works well for most cases, as it provides enough structure to hold the scissors securely. However, you can also opt for a softer fabric if you prefer a more flexible case.
You’ll also need to select some padding to protect your scissors. For this, a layer of quilt batting or fusible fleece is ideal because it adds some cushioning without making the case too bulky. This extra layer ensures that your scissors are safely tucked away, preventing any accidental cuts or damage while also giving the case a slightly padded feel.
When choosing fabric for the outer layer of your case, consider the aesthetic you want to achieve. A bright, bold print can make your scissors case a fun and lively accessory, while a more neutral tone can give the case a sleek, minimalist look. You can also mix and match fabrics for a more eclectic style, using a fun print for the outside and a solid color for the lining.
In addition to the fabric, you’ll need thread that complements your materials. Opt for a strong, durable thread, especially if you are working with thick fabrics like canvas. Don’t forget to grab a sewing needle appropriate for the fabric you’ve chosen. A sharp needle is important to ensure smooth stitching, especially when working with thicker materials.
Lastly, decide if you want to add extra features like pockets, zippers, or embellishments. Adding a pocket to your scissors case can be a great way to store small tools like seam rippers, fabric markers, or pins. A zipper will help keep your scissors secure, while embellishments like embroidery or fabric paint can make your case uniquely yours.
2. Measuring and Cutting Fabric for Your Scissors Case
Once you’ve gathered all your materials, it’s time to measure and cut the fabric for your scissors case. Accurate measurements are key to ensuring that the case fits your scissors perfectly and provides adequate protection.
Begin by measuring your scissors to determine the ideal size for the case. For example, if you’re making a case for a pair of fabric shears, measure the length of the blades and the width of the handle. Add about 1 inch to each side to allow for seam allowances and to ensure that the case isn’t too tight. For smaller scissors, such as embroidery scissors, you can reduce the measurements accordingly.
After you’ve measured your scissors, use a ruler and fabric marking tool to draw out the dimensions on your fabric. Cut out the outer fabric, lining fabric, and padding according to these measurements. Be sure to cut the outer fabric and lining fabric the same size, and cut the padding slightly smaller to avoid excess bulk along the edges.
If you want to add a pocket to your scissors case, cut an additional piece of fabric for the pocket. The pocket should be big enough to hold smaller tools but not so large that it takes up too much space inside the case. A simple rectangular or square shape will work fine for a basic pocket.
Make sure all your pieces are neatly cut and that the edges are straight. If you’re using fabric with a directional print, such as stripes or florals, be mindful of how you position the fabric pieces to ensure the pattern aligns correctly. Once all the pieces are cut, you’re ready to begin the assembly process.
3. Assembling the Scissors Case
Now that your fabric pieces are ready, it’s time to start assembling your scissors case. This process involves stitching the fabric together, adding the padding, and incorporating any extra features you want to include.
Start by laying the outer fabric face up, then place the padding on top of it. The padding should be slightly smaller than the fabric to ensure a clean edge. Next, lay the lining fabric on top of the padding, making sure that all the pieces are aligned properly.
Pin the layers together and sew around the edges, leaving a small gap to turn the case right side out. This gap will allow you to flip the case inside out, so be sure not to stitch all the way around. Once you’ve sewn the case, carefully trim the corners to reduce bulk, then turn the case right side out through the opening.
After turning the case inside out, press the seams with an iron to flatten them. Be gentle with the ironing to avoid damaging the fabric, especially if you’re using delicate materials. Once the case is neatly pressed, sew the gap closed by hand or machine, making sure the stitches are neat and secure.
At this point, you can also add any additional features, such as a pocket. To add a pocket, simply fold the edges of the pocket fabric and stitch it onto the lining side of the case before the final sewing step. You can place the pocket anywhere that feels most functional, such as on the inside or on the back of the case.
4. Personalizing Your Scissors Case
One of the best parts of making a scissors case is the opportunity to personalize it to suit your style and needs. Whether you prefer a simple, functional case or one with extra features, there are plenty of ways to customize your design.
To make your case stand out, consider adding some decorative elements, such as embroidery, appliqué, or fabric paint. You can embroider your initials, a favorite pattern, or a fun design on the front of the case to make it unique. Fabric paint is another great option if you want to add a pop of color or create a one-of-a-kind design.
If you’d like to make your scissors case more functional, consider adding a zipper closure to keep your tools secure. To do this, simply sew a zipper along the top edge of the case before sewing the final seams. Zippers are great for keeping the case tightly closed, especially if you plan to store other tools or accessories along with your scissors.
Another way to personalize your case is by using contrasting or complementary fabrics for the outer and inner layers. You could use a patterned fabric for the outer shell and a solid color for the lining. This contrast not only looks great but also makes it easier to find your scissors inside the case.
For an extra touch of elegance, consider adding a small label or tag to your case. This could be a fabric tag with your name or a handmade label, giving your scissors case a more polished and professional look.
FAQ: Frequently Asked Questions
1. What size should I make my scissors case?
The size of your scissors case will depend on the type of scissors you want to store. Measure the length and width of your scissors, then add about 1 inch to each side for seam allowances. This will ensure a snug but comfortable fit.
2. Can I add a pocket to my scissors case?
Yes! You can easily add a pocket to your scissors case to store smaller tools like pins, seam rippers, or fabric markers. Just cut a piece of fabric and sew it onto the lining before you complete the case.
3. Do I need padding for the scissors case?
Padding is highly recommended as it protects your scissors and adds structure to the case. Use quilt batting or fusible fleece for a lightweight, cushioned feel that won’t add too much bulk.
4. What fabric should I use for my scissors case?
Sturdy fabrics like cotton or canvas are ideal for a scissors case. Choose a fabric that offers both durability and aesthetic appeal. If you prefer a softer case, you can also use flannel or felt.
5. How can I make my scissors case more secure?
To make your case more secure, consider adding a zipper closure or a Velcro fastener. This will help keep your scissors in place and prevent them from slipping out.
6. Can I make a scissors case for larger tools like fabric shears?
Absolutely! Simply adjust the size of your scissors case to accommodate larger shears by increasing the measurements based on the size of your tools.
Join our VIP broadcast list and gain access to exclusive patterns, all for free. As a VIP member, you’ll receive the best patterns daily, delivered directly to your device. ✨📱 It’s a unique opportunity to stay up-to-date with the latest trends and designs, curated just for you. Don’t miss out on enhancing your projects and discovering new inspirations with the best patterns every day! 🎨🔝
Conclusion
In this scissors case tutorial, you learned how to create a functional and stylish case for your tools. We covered fabric selection, measuring and cutting, assembly, and personalization, offering tips and ideas to make your case unique. Whether you’re making a case for yourself or as a gift, this project allows for endless creativity.
We’d love to hear your thoughts on this tutorial! Please share your feedback and any suggestions you have for improving this project. Happy sewing!


