
Pie Carrier Sewing Pattern

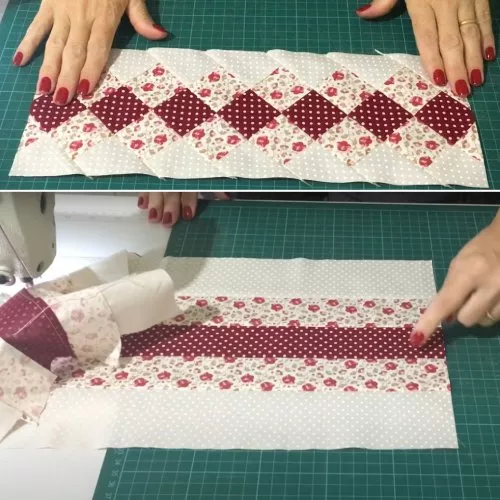
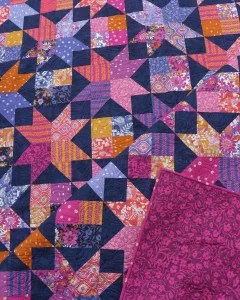
Creating Stunning Quilted Edges is one of the most satisfying steps in finishing a quilting project. The edges not only provide a polished look but also add durability and style to your quilt.
Whether you’re crafting a cozy blanket or a decorative piece, mastering the art of quilting edges will elevate your projects.
This Stunning Quilted Edges – Tutorial will guide you through essential techniques, materials, and creative ideas to achieve perfect finishes.
From simple bindings to decorative scallops, there’s something here for every skill level. With clear steps and practical tips, you’ll be well on your way to creating quilts that stand out.
Quilt edges are an opportunity to showcase your personal style. The right edge finish complements your design and highlights your hard work. Let’s explore the steps to create stunning finishes that make your quilts unforgettable.
To achieve Stunning Quilted Edges, it’s crucial to have the right tools and materials. Proper preparation ensures a smooth quilting process and high-quality results.
Having everything ready before you start will save time and reduce frustration, letting you focus on creating those beautiful quilted edges.
A classic binding technique is a go-to for most quilters. Here’s how to create flawless edges with traditional binding.
This technique creates a durable and neat finish that enhances any quilt design.
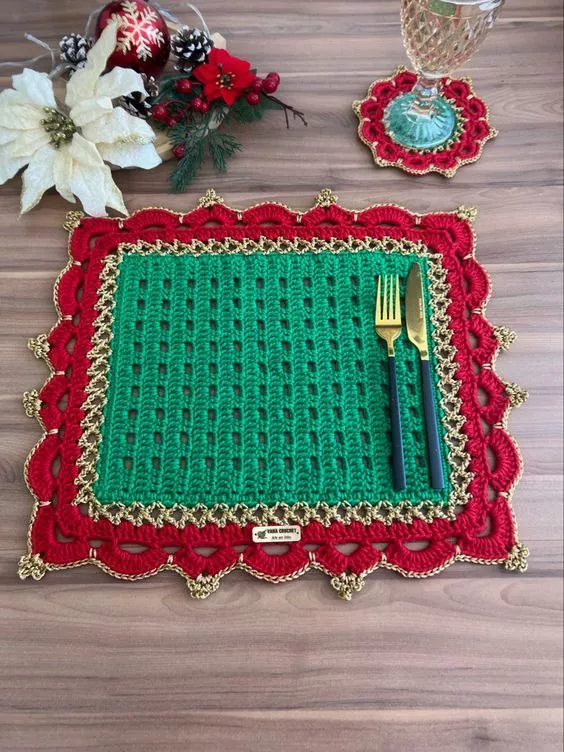
For a unique and personalized touch, try these decorative quilt edge ideas. Each technique adds flair and elegance to your project.
Experiment with these ideas to make each quilt uniquely yours.
Even experienced quilters encounter challenges when working on quilt edges. Here’s how to sidestep common pitfalls.
By keeping these tips in mind, you can avoid setbacks and create flawless quilted edges.
1. What is the best fabric for quilt binding?
Cotton is a popular choice because it’s durable, easy to work with, and available in countless patterns and colors.
2. How do I calculate how much binding I need?
Measure the perimeter of your quilt and add extra for mitered corners and overlap. Multiply by the width of your binding strips to find the total fabric needed.
3. Should I hand-sew or machine-sew the binding?
Both options are valid. Hand-sewing offers a cleaner look, while machine-sewing is faster and more durable for everyday quilts.
4. How do I miter corners on quilt binding?
Fold the binding at a 45-degree angle at each corner and secure it before stitching. Practice ensures smooth and consistent results.
5. Can I use pre-made binding?
Yes, pre-made binding saves time and is ideal for beginners. However, custom-made binding allows for more creative freedom.
6. What is the purpose of blocking a quilt?
Blocking straightens and flattens your quilt, ensuring it lays perfectly flat for a polished appearance.
Join our VIP broadcast list and gain access to exclusive patterns, all for free. As a VIP member, you’ll receive the best patterns daily, delivered directly to your device. ✨📱 It’s a unique opportunity to stay up-to-date with the latest trends and designs, curated just for you. Don’t miss out on enhancing your projects and discovering new inspirations with the best patterns every day! 🎨🔝
The Stunning Quilted Edges – Tutorial provides everything you need to finish your quilts with style and precision. From basic bindings to creative decorative edges, these techniques ensure that your hard work stands out.
We hope you’ve found this guide helpful and inspiring. Have you tried any of these methods? Share your thoughts and suggestions in the comments below—we’d love to hear from you!


