
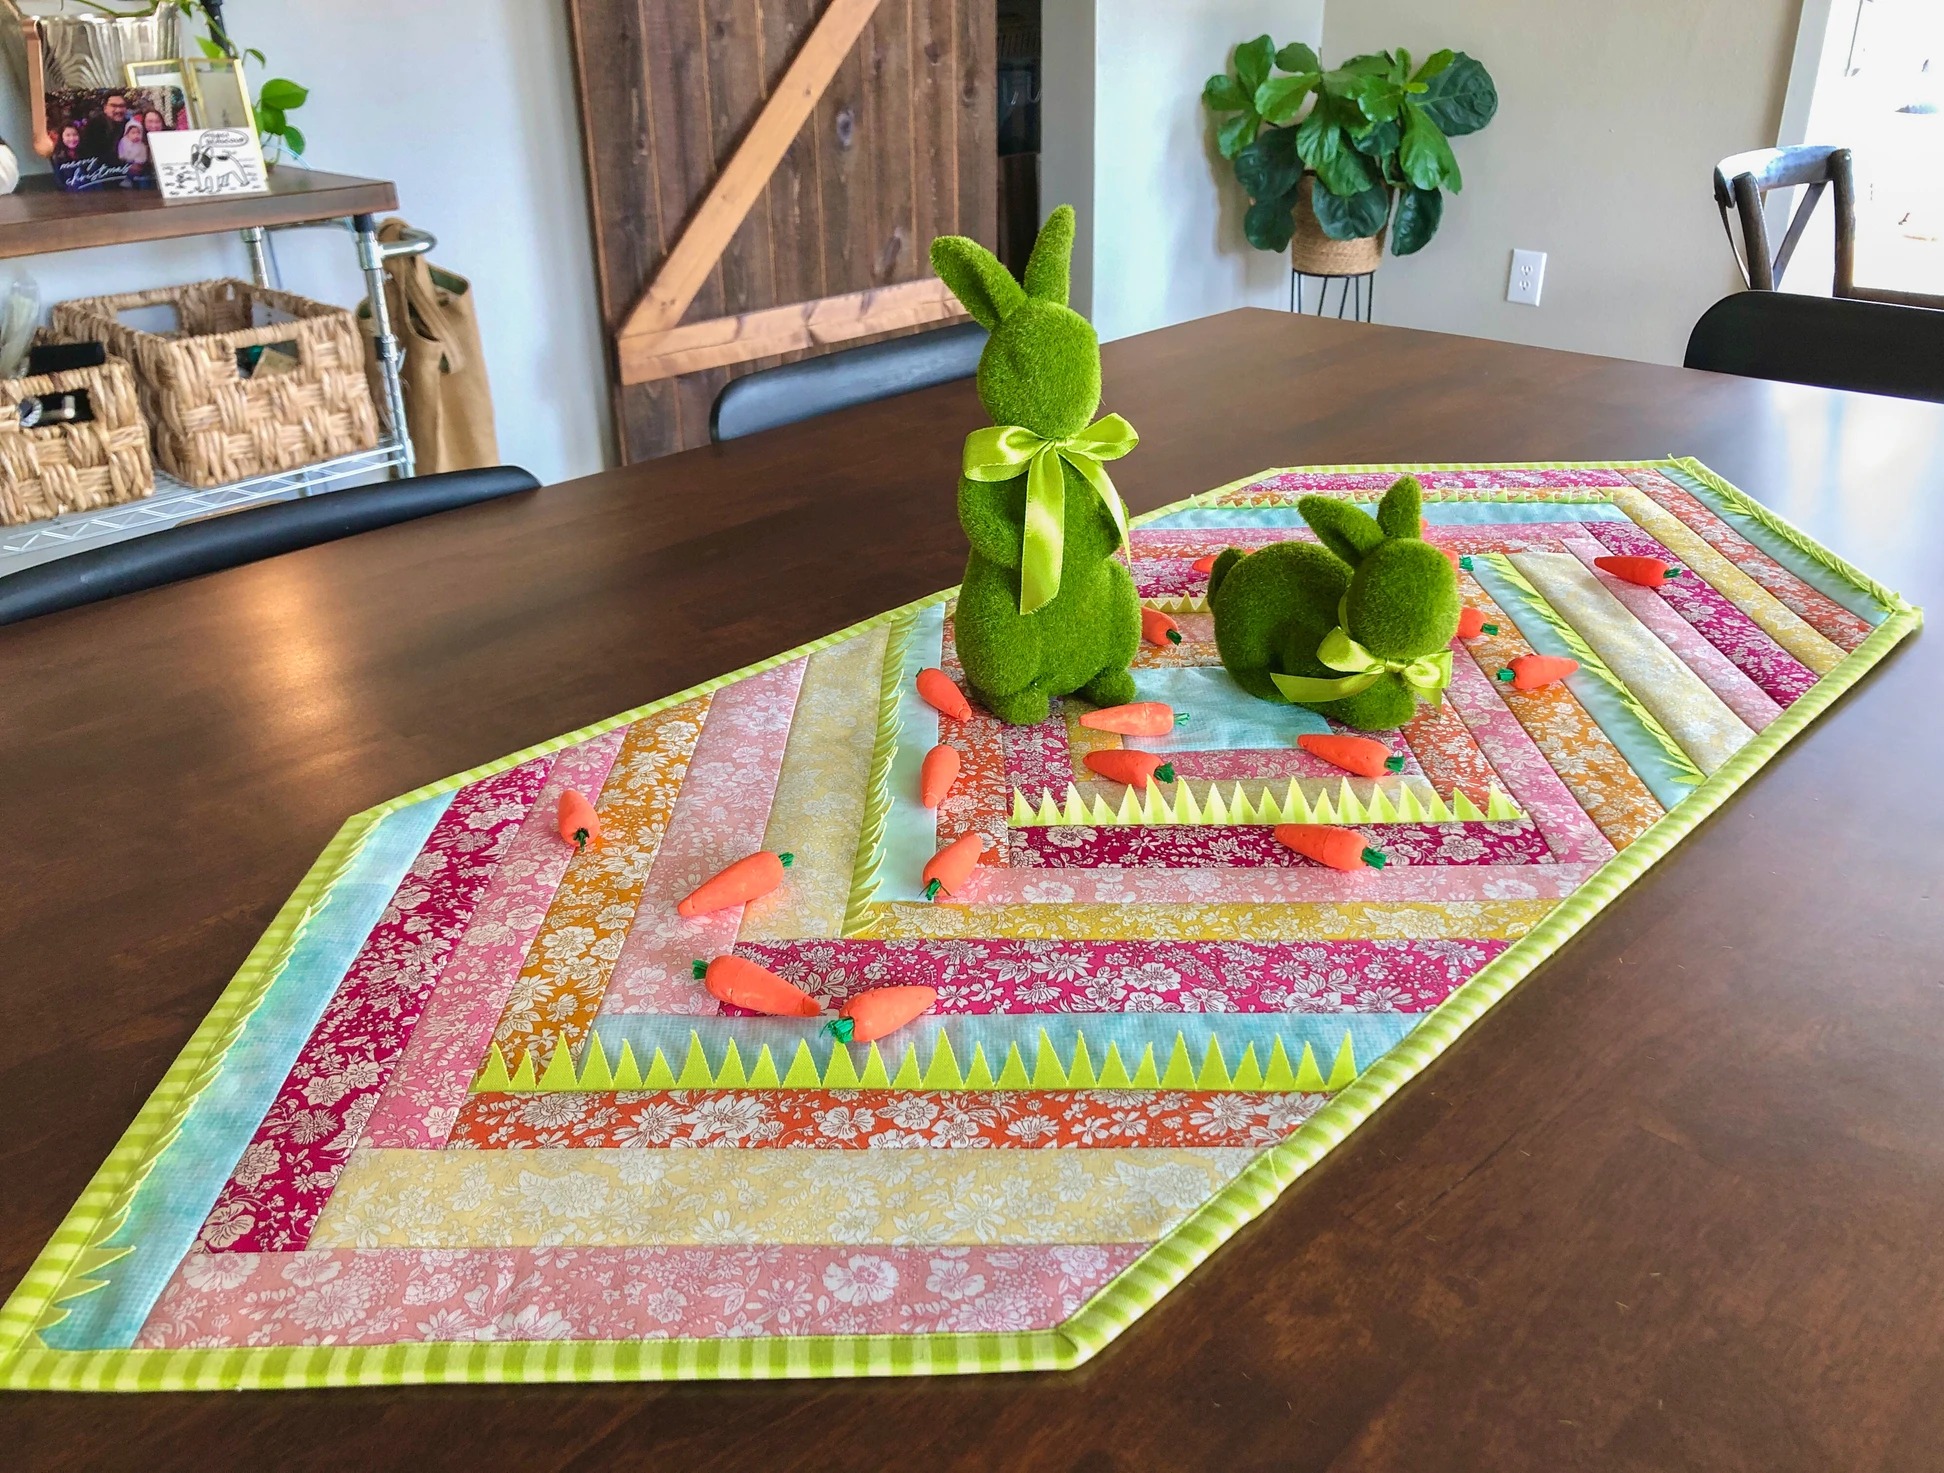
Creating beautiful and unique projects is every crafter’s dream, and The Grass is Always Greener – Free Pattern is a perfect choice for those looking to add a fresh and vibrant touch to their work.
Whether you are a quilting enthusiast or a crochet lover, this pattern offers a wonderful opportunity to explore new techniques and unleash your creativity.
This pattern stands out for its versatility, allowing crafters to experiment with different color schemes, textures, and designs. Its name reflects the lush, vibrant aesthetic that mimics a lively green landscape, making it a fantastic choice for seasonal or nature-inspired projects.
If you’re ready to dive into a fun and rewarding crafting experience, keep reading to discover everything you need to know about The Grass is Always Greener – Free Pattern, from materials to step-by-step instructions!
1. What is “The Grass is Always Greener” Pattern?
The Grass is Always Greener – Free Pattern is a unique design that mimics the beauty of lush greenery, often used in quilting, crocheting, or embroidery. This pattern is characterized by:
- A natural, organic design that gives the appearance of layered grass, creating depth and movement.
- Flexible adaptation to different crafting techniques such as patchwork, applique, or crochet.
- A fresh and lively aesthetic that works well for home decor, accessories, and seasonal projects.
- Great for beginners and experts alike, as it can be simplified or made more complex based on skill level.
- Endless customization options, from bright green hues to abstract interpretations with different colors and textures.
This pattern is perfect for those who want to bring a touch of nature into their craft projects, making it a timeless and adaptable choice.
2. Materials Needed for This Pattern
To create your Grass is Always Greener project, you will need the following materials:
- Fabric or yarn of your choice (cotton, linen, or acrylic work well depending on your craft).
- Matching or contrasting threads for embroidery or sewing.
- A cutting mat and rotary cutter for precise quilting shapes.
- Hooks or needles if you’re crocheting or knitting the design.
- Optional: Applique tools if adding layered grass details.
- Measuring tape to ensure accuracy in sizing.
Having the right materials ensures that your project turns out beautifully and lasts for years to come.
3. Step-by-Step Instructions to Create This Pattern
Follow these steps to bring the Grass is Always Greener pattern to life:
- Prepare Your Materials – Gather everything needed and choose a color palette that suits your vision.
- Cut or Shape Your Design – If quilting, cut your fabric pieces. If crocheting, start with a base row of stitches.
- Layer or Stitch the Grass-Like Texture – Arrange fabric pieces in overlapping layers or use textured stitches to mimic blades of grass.
- Secure and Reinforce – If sewing, use topstitching or applique techniques. If crocheting, work with loop stitches for a realistic look.
- Refine and Add Personal Touches – Consider adding embellishments like beads, embroidery details, or contrasting stitches.
- Finish and Display – Once complete, trim excess threads, block your project if needed, and enjoy your masterpiece!
4. Customization and Creative Ideas
Personalizing The Grass is Always Greener – Free Pattern allows for endless creative possibilities:
- Color Variations: Try different shades of green or mix in pops of bright flowers for a garden-like effect.
- Textural Effects: Use loop stitches in crochet or fabric layering in quilting to add more dimension.
- Theme Adaptations: Modify the pattern to resemble a meadow, wheat field, or mossy landscape.
- Functional Projects: Transform the pattern into pillow covers, table runners, or wall hangings.
- Seasonal Twists: Adjust colors and materials to match seasonal themes like autumn leaves or snowy landscapes.
- Experiment with Scale: Make large statement pieces or mini versions for small decor items.
FAQ – Frequently Asked Questions
1. Is this pattern suitable for beginners?
Yes! The pattern is adaptable for all skill levels. Beginners can start with a simple version, while advanced crafters can add intricate details.
2. What type of fabric or yarn works best for this pattern?
Cotton and linen work best for quilting, while acrylic and wool are great choices for crochet.
3. How can I make this pattern look more realistic?
Using layered fabric cuts, textured stitches, and various shades of green will enhance the natural effect.
4. Can I use this pattern for clothing or accessories?
Absolutely! It can be adapted for scarves, bags, and even clothing embellishments.
5. Where can I find variations of this pattern?
You can explore online crafting communities, pattern databases, or create your own unique version based on inspiration!
Join our VIP broadcast list and gain access to exclusive patterns, all for free. As a VIP member, you’ll receive the best patterns daily, delivered directly to your device. ✨📱 It’s a unique opportunity to stay up-to-date with the latest trends and designs, curated just for you. Don’t miss out on enhancing your projects and discovering new inspirations with the best patterns every day! 🎨🔝
Conclusion
The Grass is Always Greener – Free Pattern is a fantastic way to bring the beauty of nature into your handmade creations. Whether you choose to quilt, crochet, or embroider, this versatile design allows for endless customization and creativity.
Have you tried making this pattern? Share your experience, tips, and ideas in the comments below. We’d love to see how you bring your own creative twist to this unique and beautiful design!


