
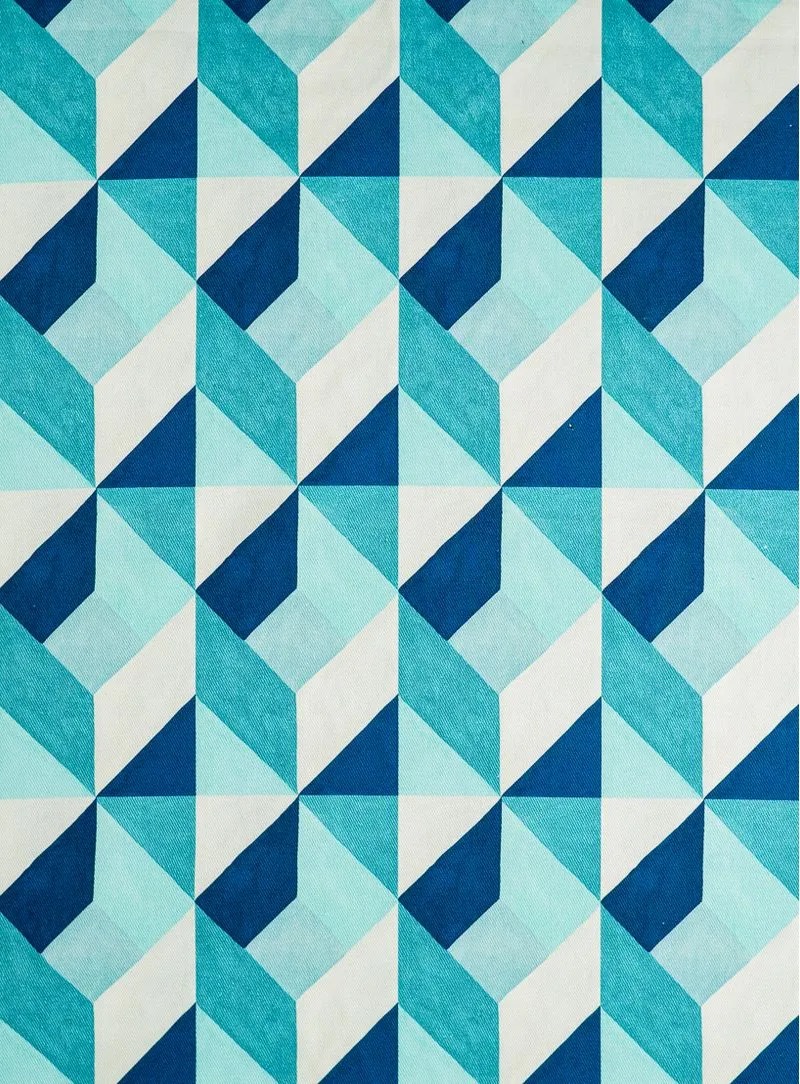
Creating a Twisted Quilt Block – TUTORIAL is an exciting way to experiment with fabric and patterns. This design adds movement and depth to any quilt project, making it a popular choice for both beginners and experienced quilters.
In this guide, we will walk you through a step-by-step process to help you achieve a stunning quilt block with ease.
The Twisted Quilt Block – TUTORIAL involves precise cutting, sewing, and arranging techniques to create a visually dynamic effect.
Whether you’re making a single block or incorporating multiple blocks into a larger quilt, this tutorial will provide you with all the necessary details to complete your project successfully.
Before diving into the step-by-step process, let’s explore the essential materials and tools you’ll need. Gathering the right supplies will ensure a smooth quilting experience, allowing you to focus on the creative aspects of your project.
1. Materials and Tools Needed
To start your Twisted Quilt Block – TUTORIAL, gather the following supplies:
- Fabric selection: Choose high-quality quilting cotton in complementary colors or patterns.
- Cutting tools: A rotary cutter, cutting mat, and quilting ruler are essential for precise measurements.
- Sewing machine: A reliable machine with a straight stitch setting is recommended.
- Thread and needles: Use high-quality thread that matches your fabric.
- Iron and ironing board: Pressing your fabric and seams will ensure a polished final look.
- Pins or clips: These help keep fabric pieces aligned during sewing.
Having all your materials ready before starting will streamline the quilting process and help you focus on the creative aspect of your project.
2. Cutting and Preparing Fabric Pieces
Proper cutting and preparation are key to achieving a perfect Twisted Quilt Block. Follow these steps to prepare your fabric:
- Measure and cut your fabric using a quilting ruler and rotary cutter to ensure precision.
- Arrange the fabric pieces according to the desired twist pattern before sewing.
- Label each section if necessary to avoid confusion during assembly.
- Iron your fabric to remove wrinkles and ensure crisp edges.
- Use starch spray if needed to add stability to lightweight fabrics.
- Double-check measurements to prevent errors before stitching begins.
By carefully cutting and preparing your fabric, you’ll create a well-structured and visually appealing quilt block.
3. Assembling the Twisted Quilt Block
Now that your fabric is ready, it’s time to start assembling the quilt block:
- Start by sewing small sections together to form the basic units of the twisted design.
- Press each seam open to reduce bulk and ensure a smooth finish.
- Arrange the sewn sections on a flat surface to visualize the final layout.
- Sew the sections together carefully, matching seam intersections for a seamless look.
- Check alignment frequently to prevent distortion in the final block.
- Trim any excess fabric to maintain uniform block size.
Following these steps will help you achieve a precise and professional-looking twisted quilt block.
4. Finishing Touches and Assembly Tips
Once your Twisted Quilt Block is assembled, focus on the finishing details:
- Press the final block thoroughly to flatten seams and enhance the overall appearance.
- Square up the block by trimming any uneven edges to the correct dimensions.
- Experiment with multiple blocks to create a larger quilt with a dynamic pattern.
- Add sashing or borders to frame the block and highlight the twisted design.
- Choose a backing fabric that complements your quilt’s color scheme.
- Consider quilting techniques such as free-motion or stitch-in-the-ditch to enhance the texture.
By paying attention to these details, you’ll create a quilt block that stands out beautifully in any project.
FAQ
Q: What is the best fabric for a Twisted Quilt Block? A: High-quality quilting cotton is recommended as it provides durability and ease of sewing.
Q: Can I sew the block by hand instead of using a machine? A: Yes, but using a machine ensures more precise seams and faster assembly.
Q: How do I prevent fabric distortion? A: Always press seams carefully, use starch spray, and avoid stretching the fabric while sewing.
Q: What size should my quilt block be? A: The size depends on your pattern. Common finished block sizes range from 6 to 12 inches.
Q: Can I mix different fabric patterns in one block? A: Absolutely! Mixing patterns can add depth and interest to your quilt design.
Join our VIP broadcast list and gain access to exclusive patterns, all for free. As a VIP member, you’ll receive the best patterns daily, delivered directly to your device. ✨📱 It’s a unique opportunity to stay up-to-date with the latest trends and designs, curated just for you. Don’t miss out on enhancing your projects and discovering new inspirations with the best patterns every day! 🎨🔝
Conclusion
The Twisted Quilt Block – TUTORIAL is a fun and creative quilting technique that adds movement and dimension to your projects. By carefully selecting fabrics, cutting precisely, and following structured assembly steps, you can create a beautiful and professional-looking quilt block.
We hope this tutorial has been helpful! Feel free to share your thoughts, opinions, or any suggestions in the comments. Happy quilting!


