
Pie Carrier Sewing Pattern

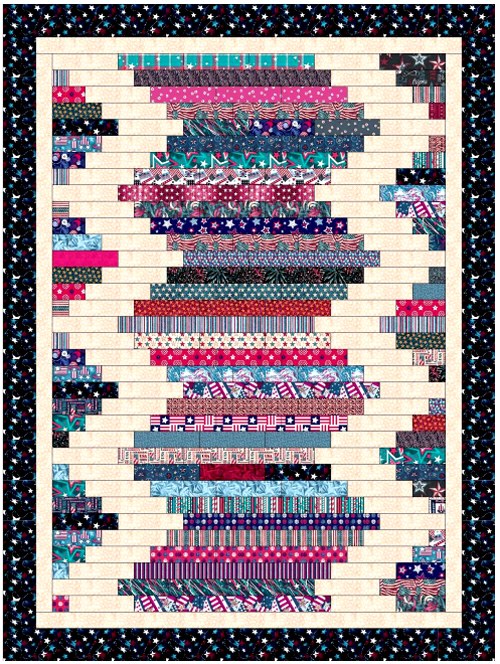
The Zig Zag Strips – Free Quilting Pattern is a fantastic quilting design that brings together the simplicity of stripes with the striking visual impact of zig-zag patterns.
Whether you’re a beginner or an experienced quilter, this pattern offers a creative way to incorporate dynamic movement and bold contrast into your quilt. By using different fabric colors and textures, you can create a quilt that is both modern and timeless.
Quilting with zig zag strips is not only an enjoyable process, but it also offers endless opportunities for customization. The pattern is versatile and can be used for various projects, from bed quilts to table runners.
If you’re looking for a free quilting pattern to experiment with, this one is a great choice to showcase your creativity and improve your quilting skills.
The beauty of the Zig Zag Strips – Free Quilting Pattern lies in its simplicity. You don’t need intricate piecing or complicated techniques to create something beautiful.
Instead, you will focus on cutting strips and arranging them in a way that produces a bold zigzag effect. This tutorial will walk you through the materials needed, the step-by-step process, and some helpful tips to make the most of this quilting project.
Before starting the Zig Zag Strips – Free Quilting Pattern, it’s essential to gather all the materials you’ll need for this project. Here’s a list of what you’ll require:
Fabric: The primary material for this project is fabric. For the zigzag strips, you can choose a combination of solid, patterned, or even hand-dyed fabrics. Depending on the desired size of your quilt, you will need several yards of fabric for the strips.
Rotary Cutter and Mat: These tools are crucial for accurately cutting your fabric strips. A rotary cutter allows you to make clean, precise cuts, while the cutting mat provides a surface to protect your workspace.
Quilt Ruler: A quilting ruler is necessary for cutting your fabric into strips with uniform width. Make sure your ruler is long enough to handle larger pieces of fabric.
Sewing Machine: A sewing machine is needed to stitch the fabric strips together. If you’re new to quilting, a basic sewing machine will suffice for this project.
Thread: Choose a thread color that matches your fabric or contrasts to create a bold effect. Cotton thread is commonly used for quilting because of its durability and ease of use.
Pins or Clips: Use pins or quilting clips to hold your fabric strips in place while you sew them together. These help ensure accurate seams and prevent fabric from shifting during stitching.
Iron: An iron is necessary for pressing your fabric strips before and after sewing. Pressing helps keep the fabric flat and ensures clean seams.
With these materials in hand, you’re ready to dive into creating your Zig Zag Strips quilt!
The first step in the Zig Zag Strips – Free Quilting Pattern is cutting your fabric strips. The width of the strips will determine the look and size of your zigzag design. Here’s how you can cut your fabric strips accurately:
1. Decide on the Width of Your Strips: The width of your strips can vary depending on the design you want. For a bold zigzag, opt for wider strips, around 3-5 inches. If you want a more delicate effect, use narrower strips, around 1.5-2 inches wide.
2. Prepare Your Fabric: Press your fabric before cutting to remove any wrinkles. This ensures that your strips are cut evenly and accurately. Lay the fabric flat on your cutting mat, and make sure it is aligned properly.
3. Cut the Strips: Using a rotary cutter and quilt ruler, carefully measure and cut the fabric into strips. For a consistent look, keep the strips even throughout the quilt. Depending on the size of your quilt, you will need several strips for the zigzag pattern.
4. Mix and Match Fabrics: If you’re using multiple fabrics, arrange them by color or pattern to create contrast and interest in your zigzag design. Feel free to experiment with different fabrics to create a visually appealing quilt.
5. Trim the Strips: After cutting the strips, trim any uneven edges to ensure all the strips are the same width. This step is important to avoid mismatched seams when sewing them together.
6. Store Your Strips: Once your strips are cut, organize them by color or design and set them aside until you’re ready to sew them into the zigzag pattern.
Now that you have your fabric strips ready, it’s time to move on to the next step of assembling the quilt top.
Assembling the quilt top is where the Zig Zag Strips – Free Quilting Pattern really starts to come together. The key to creating the zigzag effect is arranging the fabric strips in an alternating pattern of angles. Here’s how you can assemble the quilt top:
1. Lay Out the Strips: Start by laying out your fabric strips in rows, alternating the direction of the strips to form the zigzag pattern. You can decide whether you want the zigzags to go diagonally or horizontally.
2. Pin the Strips Together: Once you’re happy with the arrangement, pin or clip the strips together. Make sure the edges of the strips align evenly to maintain a straight seam when sewing.
3. Sew the Strips Together: Using your sewing machine, sew the strips together along the edges. Start with the first two strips and continue sewing them until all strips are joined together into a continuous quilt top. Use a ¼-inch seam allowance for consistent results.
4. Press the Seams: After sewing the strips together, press the seams flat with an iron. Pressing the seams helps to reduce bulk and gives your quilt a professional finish. Be sure to press each seam as you go along to keep everything aligned.
5. Trim the Edges: Once the quilt top is assembled, trim any excess fabric from the edges to ensure that all the strips are straight and the quilt is even on all sides.
6. Add Additional Strips if Necessary: Depending on the size of your quilt, you may need to add more strips to complete the top. Simply repeat the steps above to add more rows or columns of strips.
Your quilt top should now be ready for the next step – quilting and finishing!
Now that you’ve assembled your quilt top, it’s time to quilt and finish your Zig Zag Strips – Free Quilting Pattern. Here’s how to finish your quilt:
1. Prepare the Quilt Sandwich: Lay out your quilt backing fabric, then place a layer of batting on top. Finally, place the quilt top over the batting. Smooth out any wrinkles and pin or baste the layers together.
2. Quilting: You can choose to quilt your project by hand or with a sewing machine. For a simple quilting design, stitch in the ditch along the seams of the zigzag strips. This method adds texture while keeping the focus on the zigzag pattern.
3. Trim the Excess Batting and Backing: Once the quilting is complete, trim any excess batting and backing fabric so that it’s even with the quilt top.
4. Attach the Quilt Binding: The final step is to attach the quilt binding. Cut strips of fabric and sew them around the edges of your quilt to finish it off. Make sure to fold the binding over the edges and stitch it into place for a clean, finished look.
5. Press the Quilt: After the binding is attached, give your quilt a final press with the iron to smooth out any wrinkles and set the seams.
6. Enjoy Your Finished Quilt: Once your quilt is complete, take a step back and admire your work! Whether you’re displaying it on a bed or giving it as a gift, your Zig Zag Strips quilt is sure to be a beautiful and functional addition to any home.
Q1: Can I use different fabric types for the Zig Zag Strips quilt?
A: Yes, feel free to experiment with different fabric types like cotton, flannel, or even denim. Just make sure they are compatible in weight and texture to ensure a smooth quilt.
Q2: How do I adjust the size of my quilt?
A: To adjust the size, simply add more rows or columns of zigzag strips. You can also cut your strips to different lengths to change the overall dimensions.
Q3: Do I need a long-arm quilting machine for this pattern?
A: No, you can quilt this pattern with a standard sewing machine or by hand if you prefer. A long-arm machine is not necessary for this project.
Q4: Can I add other patterns to the quilt?
A: Absolutely! You can mix the zigzag strips with other quilt blocks or patterns to create a more complex design. The Zig Zag Strips pattern works well with other traditional quilting blocks.
Q5: How do I make sure the seams align correctly?
A: Take your time to pin or clip the strips before sewing. It’s also helpful to measure each strip to ensure consistent widths and straight edges.
Q6: What are some other ways to use the Zig Zag Strips pattern?
A: In addition to quilts, the Zig Zag Strips pattern can be used for wall hangings, table runners, or even pillows. It’s a versatile design that can be adapted to many different projects.
Join our VIP broadcast list and gain access to exclusive patterns, all for free. As a VIP member, you’ll receive the best patterns daily, delivered directly to your device. ✨📱 It’s a unique opportunity to stay up-to-date with the latest trends and designs, curated just for you. Don’t miss out on enhancing your projects and discovering new inspirations with the best patterns every day! 🎨🔝
The Zig Zag Strips – Free Quilting Pattern is a simple yet striking design that offers endless possibilities for creative quilters. From selecting fabrics to piecing together the strips, this quilt offers a great opportunity to practice your skills and create something beautiful. Whether you’re making a quilt for yourself or as a gift, the bold zigzag pattern will be sure to impress.
We hope this tutorial has helped you understand how to bring your Zig Zag Strips quilt to life. Don’t forget to share your thoughts and experiences with us in the comments below. We’d love to see what you create and hear your suggestions for future projects!


