Quilting is a timeless art form that combines creativity and functionality, and the Betty’s Bloom Quilt Block – Tutorial is a perfect project for those looking to enhance their skills while crafting something beautiful.
With its floral-inspired design, Betty’s Bloom Quilt Block brings elegance and charm to any quilt, making it an excellent choice for both beginners and experienced quilters.
This tutorial will guide you step-by-step through the process of creating this stunning block. From fabric selection to assembly, we’ll cover everything you need to know to achieve a professional-looking result.

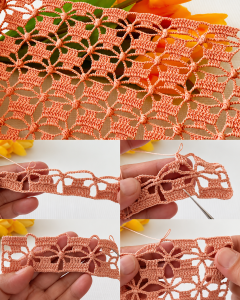
Image from google.
Whether you’re making a bed quilt, table runner, or decorative wall hanging, this versatile pattern will add a touch of sophistication to your work.
SEE MORE PATTERNS
Before we begin, gather your materials. You’ll need fabric in complementary colors, a rotary cutter, a quilting ruler, thread, and a sewing machine.
Optional but helpful tools include a cutting mat and fabric clips. Now, let’s dive into creating the Betty’s Bloom Quilt Block and bring this timeless design to life.
1. What Makes Betty’s Bloom Unique?
Understanding the elements that define Betty’s Bloom is the first step toward mastering it.
- The Betty’s Bloom Quilt Block is characterized by its floral motif, achieved through a combination of geometric shapes arranged to mimic petals and a central bloom.
- This block is versatile and can be scaled to fit different projects. Its intricate appearance is surprisingly easy to achieve with careful planning.
- Choosing fabrics is key to showcasing the design. Opt for colors that contrast yet complement each other to highlight the petal shapes.
- The block typically involves piecing techniques like half-square triangles (HSTs) and flying geese. These foundational skills are excellent for quilters of all levels.
- The central bloom acts as the focal point, drawing attention to the heart of the design while the “petals” radiate outward.
- Experimenting with fabric patterns, such as solids or subtle prints, can significantly influence the overall look and feel of the block.
2. Cutting and Preparing Your Fabric Pieces
Precision is key when preparing fabric for Betty’s Bloom.
- Begin by selecting fabrics in three or four colors. You’ll need a dominant color for the petals, a contrasting shade for the background, and a coordinating hue for the bloom’s center.
- Wash and press your fabrics to ensure they are wrinkle-free and easy to cut. This also helps prevent shrinking after assembly.
- Use a rotary cutter and ruler to cut your pieces accurately. For Betty’s Bloom, you’ll need squares, rectangles, and triangles in various sizes. Refer to your cutting chart for exact measurements.
- Lay out the pieces on a flat surface to visualize the design. This step ensures proper placement and gives you a chance to make adjustments before sewing.
- Mark seam allowances using a fabric marker. A standard 1/4-inch seam allowance is typically used in quilting.
- Group your pieces according to their roles (e.g., petals, background, bloom center) to keep your workspace organized.
3. Assembling Betty’s Bloom Quilt Block
The assembly process transforms your fabric pieces into a cohesive design.
- Begin with the smaller components, like creating HSTs or flying geese units. These form the petals and are essential to the block’s structure.
- Stitch your components together row by row, starting from the outer edges and working toward the center. Use pins or clips to keep everything aligned.
- Press seams open or to one side after each step. Pressing helps reduce bulk and ensures a smoother finish.
- Align your rows carefully to ensure sharp points and clean lines. The precision in this stage significantly affects the final appearance of the block.
- Once the rows are assembled, sew them together to complete the block. Double-check measurements to ensure the block is square.
- Trim any excess fabric for a neat, polished look. A square block is easier to join with others in your quilt project.
4. Tips and Tricks for Perfect Results
Achieving a flawless Betty’s Bloom Quilt Block is all about attention to detail.
- Use high-quality thread that matches or complements your fabric colors. This ensures durability and minimizes visible stitches.
- Test your sewing machine tension on scrap fabric to avoid uneven stitches or puckering.
- Work in a well-lit area to see fabric contrasts clearly, especially when sewing intricate designs.
- Take your time with cutting and piecing. Rushing through these steps can lead to errors that affect the overall design.
- Practice patience when aligning seams. Even small adjustments can make a big difference in the final appearance of your block.
- Keep your tools sharp and clean. A dull rotary cutter or dirty sewing machine can compromise the quality of your work.
FAQ
Q: Can beginners make Betty’s Bloom Quilt Block?
A: Yes! While the design appears complex, breaking it into smaller steps makes it approachable for beginners. Start with basic techniques like HSTs and build your skills.
Q: What fabrics are best for this design?
A: Solids or subtle prints work best to highlight the block’s geometric elements. Choose colors that contrast but harmonize to emphasize the bloom’s petals and center.
Q: How do I ensure my block is square?
A: Accurate cutting, consistent seam allowances, and careful pressing are essential. Trim any uneven edges before assembling the final block.
Q: Can I adjust the block size?
A: Absolutely! The block can be scaled up or down depending on your project. Larger blocks are great for quilts, while smaller ones work well for pillows or table runners.
Q: How do I join multiple blocks in a quilt?
A: Sew blocks together in rows, aligning seams carefully. Consider adding sashing between blocks for added dimension and easier alignment.
Q: What projects can I make with Betty’s Bloom?
A: This block is versatile and works well for quilts, table runners, wall hangings, and even tote bags. Let your creativity guide you!
Join our VIP broadcast list and gain access to exclusive patterns, all for free. As a VIP member, you’ll receive the best patterns daily, delivered directly to your device. ✨📱 It’s a unique opportunity to stay up-to-date with the latest trends and designs, curated just for you. Don’t miss out on enhancing your projects and discovering new inspirations with the best patterns every day! 🎨🔝
JOIN NOW
Conclusion
The Betty’s Bloom Quilt Block – Tutorial is an excellent project for quilters seeking a blend of beauty and skill-building. By following these steps, you’ll create a block that’s as timeless as it is stunning. Whether for a quilt or a standalone piece, this design adds elegance and personality to your work.
PATTERN HERE
We hope you found this tutorial helpful and inspiring. If you try making Betty’s Bloom, we’d love to hear about your experience! Share your thoughts and suggestions to help us continue creating valuable content for the quilting community. Happy quilting!


