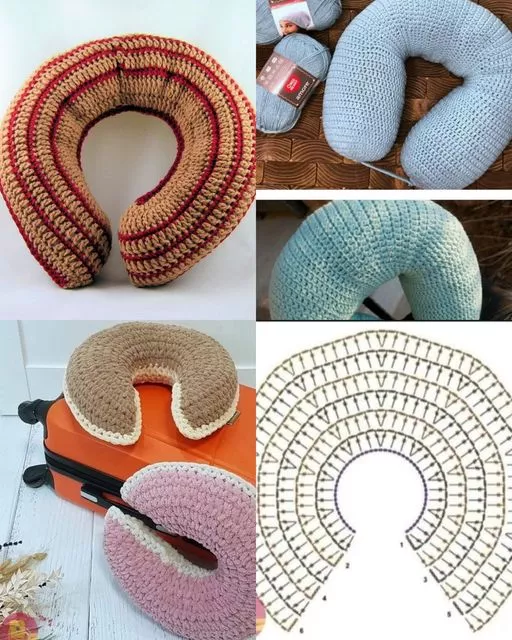
Traveling can be exhausting, especially when it’s hard to find a comfortable position to rest. A comfy crochet travel neck pillow for better rest is the perfect solution! Not only is it practical, but it’s also a fun and creative project that you can customize to suit your style.
This free tutorial will guide you through the process of crafting a soft and supportive neck pillow, perfect for long journeys.
Advertising
Whether you’re flying, taking a road trip, or just relaxing at home, a travel neck pillow provides the support you need to rest comfortably.
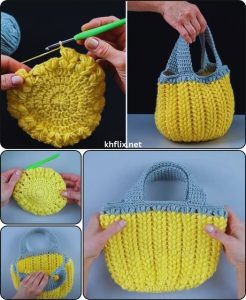
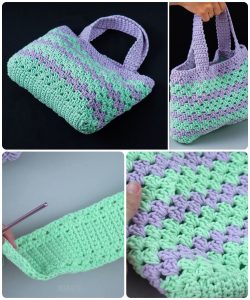
Image from google.
By crocheting your own, you can choose the ideal size, color, and texture for a pillow that fits your unique needs. Plus, handmade items like this make great gifts for family and friends who love to travel.
In this step-by-step tutorial, we’ll show you how to create a cozy neck pillow that combines functionality and style. Let’s dive into this creative project and ensure you or your loved ones travel in comfort!
1. Benefits of a Crochet Travel Neck Pillow
Making your own crochet travel neck pillow has several advantages.
Advertising
Customizable Fit: Create a neck pillow tailored to your preferences, ensuring the perfect balance of comfort and support.
Stylish and Unique: Choose colors and patterns that reflect your personality, making your travel gear stand out.
Budget-Friendly: Crafting your own pillow is often more cost-effective than buying a store-bought version.
Eco-Friendly: Use sustainable materials like organic cotton yarn to reduce your environmental impact.
Perfect Gift: Handmade neck pillows are thoughtful and practical gifts for travelers.
Therapeutic Crafting: Crocheting is a relaxing hobby that allows you to create something useful while unwinding.
2. Materials Needed for the Neck Pillow
To crochet your travel neck pillow, gather these essential materials.
Yarn: Opt for soft, durable yarn, such as cotton or acrylic blends. Choose a color that complements your travel accessories.
Crochet Hook: Use the size recommended on your yarn label. Typically, a 4.5mm to 5.5mm hook works well for this project.
Stuffing: Use polyester fiberfill or memory foam pieces to stuff your pillow for maximum comfort.
Tapestry Needle: Essential for sewing seams and weaving in loose ends.
Stitch Markers: Helpful for keeping track of rounds and ensuring consistent stitching.
Pattern Reference: Have a copy of this comfy crochet travel neck pillow for better rest – free tutorial on hand.
3. Step-by-Step Instructions for Your Neck Pillow
Follow these easy steps to crochet your travel neck pillow.
Start with the Base: Begin by crocheting two identical U-shaped pieces that will form the front and back of the pillow. Use single crochet or half-double crochet stitches for durability.
Join the Pieces: Align the two U-shaped pieces and crochet around the edges, leaving an opening for stuffing.
Add Padding: Fill the pillow evenly with stuffing material, ensuring it provides adequate support. Avoid overstuffing to maintain flexibility.
Close the Opening: Once stuffed, crochet the remaining edge closed, securing the stuffing inside.
Embellish the Design: Add decorative details like stripes, polka dots, or a monogram using contrasting yarn colors.
Finish and Test: Weave in all loose ends and test the pillow for comfort. Adjust stuffing or edges as needed.
4. Creative Ways to Personalize Your Pillow
Enhance your crochet travel neck pillow with these creative ideas.
Use Multiple Colors: Combine different yarn colors to create stripes, gradients, or patterns that match your travel style.
Add Texture: Experiment with bobble stitches or ribbing to give your pillow a unique texture and feel.
Incorporate a Handle: Crochet a small loop or handle for easy carrying or attachment to luggage.
Include a Cover: Make a removable, washable cover to keep your pillow clean and fresh during travels.
Use Themed Designs: Create pillows with shapes or patterns inspired by your favorite destinations, such as seashells or mountains.
Add Aromatherapy: Insert a sachet with calming scents like lavender or chamomile to enhance relaxation during travel.
FAQ
Q: What type of yarn is best for a travel neck pillow?
A: Soft, washable yarn like cotton or acrylic blends is ideal for comfort and durability.
Q: Can I make this project as a beginner?
A: Absolutely! The pattern uses basic stitches, making it beginner-friendly with a bit of practice.
Q: How do I clean my crochet neck pillow?
A: If it’s stuffed, spot clean with a damp cloth. If it has a removable cover, machine wash the cover on a gentle cycle.
Q: How long does it take to crochet a neck pillow?
A: Depending on your skill level, it typically takes 4–6 hours to complete this project.
Q: Can I use memory foam for stuffing?
A: Yes, memory foam provides excellent support and retains its shape over time.
Q: What size should the pillow be?
A: Aim for dimensions that comfortably fit around your neck, typically about 16–18 inches wide and 4–5 inches thick.
Join our VIP broadcast list and gain access to exclusive patterns, all for free. As a VIP member, you’ll receive the best patterns daily, delivered directly to your device. ✨📱 It’s a unique opportunity to stay up-to-date with the latest trends and designs, curated just for you. Don’t miss out on enhancing your projects and discovering new inspirations with the best patterns every day! 🎨🔝
This comfy crochet travel neck pillow for better rest – free tutorial is the perfect project for anyone seeking comfort and creativity. By crafting your own pillow, you’ll enjoy a unique, personalized travel accessory that’s both functional and stylish. Whether you’re a seasoned crocheter or a beginner, this project offers a satisfying and practical outcome.
PATTERN HERE
We’d love to hear about your experience creating this neck pillow! Share your thoughts, tips, and suggestions in the comments below. Your feedback helps us provide even better tutorials for the crochet community. Safe and comfy travels!


