
Crochet Multi-Purpose Blouse, Shawl, Runner Model

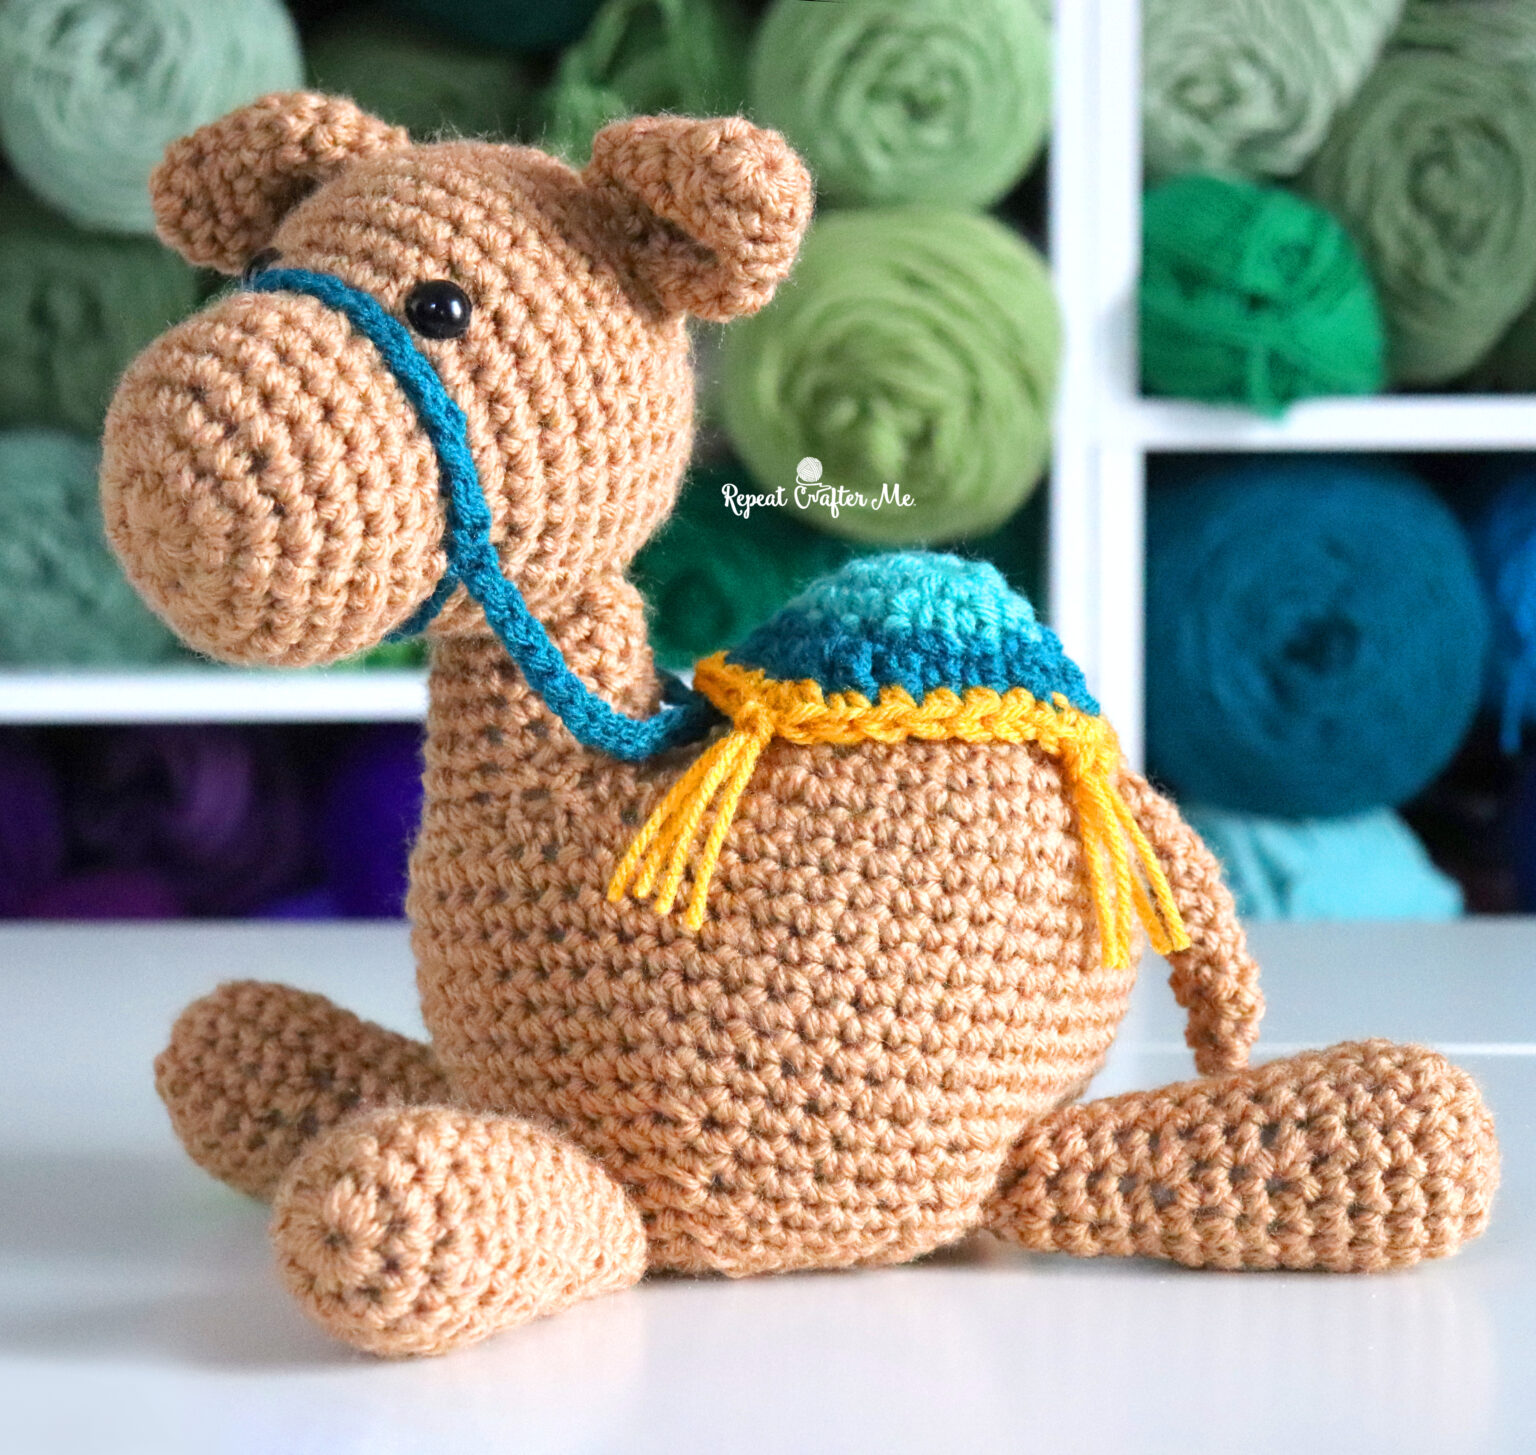
The Cute Crochet Camel Pattern is a delightful and creative project that will bring a touch of whimsy to your crochet collection. Whether you are a beginner or an experienced crocheter, this pattern is sure to be an enjoyable and rewarding experience.
The beauty of crocheting animals is that they can be customized in so many ways, and a crochet camel is no exception. From the soft, cuddly texture to the ability to add your own unique touches, this project is perfect for anyone looking to create a cute and charming handmade item.
Crocheting a camel might seem like a complex task, but with the right materials, steps, and techniques, you’ll find that it’s a fun and approachable project.
This Cute Crochet Camel Pattern is designed to be easy to follow, even for those just starting out with amigurumi (crochet toys).
The final result is a lovely camel that’s perfect for gifting or displaying in your home. The key to success with this pattern is to take it one step at a time, paying attention to the details and adding your personal flair.
In this article, we’ll walk you through the steps of creating your very own Cute Crochet Camel Pattern. We’ll cover everything from gathering your materials to the final finishing touches.
So, if you’re ready to bring your crochet camel to life, read on for a detailed guide that will help you create a wonderful and memorable piece.
Before you start crocheting your camel, it’s essential to gather the right materials. Having everything prepared ahead of time will ensure that your project runs smoothly. Here’s a list of what you’ll need for the Cute Crochet Camel Pattern:
Once you have your materials ready, you can begin the fun process of crocheting your Cute Crochet Camel Pattern.
Now that you have your materials, let’s dive into crocheting the body of the camel. The body is the largest part of the camel and will be worked in rounds. It’s important to start with a magic ring and follow the stitch instructions carefully to achieve a smooth, even shape.
Begin by crocheting the bottom of the camel’s body using a single crochet stitch in the round. As you work your way up, you’ll gradually increase the number of stitches to create the rounded shape. Be sure to stitch tightly to avoid gaps between the stitches.
Once the body is completed, stuff it with fiberfill to give it structure and a soft feel. The fiberfill will ensure that the camel holds its shape while also making it comfortable to touch and cuddle. As you stuff the body, be mindful of the shape and adjust the stuffing as needed to maintain an even appearance.
After the body is stuffed, continue crocheting the top part of the camel’s body. The shape should start to resemble a camel’s distinctive hump. Once the body is finished, you can move on to the legs.
The next step in creating your Cute Crochet Camel Pattern is crocheting the legs. The camel’s legs are worked in individual pieces and then sewn onto the body. To start, crochet four cylindrical pieces for the legs, using single crochet stitches and working in the round. Each leg should be slightly tapered at the top to allow it to fit snugly onto the body.
As you work the legs, make sure to stuff them lightly with fiberfill to keep them firm and balanced. The legs should be sturdy enough to support the camel when it’s standing.
Once the legs are complete, carefully sew them onto the body using a yarn needle. Position them evenly around the body, making sure they are securely attached. The legs should be placed in a way that allows the camel to stand upright.
After the body and legs are done, it’s time to move on to the camel’s head. The head will be crocheted in a similar way to the body, using a magic ring and working in rounds. The key to making the head look realistic is shaping it properly and adding the correct features.
Start by crocheting the base of the head and then gradually increase the stitches to form the shape of the camel’s face. Once the basic shape is complete, stuff the head with fiberfill to give it a soft, rounded look.
Next, crochet the ears and attach them to the head. The camel’s ears are typically small and triangular in shape, adding a cute touch to the overall look. You can also embroider the nose and mouth to give your camel more character.
Finally, attach the safety eyes to the head, positioning them in a way that gives the camel a friendly expression. If you prefer, you can also embroider the eyes instead of using safety eyes.
Q1: Can I customize the color of my camel?
Yes! The great thing about crochet is that you can customize your project as much as you like. Feel free to experiment with different yarn colors to create a unique and personalized camel.
Q2: How do I ensure my camel’s body stays firm?
Make sure to stuff the body with enough fiberfill to maintain its shape. Avoid overstuffing, as this can cause the body to become too stiff. The goal is to achieve a firm yet soft feel.
Q3: Can I crochet a smaller or larger camel?
Yes! You can adjust the size of the camel by using different yarn weights and adjusting your hook size accordingly. This will change the overall dimensions of your camel.
Q4: How do I attach the legs securely to the body?
To ensure the legs are securely attached, use a yarn needle and sew them on tightly. It’s important to position the legs evenly to make sure the camel can stand upright.
Q5: Can I make this pattern without safety eyes?
Yes, if you prefer, you can embroider the eyes instead of using plastic safety eyes. This is a great option if you’re making the camel for a young child or prefer a more handmade look.
Join our VIP broadcast list and gain access to exclusive patterns, all for free. As a VIP member, you’ll receive the best patterns daily, delivered directly to your device. ✨📱 It’s a unique opportunity to stay up-to-date with the latest trends and designs, curated just for you. Don’t miss out on enhancing your projects and discovering new inspirations with the best patterns every day! 🎨🔝
Creating a Cute Crochet Camel Pattern is a fun and rewarding project that allows you to practice your crochet skills while creating an adorable piece. By following the steps outlined in this guide, you can make your own camel and personalize it with different colors, features, and embellishments. Whether you’re gifting it to someone special or adding it to your own collection, the finished product is sure to bring a smile to anyone who sees it.
We hope this guide has inspired you to start crocheting your own camel. If you have any questions or suggestions, please feel free to leave a comment below. We would love to hear about your experience and see your finished creations!


