
Crochet Multi-Purpose Blouse, Shawl, Runner Model

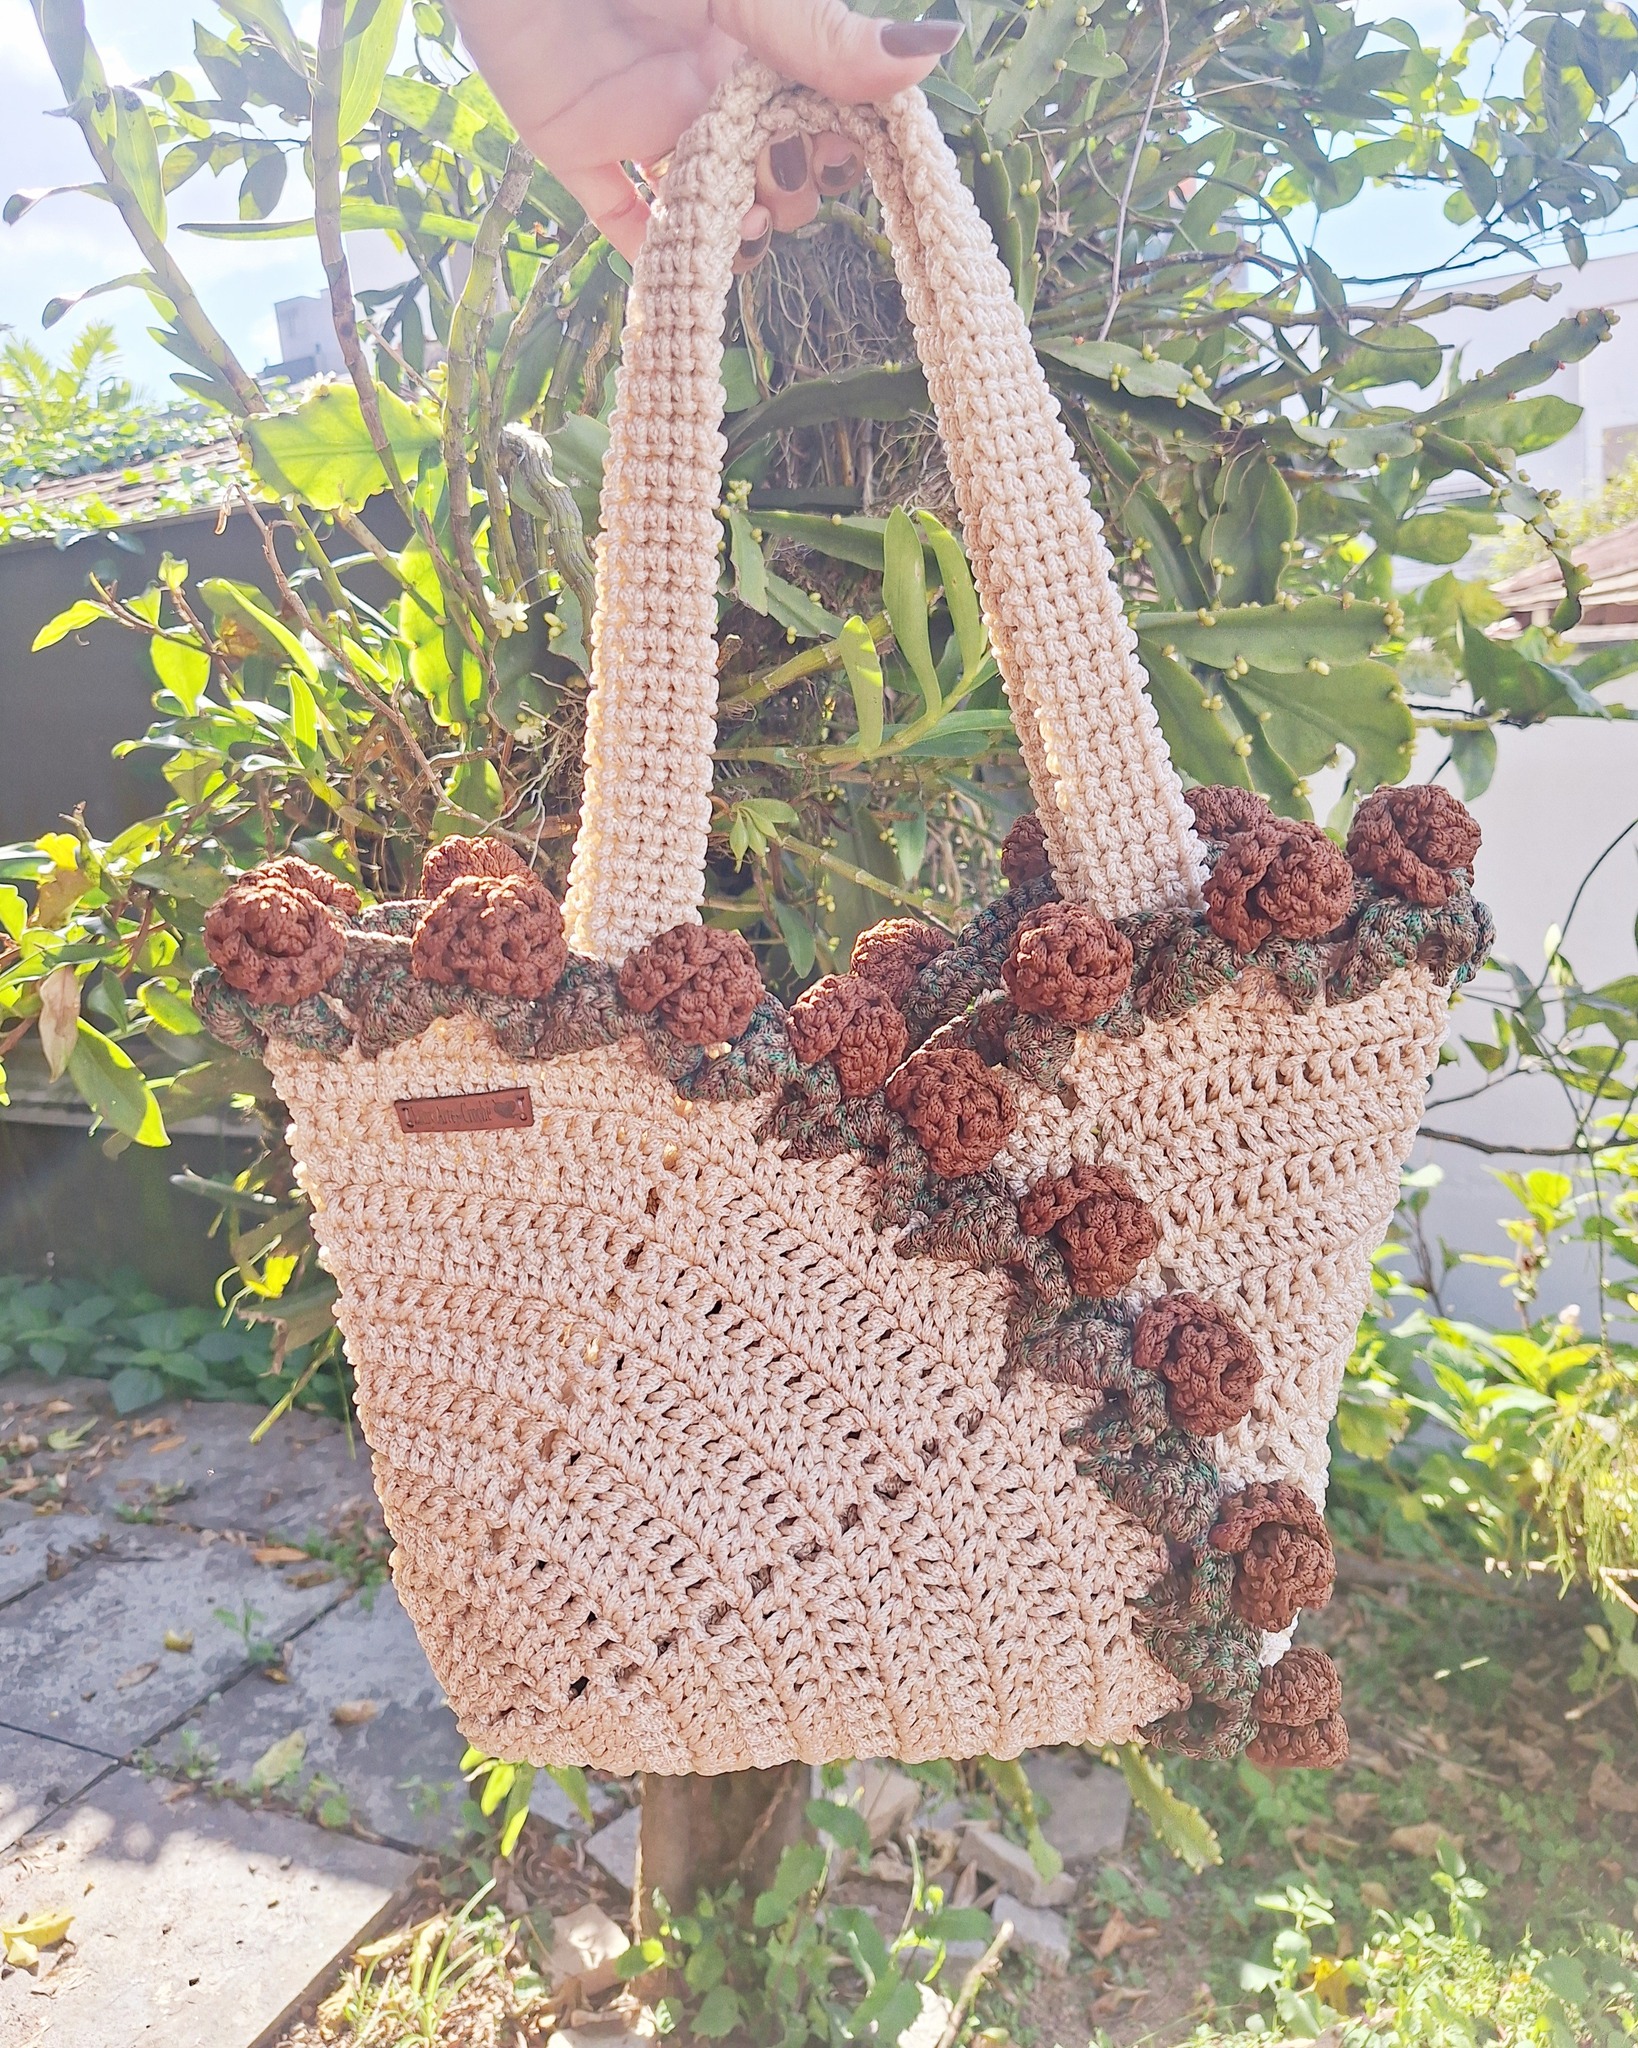
If you’re looking to expand your creative skills and make a stunning accessory, this CROCHET BAG WITH ROSES MADE WITH A DIFFERENT TECHNIQUE – FREE PATTERN is the perfect project.
Combining practicality with elegance, this design stands out for its originality and floral charm. Whether you’re new to crochet or a seasoned artisan, this bag will spark your creativity.
What makes this pattern so special is the technique used to create the roses. Unlike traditional appliqué or surface embroidery, the flowers are crocheted as part of the fabric or assembled in a layered, textural way. This approach adds depth and sophistication to your handmade piece.
This article will walk you through the full process, from materials and tools to customization ideas, while keeping everything beginner-friendly and SEO-optimized.
Let’s dive into the magic of the CROCHET BAG WITH ROSES MADE WITH A DIFFERENT TECHNIQUE – FREE PATTERN and bring beauty into your everyday carry.
To bring your CROCHET BAG WITH ROSES MADE WITH A DIFFERENT TECHNIQUE – FREE PATTERN to life, selecting the right materials is essential. The finished bag should be both sturdy and aesthetically pleasing.
Opt for a medium-weight yarn like cotton or a cotton-acrylic blend. These types of yarn offer the best combination of softness, durability, and stitch definition, which is crucial for highlighting the rose details.
Choose a 4.0 mm to 5.0 mm crochet hook, depending on the yarn thickness. A slightly smaller hook can help keep the stitches tight, which is ideal for a structured bag.
You will also need a tapestry needle for weaving in ends and possibly a lining fabric if you want to add extra strength or aesthetic polish inside the bag.
For the rose embellishments, consider using a contrasting or complementary yarn color. Pink, red, or even multicolor skeins can give your roses a more realistic and vibrant look.
Buttons, zippers, or magnetic snaps can be added as closures. A simple drawstring or flap closure works beautifully and is easy for beginners to install.
A pair of wooden or leather handles can add a professional finish to your project and increase its durability for everyday use.
The CROCHET BAG WITH ROSES MADE WITH A DIFFERENT TECHNIQUE – FREE PATTERN typically begins with the bag base. Most patterns start with a rectangular or circular base worked in rounds.
After establishing the base, continue working the body in rows or rounds, depending on the desired style. Single crochet or half double crochet stitches are often used for a tight, dense fabric.
As you build the body of the bag, be sure to count stitches carefully. Keeping the stitch count consistent ensures your bag holds its shape and the roses line up correctly.
The roses in this pattern are often created using a spiral technique or layered petal method. Start with a long chain, work varied stitches into each chain space, then roll it into a rose and secure.
You can either attach the roses as you go or sew them onto the completed bag. If you’re attaching them later, position them with pins first to find the most pleasing layout.
Some versions of this pattern allow you to crochet the roses directly into the bag using front post or back loop techniques. This creates a textured floral surface that’s seamlessly integrated.
With the CROCHET BAG WITH ROSES MADE WITH A DIFFERENT TECHNIQUE – FREE PATTERN, there are many ways to personalize your project and express your style.
Play with color schemes! While green and pink are classic floral tones, don’t be afraid to experiment with purples, oranges, or even black and white for a dramatic twist.
Use metallic or glitter yarn for the roses to add a bit of sparkle. This can turn your bag into an elegant evening accessory or a standout daytime piece.
Consider embroidering leaves or vines between the roses for a more botanical and connected look. This works especially well if you want the whole bag to resemble a rose bush.
Mix different textures by combining smooth cotton yarn with boucle or eyelash yarn for the roses. The contrast adds interest and dimension.
Change the bag shape — instead of a tote, make a drawstring pouch, a messenger bag, or even a clutch. The rose design will adapt beautifully to any silhouette.
Add a lining with a floral print fabric to complement the crocheted roses. This hidden detail adds charm and professional polish, especially if you’re gifting or selling the bag.
Even though the CROCHET BAG WITH ROSES MADE WITH A DIFFERENT TECHNIQUE – FREE PATTERN is beginner-friendly, some parts may require extra care and attention to detail.
Take your time when making the roses. The spiral method can feel tricky at first, but with practice, it becomes easier. Use stitch markers to help track your progress.
Secure each rose tightly. If using them as appliqués, sew around the base thoroughly to avoid loose petals catching or fraying over time.
Use interfacing or cardboard inserts if you want a stiffer structure, especially on the bag’s base. This helps maintain the shape even after regular use.
Make sure to block your roses before attaching them. This helps them lie flatter or puff more evenly, depending on the look you want.
If your bag turns out smaller or larger than expected, adjust by adding or subtracting rows. Gauge can affect the size, so always check your tension beforehand.
Practice the rose technique on scrap yarn before starting the final project. Once you feel confident, begin your actual bag with the chosen colors and yarns.
1. Is the CROCHET BAG WITH ROSES MADE WITH A DIFFERENT TECHNIQUE – FREE PATTERN beginner-friendly?
Yes, the base of the bag is easy, and the rose technique can be learned with a bit of practice. Even beginners can complete this project successfully.
2. What is the “different technique” used for the roses?
The roses are often made using a spiral or layered petal method, which gives them a three-dimensional look and integrates them creatively into the bag design.
3. Can I use any type of yarn for this pattern?
While you can experiment, medium-weight cotton or blends are best. They provide structure and show off the rose details clearly.
4. How do I keep the bag sturdy and in shape?
Tight stitches, correct gauge, and possibly lining or interfacing help maintain shape. You can also use smaller hooks for tighter tension.
5. Is this pattern really free?
Yes! Many crochet websites and designers offer this pattern for free. Just be sure to access it from a reputable source to respect creator rights.
6. Can I sell bags made with this pattern?
If the pattern allows commercial use, yes. Always check the designer’s terms and give proper credit when applicable.
This guide to the CROCHET BAG WITH ROSES MADE WITH A DIFFERENT TECHNIQUE – FREE PATTERN has taken you through everything you need to know—from yarn choices and construction to customization and care. Whether you’re making it for yourself, a loved one, or even to sell, this bag is guaranteed to turn heads.
Its beautiful floral design paired with practical function makes it a rewarding project that bridges creativity and usability. The “different technique” for the roses offers a refreshing take on crochet flowers, adding both elegance and uniqueness.
We hope you enjoyed this tutorial and feel inspired to start your own crochet rose bag. Please leave a sincere comment with your thoughts and any suggestions you have for future projects. We love hearing from fellow crocheters and learning from each other. Happy crocheting!


