
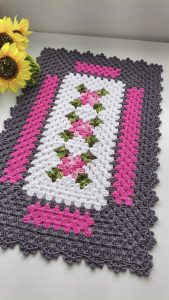
Crochet Multi-Purpose Blouse, Shawl, Runner Model

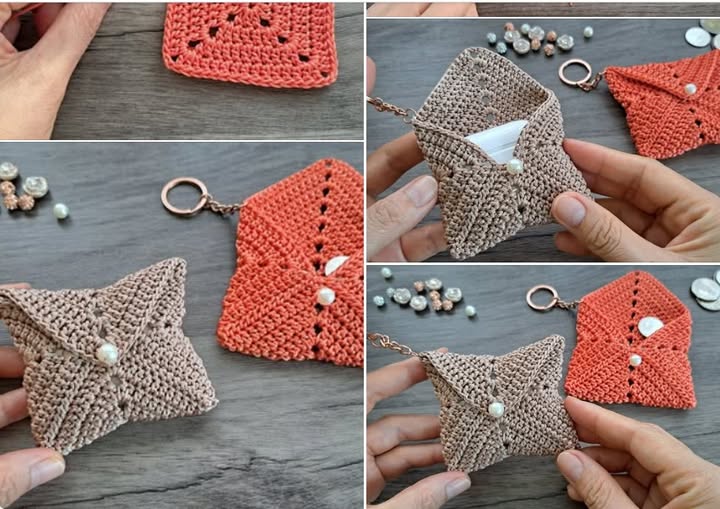
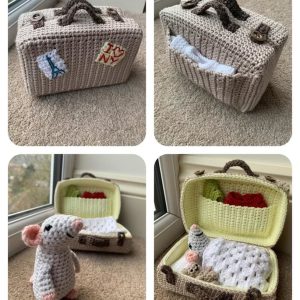
DIY crochet mini bag keychains are the perfect blend of charm, functionality, and handmade creativity. These tiny accessories are not only adorable but also practical for holding small items like coins, lip balm, or earbuds—all while adding a personal touch to your keys, bags, or gifts.
Whether you’re just learning to crochet or you’re already an experienced yarn artist, making mini bag keychains is a satisfying and portable project that suits any skill level.
One of the best things about DIY crochet mini bag keychains is how customizable they are. You can experiment with colors, textures, and stitches to create something that reflects your style. They make fantastic gifts, party favors, and craft fair items.
With minimal materials and just a bit of time, you can complete one in a single sitting. It’s a great way to practice new stitches or use up yarn scraps.
In this guide, we’ll take you through everything you need to make your own mini bag keychains. From choosing the right yarn and hook to understanding the construction process, you’ll find all the tips and techniques you need right here.
And while we’re focusing on crochet, we’ll also explore helpful resources like Quilting Classes Online, Machine Quilting Services, and even tools like the Long Arm Quilting Machine, since many crafters enjoy both quilting and crochet as part of their handmade journey.
When preparing to create your DIY crochet mini bag keychains, the first step is gathering your materials. These projects are quite beginner-friendly and require only a few essentials. All you need is some cotton yarn, a crochet hook, a keychain ring, and scissors.
Cotton yarn is a great choice for mini bags because it’s durable and holds its shape well. You can find a wide variety of colors when browsing quilt fabric by the yard sections at local craft stores. Many quilters and crocheters share shopping spaces, and it’s worth exploring fabrics for possible inspiration.
Choosing the right hook size is also important. For tighter stitches and a sturdy finish, go with a smaller hook than what’s usually recommended for your yarn weight. This ensures your mini bag keychain holds its form.
If you already sew or quilt, some of your existing tools—like stitch markers or tapestry needles—can be reused for crochet. If you’re interested in broader crafting experiences, you might consider joining quilting retreats USA where multi-disciplinary workshops are offered, including crochet and quilting hybrids.
Although quilting and crochet are separate crafts, owning the best sewing machine for quilting can enhance your creative output if you enjoy mixing textile techniques. Some crafters even sew fabric linings for their crochet bags using their machines.
When you’re looking for inspiration or tools, visiting a quilt shop near me can often provide surprising discoveries. Many of these shops carry yarn and crochet hooks alongside their quilting supplies, making them great all-in-one stops for fiber lovers.
The process of making DIY crochet mini bag keychains is simple, yet rewarding. It typically starts with a small circle or oval that forms the base of your bag. You’ll work upward in rounds or rows, depending on your chosen style.
Begin with a magic ring or chain circle for the base. Using single crochet stitches, work evenly around to create a tight and uniform bottom. This keeps your items from falling out of the bag.
As you build up the sides, you can choose to work in the round for a cylindrical shape or back and forth in rows for a flat pouch. Try different stitches like half double crochet or puff stitch for added texture.
Once your bag reaches the desired height—usually around 2 to 3 inches—it’s time to create a flap or a drawstring top. You can make a buttoned flap or chain a drawstring that gathers the bag shut, adding both style and function.
Don’t forget to attach your keychain ring before closing the bag completely. Many crocheters sew the ring onto the side or weave it into a small loop added to the top of the bag.
If you’re struggling with parts of the process or just want a more structured experience, enrolling in quilting classes online can also introduce you to communities that often cross over with crochet. These online spaces are full of crafters sharing mini bag tips and patterns.
The beauty of DIY crochet mini bag keychains lies in their versatility. Once you’ve mastered the basic shape, the creative possibilities are endless. Add embellishments, mix stitch styles, or even incorporate beads and buttons for extra flair.
For a boho vibe, try using variegated yarns and adding fringe. If you’re making them for kids, go with bright colors and fun shapes like hearts or stars. These small design changes give your keychains unique personalities.
You can also coordinate your mini bags with handmade quilts or gift sets. For example, if you’re giving a baby quilt finished with a long arm quilting machine, adding a matching crochet bag keychain for pacifiers makes the gift extra special.
Selling your finished products? Many crafters offer custom quilt services and include small crochet items like these mini bags as add-ons. They’re popular in Etsy shops and at craft fairs, where having multi-use, portable items boosts sales.
If you’re attending quilting retreats USA, consider bringing your mini bag projects to swap or gift. These retreats often include gift exchanges or marketplaces, and your little creations will be a hit.
Lastly, crocheting these bags can be an excellent hobby that complements quilting. It’s a small, portable project you can work on while waiting for your machine quilting services to finish your latest large quilt.
Once you’re comfortable with the basics of DIY crochet mini bag keychains, you might want to push your skills further. Try experimenting with tapestry crochet, which allows you to add patterns or pictures to your bags by switching colors within stitches.
Adding fabric linings is another advanced step. Use scraps from your quilt fabric by the yard stash and a small sewing machine, or hand stitch for more control. This is where having the best sewing machine for quilting can come in handy—it’s perfect for these small yet intricate tasks.
Storage and care are also important. While mini bags don’t need much maintenance, teaching customers or gift recipients how to hand-wash and air-dry them helps them last longer. If you’re selling these bags, consider including a small care tag with each item.
If you’re a serious crafter, it’s worth looking into quilt insurance coverage—yes, even for crochet! Many policies also protect all your handmade items, especially if you sell at markets or ship internationally.
Want to go even further? Combine techniques from quilting classes online and crochet by adding quilted elements to your bags, like tiny patchwork appliqués or embroidered initials.
Finally, always keep an eye out for a good quilting frame for sale. Even though it’s meant for quilting, these frames can be modified to stretch out larger crochet pieces or block your mini bags if you decide to upscale them.
What size yarn is best for crochet mini bag keychains?
Worsted weight or DK (light worsted) yarn works great for structure and durability. Cotton yarn is recommended for a clean, tight finish.
How long does it take to make one mini bag keychain?
On average, a mini bag can be completed in 30 minutes to 1 hour, depending on your speed and the complexity of your design.
Do I need a sewing machine to finish these projects?
Not at all, but if you want to add fabric linings or other sewn features, having the best sewing machine for quilting or a basic domestic model can be helpful.
Can these be sold at craft fairs?
Yes! They’re popular, quick to make, and customizable—ideal for craft fairs or as additions to custom quilt services.
What stitches are best for beginners?
Single crochet and half double crochet are the most beginner-friendly and provide a solid structure for the bag.
Where can I find crochet-friendly quilting communities?
Try attending quilting retreats USA or enrolling in quilting classes online—many include broader fiber arts groups that welcome crochet projects.
In this article, we explored the creative world of DIY crochet mini bag keychains, from choosing your materials to crafting your unique keychain accessory. We also touched on how quilting tools and services—from the long arm quilting machine to machine quilting services—can complement your crochet practice, especially if you’re a multi-craft artist.
You now have the steps, tips, and inspiration to create beautiful mini bags that can be treasured, gifted, or sold. Whether you’re adding a handmade touch to your keyring or pairing these little bags with quilts made from quilt fabric by the yard, the possibilities are endless.
We’d love to hear from you! Leave a sincere opinion and share any suggestions you might have. Have you tried making your own mini crochet bag keychains? What techniques or styles do you love most? Your feedback helps keep this creative community thriving.


